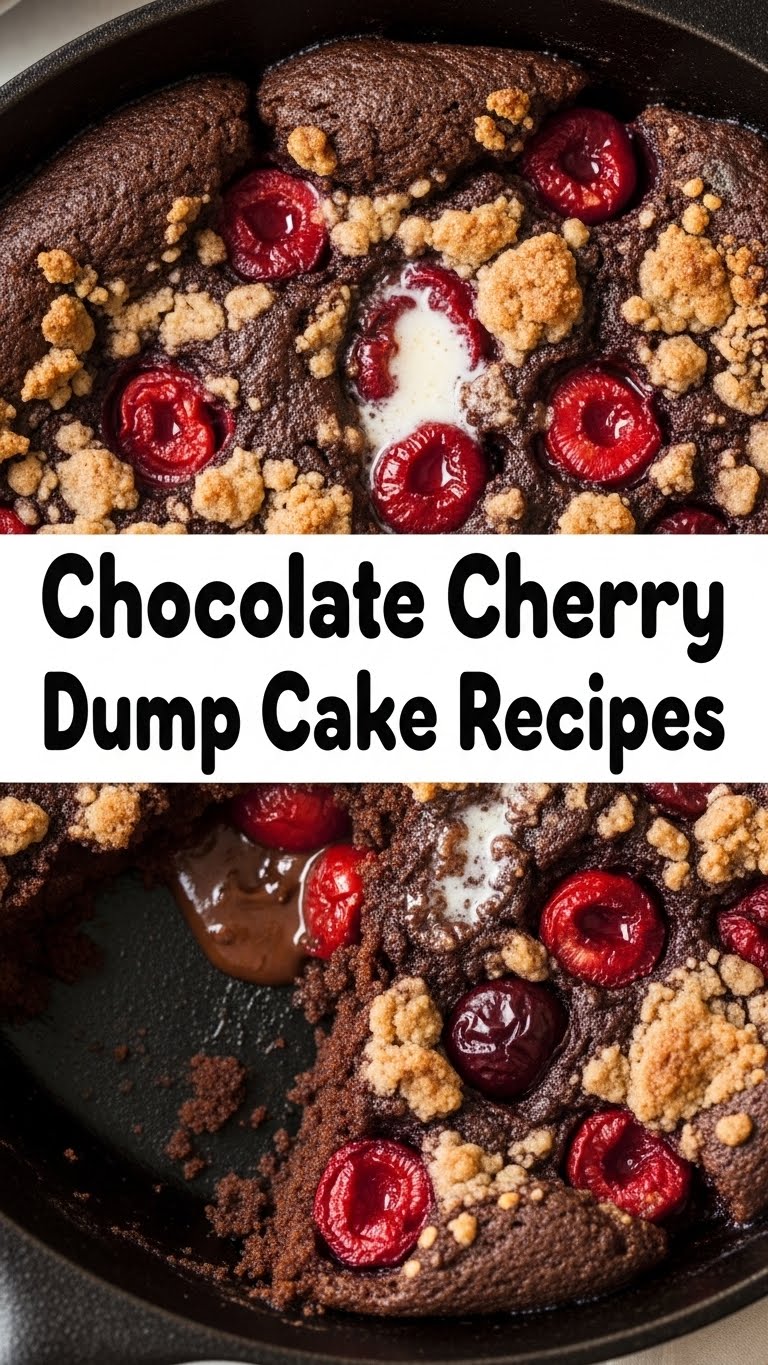
So, your sweet tooth is screaming but your motivation is on vacation, huh? My friend, I hear you. We’ve all been there: staring into the fridge, dreaming of something warm, gooey, and utterly delicious, but the thought of actual *baking* just feels… exhausting. Well, buckle up, buttercup, because I’m about to introduce you to your new favorite dessert soulmate: the **Chocolate Cherry Dump Cake**!
Why This Recipe is Awesome
Let me tell you, this isn’t just a recipe; it’s a life hack disguised as a dessert. Why is it awesome? Because it’s practically idiot-proof. Seriously, you literally just “dump” ingredients into a pan. There’s no fancy mixer involved, no complicated steps, and absolutely no need to channel your inner pastry chef. **Even if you’ve historically set fire to water, you can make this cake.** It’s the ultimate low-effort, high-reward situation. Plus, chocolate and cherries? Name a more iconic duo. I’ll wait.
Ingredients You’ll Need
Gather ’round, my lazy-but-gourmet friend. Here’s what you’ll need for this magical concoction. Keep it simple, keep it fun!
- Cherry Pie Filling (2 cans, 21 oz each): Go for the bright red, syrupy kind. No judgment if you sneak a spoonful or two straight from the can. We all do it.
- Chocolate Cake Mix (1 box, 15.25 oz, dry): Any brand, any chocolate flavor you fancy. Dark chocolate, milk chocolate, devil’s food – your call! Just don’t add the eggs or oil, unless you’re making a different recipe entirely, which would totally defeat the “dump” purpose. Don’t be that person.
- Butter (1 stick or 1/2 cup, unsalted): Melted, or cut into thin pats. Because everything’s better with butter, amirite?
- Optional: Chocolate Chips (1/2 cup): Because more chocolate is always a good idea. Duh.
Step-by-Step Instructions
Get ready for the easiest baking experience of your life. This is where the magic happens, with minimal effort!
- Preheat Your Oven: Set it to a cozy 350°F (175°C). Rookie mistake to skip this, your cake won’t know what hit it.
- Grease Your Pan: Grab a 9×13 inch baking dish. Give it a light spray with cooking oil or a quick swipe of butter. We don’t want anything sticking.
- Dump the Cherries: Open those cans of cherry pie filling and pour them evenly into the bottom of your prepared dish. Do NOT stir them. We want distinct layers here!
- Sprinkle the Cake Mix: Evenly sprinkle the dry chocolate cake mix over the cherry layer. Try to get full coverage. Again, **no stirring allowed!**
- Add the Chocolate Chips (Optional, but highly recommended): If you’re using them, scatter the chocolate chips over the cake mix layer now.
- Drizzle with Butter: If using melted butter, drizzle it slowly and evenly over the top of the cake mix. If using pats, arrange them strategically over the entire surface. This is your moisture and flavor bomb.
- Bake It Up: Pop that glorious pan into your preheated oven. Bake for about 45-55 minutes, or until the top is golden brown and the cherry filling is bubbly around the edges.
- Cool (If You Can Wait): Let it cool for at least 15-20 minutes before serving. It’ll be scorching hot, and it gives the gooey goodness a chance to set a little. Best served warm with a scoop of vanilla ice cream, IMO.
Common Mistakes to Avoid
Even with an “idiot-proof” recipe, there are a few pitfalls. Don’t worry, I’m here to save you from yourself!
- **Stirring the layers:** This ain’t a regular cake, friend. We’re going for distinct layers of gooey fruit and cakey goodness, not a chocolate-cherry swirl soup. Resist the urge!
- **Forgetting to preheat your oven:** Your cake won’t know what hit it, and not in a good way. It needs that consistent heat from the get-go.
- **Using cold butter for pats:** If you’re doing pats instead of melted, make sure they’re thin and spread out. Big cold clumps will leave dry spots. Warm or melted is truly the easiest route.
- **Overbaking:** Keep an eye on it! If the top looks too dry or the cherries seem burnt, you’ve gone too far. A little golden is perfect.
Alternatives & Substitutions
Feeling adventurous? Or maybe you just have different stuff in your pantry? No stress!
- Not a cherry fan? (Gasp! But okay, I respect your choices.) Try peach pie filling, mixed berry, or even apple! For an extra zing, throw in some cranberry sauce.
- Chocolate overload? If you want to dial back the chocolate, use a yellow cake mix or even a white cake mix for a more classic fruit cobbler vibe. Still delicious!
- Nutty addition: Sprinkle a handful of chopped pecans or walnuts over the top before baking for a delightful crunch.
- Spice it up: A pinch of cinnamon or almond extract (added to the cherry filling) can really elevate the flavor profile.
FAQ (Frequently Asked Questions)
You’ve got questions, I’ve got (casual) answers!
- **Can I use fresh or frozen cherries instead of canned?** You *can*, but they’ll release a lot of liquid, which might make your cake a bit… soupy. If you go this route, consider adding a tablespoon of cornstarch to the cherries before dumping to help thicken things up.
- **What if I don’t have butter?** Okay, deep breaths. You could try margarine, but honestly, butter just hits different. If you absolutely must, just know it won’t be quite the same level of divine richness. Don’t say I didn’t warn you.
- **Can I make this in a smaller pan?** Yes, but you’ll need to halve the ingredients and adjust baking time. A 9×9 inch pan would work.
- **How do I know when it’s done?** The top should be golden brown and the fruit filling underneath should be visibly bubbling around the edges. A tiny bit of jiggle in the center is okay, it will set more as it cools.
- **How long does it last?** Covered in the fridge, it’s usually good for 3-4 days. But honestly, it rarely lasts that long!
Final Thoughts
See? Told you it was ridiculously easy! You just whipped up a decadent, warm, gooey dessert with minimal fuss. Your kitchen isn’t a disaster zone, you barely broke a sweat, and now you have something amazing to show for it. **You’ve officially leveled up your dessert game** without needing a culinary degree. Now go forth and conquer your dessert cravings. Your friends (and your stomach) will thank you. Maybe make an extra batch, just in case. 😉


