“`html
Chocolate Cake So Easy, Even Your Cat Could (Almost) Make It!
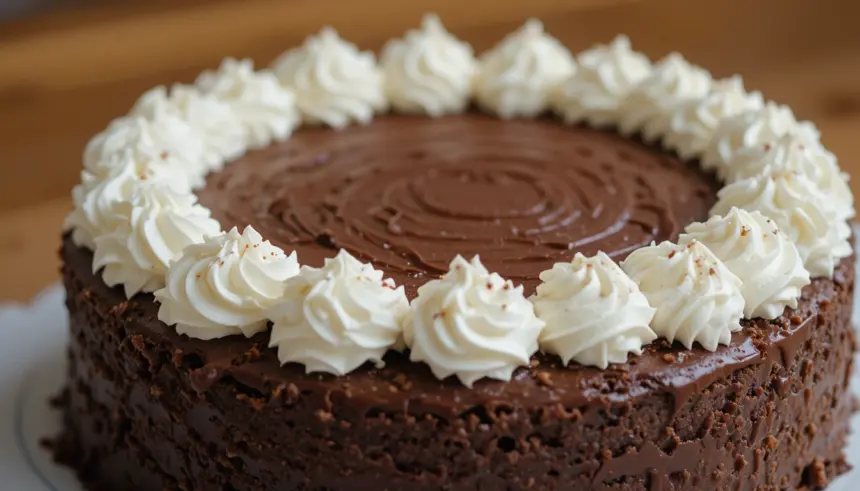
So you’re craving something deliciously decadent but don’t want to spend your entire weekend wrestling with a whisk? My friend, you have come to the right place. We’re talking a ridiculously moist chocolate cake that practically makes itself, crowned with a cloud of fluffy whipped cream. Basically, it’s a hug in cake form, and who doesn’t need more of those?
Why This Recipe is the MVP of Your Dessert Drawer
Let’s be real. Some cake recipes are more complicated than assembling IKEA furniture after a long day. This one? Not so much. It’s like the culinary equivalent of a comfy pair of sweatpants – reliable, satisfying, and requires minimal effort for maximum deliciousness. Plus, that whipped cream border? It’s the fancy hat your cake deserves, and it’s shockingly simple to achieve. It’s practically idiot-proof, and trust me, I’ve tested that theory. 😉
Ingredients You’ll Need (No Fancy Stuff Required)
- Flour: The usual suspect. All-purpose is your best friend here.
- Sugar: For sweetness, obviously. Granulated is the way to go.
- Cocoa Powder: The star of the show! Use unsweetened for that deep, dark chocolate flavor.
- Baking Soda & Baking Powder: The dynamic duo that gives us lift. Don’t skip ’em!
- Salt: Just a pinch to make all those sweet flavors pop.
- Eggs: Room temperature is ideal, but honestly, I’ve thrown cold ones in and it’s still been okay. Don’t stress too much.
- Milk: Whole milk gives the best richness, but whatever you have in the fridge will probably work.
- Vegetable Oil: For that super moist texture. You could use canola too.
- Vanilla Extract: The secret weapon of deliciousness.
- Hot Water/Coffee: This is the magic potion for extra moisture and flavor. Coffee is IMO superior because it intensifies the chocolate.
- Heavy Whipping Cream: For our glorious border. Needs to be cold!
- Powdered Sugar: To sweeten and stabilize our whipped cream.
Step-by-Step Instructions (We’re Doing This!)
- Preheat and Prep: Crank your oven up to 350°F (175°C). Grease and flour your cake pan. A 9-inch round is standard, but hey, get creative!
- Dry Ingredients Party: In a big bowl, whisk together the flour, sugar, cocoa powder, baking soda, baking powder, and salt. Make sure there are no sneaky lumps of cocoa.
- Wet Ingredients Unite: In another bowl, whisk together the eggs, milk, oil, and vanilla extract.
- Combine with Caution: Pour the wet ingredients into the dry. Mix until *just* combined. Seriously, don’t go crazy here. A few lumps are fine.
- The Magic Pour: Carefully stir in the hot water or coffee. The batter will be thin, and that’s exactly what you want. Trust the process!
- Bake It Till It’s Pretty: Pour the batter into your prepared pan and bake for 30-35 minutes, or until a toothpick inserted into the center comes out clean.
- Cool Down: Let the cake cool in the pan for about 10 minutes, then invert it onto a wire rack to cool completely. Patience, grasshopper!
- Whip It Good: Once the cake is *fully* cool, whip your cold heavy cream with powdered sugar and a splash of vanilla until stiff peaks form. This is where the fun begins!
- Border Patrol: Now for the best part! Dollop spoonfuls of whipped cream around the edge of the cake. You can make little swirls or just go for a rustic look. It’s your masterpiece!
Common Mistakes to Avoid (So You Don’t Cry Over Cake)
- Under-baking: Nobody likes a gooey center unless it’s intentional. **Always test with a toothpick!**
- Over-mixing: This can lead to a tough cake. Mix until *just* combined, and you’ll be golden.
- Not letting the cake cool: Trying to frost a warm cake is like trying to hug a cactus. It’s just not going to end well. **Let it cool completely!**
- Using warm cream for whipping: Your whipped cream will be sad and runny. **Make sure your heavy cream is ice cold.**
Alternatives & Substitutions (Because Life Happens)
- Gluten-Free? Swap the all-purpose flour for a good quality gluten-free baking blend. Results may vary slightly, but it’s totally doable.
- Dairy-Free? Use a non-dairy milk (almond, oat, soy all work!) and coconut cream for whipping. It’s not *exactly* the same, but it’s a delicious workaround.
- No coffee? Plain hot water works just fine. It’ll still be delicious, just maybe not *as* intensely chocolatey.
FAQ (Your Burning Questions Answered Casually)
- Can I make cupcakes instead? Absolutely! Just adjust the baking time – usually around 18-22 minutes. Keep an eye on them!
- My whipped cream isn’t stiff! What did I do wrong? It might not be cold enough, or you might not have whipped it long enough. Give it another go with super cold cream!
- Can I use margarine instead of butter in the cake? Technically, yes. But butter adds a lovely flavor that margarine just can’t replicate. Stick with oil in this recipe for supreme moistness, though!
- What if I don’t have a whisk? A fork will do in a pinch for the dry ingredients. For the wet ingredients and batter, a sturdy spoon or spatula is your friend.
- How do I store this cake? Keep it in an airtight container in the fridge. The whipped cream is best eaten within a day or two.
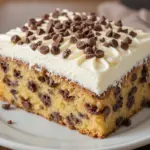
- Can I add chocolate chips? Ummm, is the sky blue? Yes, add chocolate chips! Fold them in gently after you’ve added the hot liquid.
Final Thoughts (Go Forth and Bake!)
And there you have it! A chocolate cake so good, you’ll want to eat the whole thing yourself (no judgment here). The whipped cream border just adds that extra touch of “wow” without the fuss. Now go forth and bake something amazing! Your taste buds (and anyone lucky enough to share your creation) will thank you. You’ve earned it!
“`
