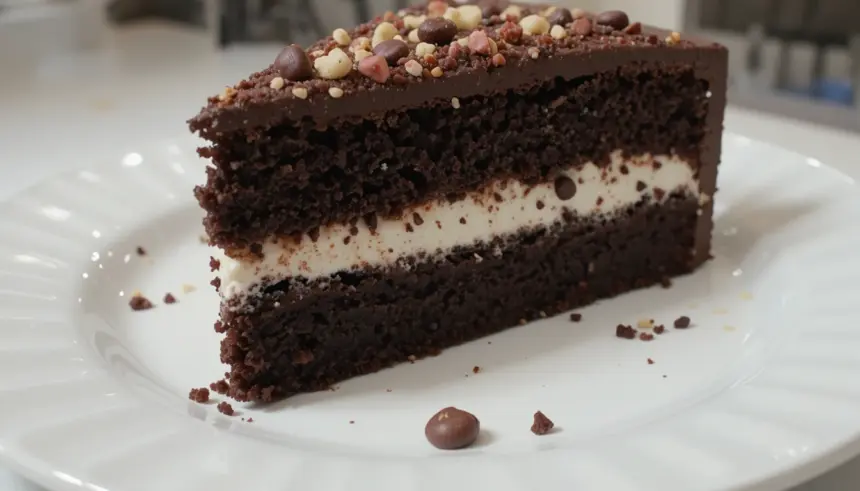
So, you’ve got a chocolate craving that’s practically an emergency?
Don’t worry, I get it. Sometimes the only cure for a tough day (or a Tuesday) is a serious dose of fudgy, chocolatey goodness. And guess what? You don’t need to be a Michelin-star chef to whip up something that’ll make your taste buds sing. This recipe is my go-to for those “I need cake NOW” moments, and it’s so ridiculously easy, you might just start making it weekly. No judgment here!
Why This Recipe is Your New BFF
Let’s be real, some cake recipes are more complicated than my last tax return. But this one? It’s a hug in a bowl, a shortcut to pure happiness. We’re talking minimal fuss, maximum flavor. It’s so straightforward, even your cat could probably help (though I wouldn’t recommend it). Plus, the whipped cream and toppings are where the real magic happens, turning a good cake into an *epic* cake. It’s basically idiot-proof, even I didn’t mess it up.
Ingredients You’ll Need (Don’t panic, it’s not that bad)
Here’s what you’ll need to gather. Think of it as your treasure map to dessert Nirvana.
- For the Cake:
- 1 ½ cups all-purpose flour (the regular kind, not the fancy gluten-free stuff unless you’re feeling brave)
- 1 cup granulated sugar (for that sweet kiss)
- ⅓ cup unsweetened cocoa powder (the darker, the better, IMO)
- 1 teaspoon baking soda (our fluffy magic ingredient)
- ½ teaspoon salt (just a pinch, we’re not making pretzels)
- 1 cup warm water or coffee (coffee makes it taste *extra* chocolatey, just sayin’)
- ½ cup vegetable oil (or any neutral oil you have lurking in the pantry)
- 1 teaspoon vanilla extract (the soul of any good bake)
- 1 teaspoon white vinegar (don’t ask, just trust the process!)
- For the Whipped Cream:
- 1 cup heavy whipping cream (needs to be cold, like your ex’s heart)
- 2-3 tablespoons powdered sugar (adjust to your sweetness level)
- ½ teaspoon vanilla extract (more vanilla? Always!)
- For the Toppings (The Fun Part!):
- Chocolate shavings (from your favorite bar, obviously)
- Fresh berries (raspberries, strawberries, whatever tickles your fancy)
- A sprinkle of cocoa powder (for that sophisticated dusting)
- Or go wild! Sprinkles, chopped nuts, a drizzle of caramel – the world is your oyster!
Step-by-Step Instructions (You got this!)
Deep breaths. We’re almost there.
- Preheat and Prep: Crank your oven to 350°F (175°C). Grease and flour an 8×8 inch baking pan. You can also use a round cake pan, but remember the baking time might be a smidge different.
- Dry Ingredients Party: In a large bowl, whisk together the flour, sugar, cocoa powder, baking soda, and salt. Give it a good mix until there are no lumps, like you’re smoothing out life’s little annoyances.
- Wet Ingredients Unite: In a separate bowl (or just a sturdy measuring cup), whisk together the warm water/coffee, oil, vanilla extract, and vinegar. This might look a little odd, but it’s our secret weapon.
- Combine and Conquer: Pour the wet ingredients into the dry ingredients. Stir *just* until combined. Seriously, don’t overmix! A few small lumps are fine. Overmixing is the enemy of fluffy cake.
- Bake it Up: Pour the batter into your prepared pan and spread it evenly. Bake for 30-35 minutes, or until a toothpick inserted into the center comes out clean.
- Cool Down: Let the cake cool in the pan for about 10-15 minutes before inverting it onto a wire rack to cool completely. Patience, grasshopper.
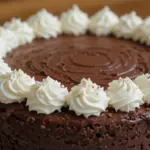
- Whip it Good: While the cake is cooling, make your whipped cream. In a chilled bowl, whip the heavy cream, powdered sugar, and vanilla extract until stiff peaks form. This means when you lift the whisk, the cream stands up straight like a little soldier.
- Decorate and Devour: Once the cake is completely cool, spread that glorious whipped cream all over the top. Then, go nuts with your chosen toppings! Shavings, berries, whatever your heart desires.
Common Mistakes to Avoid (Don’t be *that* person)
Even the simplest things can go sideways. Here are a few pitfalls to dodge:
- Thinking you don’t need to preheat the oven: Rookie mistake. Your cake will be sad and flat.
- Overmixing the batter: This leads to a tough, dense cake. We want light and airy, remember?
- Not cooling the cake completely before frosting: Melted whipped cream is a sad, sad sight.
- Using stale baking soda: If your baking soda is older than your favorite pair of jeans, it might not be working its magic.
Alternatives & Substitutions (Because life happens)
Don’t have an ingredient? No sweat!
- No coffee? Regular warm water is totally fine. The cake will still be delicious.
- No vegetable oil? Melted butter (about ½ cup) can work in a pinch, but it might make the cake a little denser.
- Don’t have powdered sugar for the cream? You can try using granulated sugar, but whisk it really well to avoid grittiness. FYI, it might not get as perfectly smooth.
- Want a richer chocolate flavor? Add a tablespoon or two of instant espresso powder to the dry ingredients. It intensifies the chocolate without making it taste like coffee.
FAQ (Your Burning Questions, Answered Casually)
Can I use margarine instead of butter for the cake? Well, technically yes, but why hurt your soul (and your cake) like that? Butter adds flavor and richness that margarine just can’t replicate. Stick with oil for this recipe, it’s designed for it!
My whipped cream isn’t getting stiff! What am I doing wrong? Make sure your cream and bowl are *super* cold. Also, don’t over-whip it, or you’ll end up with butter! Stop when it holds its shape.
Can I make this gluten-free? You can try substituting a good quality gluten-free all-purpose flour blend for the regular flour. You might need to adjust the liquid slightly. Good luck!
How long does this cake last? Honestly, it rarely lasts more than a day in my house. But if you must, store it in an airtight container in the fridge for up to 3-4 days. The whipped cream is best eaten fresh, though.
Can I make cupcakes instead? Absolutely! Line a muffin tin with paper liners and fill them about two-thirds full. Bake for 18-22 minutes, or until a toothpick comes out clean.
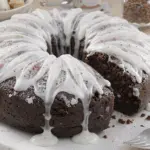
Is it okay if the cake isn’t perfectly flat on top? Totally! The beauty of a rustic chocolate cake is that it doesn’t have to be runway-ready. Just slather on that whipped cream and let the toppings do their thing.
Final Thoughts (Go forth and bake!)
See? That wasn’t so bad, was it? You’ve just created a masterpiece of chocolatey, creamy goodness. It’s perfect for sharing, but also totally acceptable to hoard for yourself. Because, hey, you deserve it. Now go impress someone—or yourself—with your new culinary skills. You’ve earned it! Happy baking!
