So you’re craving something tasty but too lazy to spend forever in the kitchen, huh? Same, friend. Same. But what if I told you we could whip up a show-stopping chocolate cake, complete with decadent truffles and adorable decorations, without feeling like you just ran a marathon? Impossible, you say? Nah, just grab your apron and let’s get baking! This isn’t just a cake; it’s a chocolate-infused declaration of independence from boring desserts.
Why This Recipe is Awesome
Because it’s a chocolate cake, duh! But seriously, this isn’t just *any* chocolate cake. This bad boy is so rich, so moist, and so gloriously chocolatey, it practically whispers sweet nothings to your soul. Plus, we’re adding truffles. Truffles! It’s like a tiny, fancy bonus dessert on top of your already amazing dessert. It’s almost idiot-proof; even I managed to nail it, and my kitchen usually looks like a science experiment gone wrong. Trust me, you’re gonna feel like a culinary genius after this one, and the best part? It looks way more complicated than it actually is. Win-win, IMO.
Ingredients You’ll Need
For the Ridiculously Moist Chocolate Cake:
- 2 cups All-Purpose Flour: The foundation of our chocolate dreams.
- 2 cups Granulated Sugar: For that sweet, sweet goodness. Don’t skimp, we’re not calorie counting here.
- ¾ cup Unsweetened Cocoa Powder: The darker, the better, for maximum chocolate impact!
- 2 teaspoons Baking Soda: Our lift-off agent!
- 1 teaspoon Baking Powder: Its trusty sidekick, ensuring maximum fluffiness.
- 1 teaspoon Salt: Balances everything out. Crucial, don’t forget it!
- 1 cup Buttermilk: Or make your own (see FAQs). It’s the secret to that ridiculously moist crumb.
- ½ cup Vegetable Oil: Keeps things super tender.
- 2 Large Eggs: The glue that holds it all together.
- 1 teaspoon Vanilla Extract: Because everything’s better with vanilla.
- 1 cup Hot Coffee: Yes, coffee! It deepens the chocolate flavor without making it taste like coffee. Mind blown, right?
For the Decadent Chocolate Truffles:
- 8 oz Good Quality Chocolate: Chunks or chips, just make it decent quality. This is the star of the show!
- ½ cup Heavy Cream: Makes them silky smooth.
- 1 teaspoon Vanilla Extract (optional): Extra fancy flavor.
- ¼ cup Unsweetened Cocoa Powder (for rolling): For that classic, slightly bitter finish.
For the Dreamy Decorations:
- 1 batch of your favorite Chocolate Buttercream Frosting: Store-bought is totally fine, no judgment here!
- Colorful Sprinkles: Or whatever catches your eye. Make it fun!
- Melted Chocolate (optional): For drizzling or fancy swoops.
- Edible Flowers (optional): If you’re feeling extra bougie.
Step-by-Step Instructions
Let’s Make That Killer Cake!
- Preheat & Prep: Preheat your oven to 350°F (175°C). Grease and flour two 8-inch round cake pans. Or, you know, just use parchment paper if you’re fancy like that.
- Mix the Dry: In a large bowl, whisk together the flour, sugar, cocoa powder, baking soda, baking powder, and salt. Give it a good whisk until no lumps remain. We want smooth sailing!
- Add the Wet: Pour in the buttermilk, oil, eggs, and vanilla extract. Beat with an electric mixer on medium speed for about 2 minutes. Don’t overmix! We’re not trying to make bread here.
- The Coffee Secret: Carefully stir in the hot coffee. The batter will be thin, but that’s perfectly normal. This is where the magic happens!
- Bake It Up: Divide the batter evenly between your prepared cake pans. Bake for 30-35 minutes, or until a wooden skewer inserted into the center comes out clean.
- Cool Down: Let the cakes cool in the pans for 10-15 minutes before inverting them onto a wire rack to cool completely. This is crucial! Don’t rush it!
Now for the Truffles (The Best Part, IMHO)!
- Heat the Cream: In a small saucepan, heat the heavy cream over medium heat until it just begins to simmer. Don’t let it boil!
- Melt the Chocolate: Place your chopped chocolate (or chips) in a heatproof bowl. Pour the hot cream over the chocolate and let it sit for 5 minutes. No peeking!
- Stir to Combine: Whisk gently until the chocolate is completely melted and smooth. Stir in the vanilla extract, if using. This gorgeous mixture is called ganache.
- Chill Out: Cover the bowl and refrigerate for at least 2 hours, or until the ganache is firm enough to roll. Overnight is even better if you have the patience.
- Roll ‘Em Up: Scoop out small portions (about a tablespoon) and roll them into balls. Dust them generously with cocoa powder. Pop them back in the fridge until you’re ready to decorate.
Time to Get Fancy: Assemble & Decorate!
- Level Up: If your cakes have domed tops, carefully level them with a serrated knife so they stack nicely. Nobody wants a leaning tower of cake.
- Frost & Stack: Place one cake layer on your serving plate. Spread a generous layer of buttercream on top. Place the second cake layer on top and repeat with more frosting.
- Crumb Coat (Optional but Recommended): Do a thin “crumb coat” of frosting all over the cake. This traps any loose crumbs. Chill for 15 minutes, then apply your final, thicker layer of frosting.
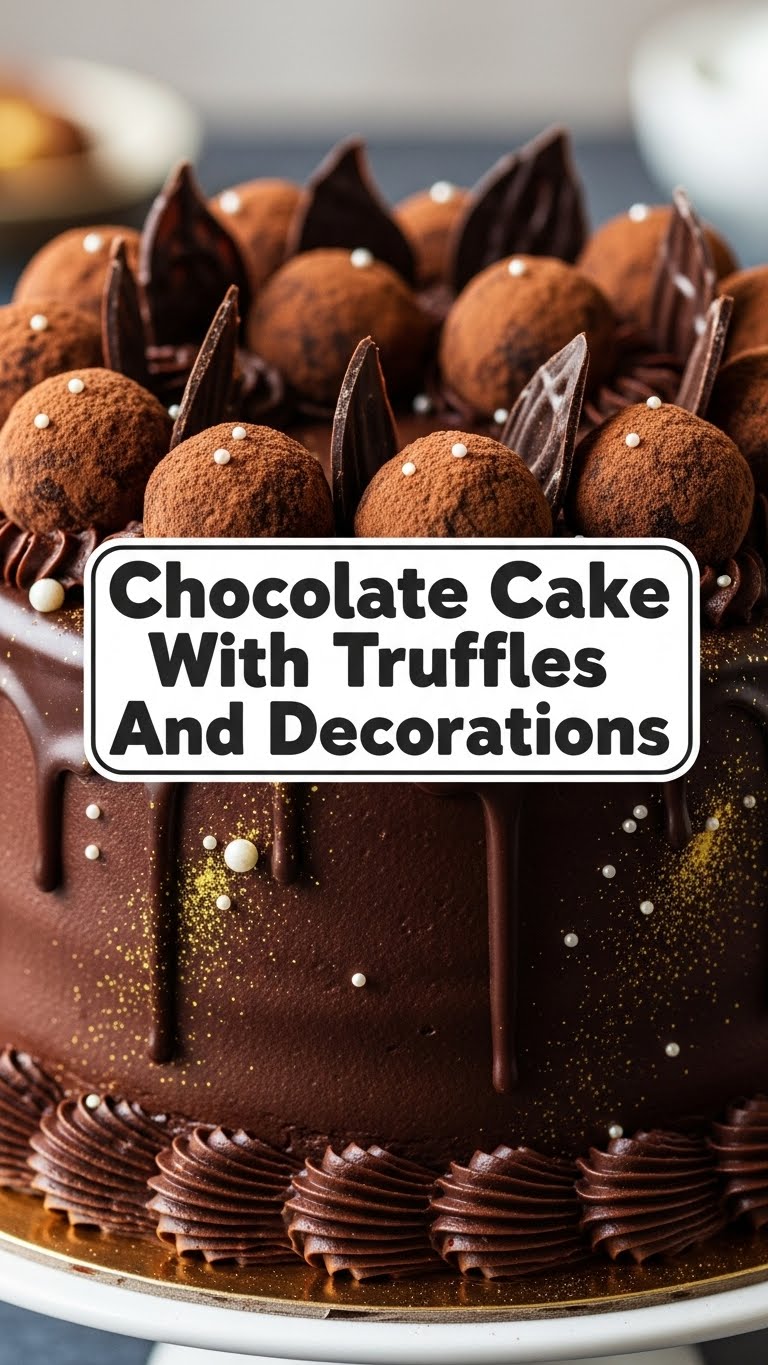
- The Grand Finale: Arrange your beautiful chocolate truffles on top of the cake. Scatter those colorful sprinkles everywhere! Drizzle with melted chocolate if you’re feeling extra. Be as wild or as minimalist as you like. It’s your masterpiece!
Common Mistakes to Avoid
- Thinking you don’t need to preheat the oven: Rookie mistake! Your cake won’t rise properly.
- Overmixing the batter: This develops the gluten too much, making your cake tough. We want tender, not chewy!
- Not letting cakes cool completely: If you try to frost a warm cake, that frosting will just melt into a messy puddle. Patience, young padawan.
- Rushing the truffle chilling: Trying to roll warm ganache is a sticky, frustrating disaster. Chill ’em properly, or suffer the consequences.
- Skimping on good chocolate for truffles: Trust me, it makes a *huge* difference. Don’t use that mystery chocolate bar you found in the back of the pantry.
Alternatives & Substitutions
- No Buttermilk? No Problem! You can totally make your own. Just add 1 tablespoon of white vinegar or lemon juice to a measuring cup, then fill it up to the 1-cup mark with regular milk. Let it sit for 5 minutes. Voilà! Instant buttermilk.
- Coffee-Averse? While coffee really enhances the chocolate flavor, you can use hot water instead. But honestly, give the coffee a try – you won’t taste coffee, just super intense chocolate.
- Truffle Flavors: Feel free to experiment! Add a splash of orange zest, a dash of peppermint extract, or a tiny bit of your favorite liqueur (like Kahlua or Grand Marnier) to the ganache for an adult twist.
- Decoration Shenanigans: Not feeling sprinkles? Use chocolate shavings, fresh berries, or even edible glitter. Get creative! This is where you really make it *yours*.
- Gluten-Free Option: Swap out the all-purpose flour for a good quality 1:1 gluten-free baking flour blend. Make sure it contains xanthan gum!
FAQ (Frequently Asked Questions)
- Can I use margarine instead of butter for the frosting? Well, technically yes, but why hurt your soul like that? Butter just tastes better, and frosting is meant to be indulgent!
- My truffles aren’t rolling well, they’re too sticky! What gives? Did you chill them long enough, my friend? Probably not. Pop them back in the fridge for at least another 30-60 minutes. Cold hands help too!
- Can I make this cake ahead of time? Absolutely! The cake layers can be baked, cooled, and wrapped tightly in plastic wrap (then foil) and stored at room temperature for up to 2 days, or frozen for up to 2 months. Truffles can be made a few days in advance and stored in the fridge. Assemble on the day you want to serve.
- My cake is dry! What went wrong? You likely overbaked it. Every oven is a little different, so start checking for doneness a few minutes early. Also, make sure you’re using proper measurements; too much flour can dry things out.
- Do I *really* need hot coffee? Can’t I just use cold? Hot liquids react better with cocoa powder, blooming its flavor and giving you a deeper, richer chocolate. Plus, it helps thin out the batter perfectly. Go hot or go home!
- Is homemade frosting really that much better than store-bought? Honestly, yes. But if you’re short on time or just want to keep things simple, store-bought is perfectly acceptable. No stress baking, remember?
Final Thoughts
So there you have it! A chocolate cake that looks like it came from a fancy bakery but was actually whipped up in your very own kitchen. You’ve conquered the cake, mastered the truffles, and decorated like a pro. Now go impress someone—or yourself—with your new culinary skills. You’ve earned it! Seriously, pour yourself a cuppa (or something stronger) and enjoy the fruits of your delicious labor. You’re a rockstar!


