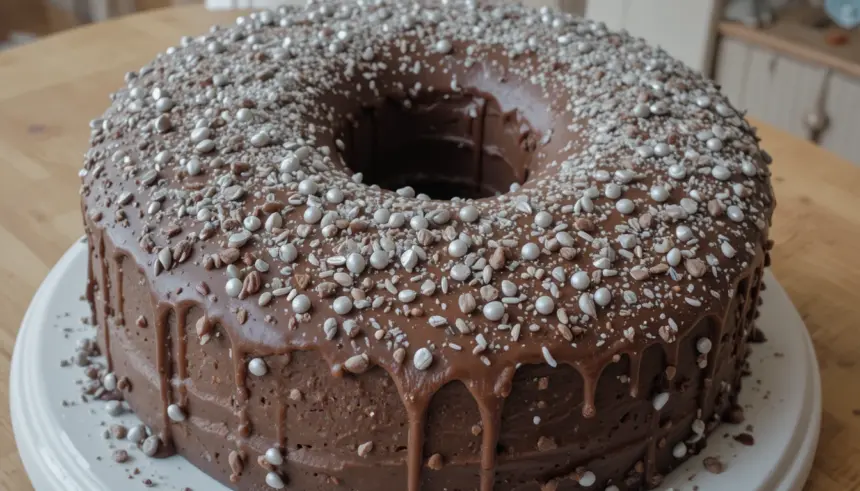
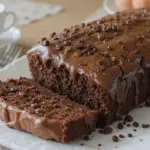
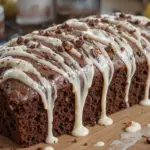
Oh, the humble chocolate cake! A timeless classic, a comforting embrace, and the undisputed monarch of dessert tables. But what happens when you introduce a sprinkle of pure magic, a shimmer of starlight, a cascade of cosmic dust? You get the show-stopping, jaw-dropping, utterly enchanting Chocolate Cake With Silver Sprinkles! It’s not just a dessert; it’s a celebration in edible form, a dazzling declaration that fun is on the menu. As an expert who has witnessed countless smiles ignited by this particular confection, let me assure you: this cake isn’t just delicious; it’s an experience. Get ready to dive into the sweet science and playful artistry of creating a masterpiece that glitters with joy!
Why Chocolate Cake With Silver Sprinkles is Every Celebration’s Star
Imagine a rich, dark canvas of moist chocolate – deep, complex, and utterly satisfying. Now, picture that canvas adorned with a constellation of shimmering silver. It’s a contrast that captivates both the eye and the palate. The classic comfort of chocolate meets the festive glamor of silver, creating a dessert that feels both familiar and extraordinarily special. This isn’t just about taste; it’s about the visual spectacle, the “wow” factor that elevates any event from ordinary to unforgettable. Whether it’s a birthday, an anniversary, a graduation, or just a Tuesday that needs a little sparkle, a Chocolate Cake With Silver Sprinkles delivers an instant mood lift and an undeniable sense of occasion.
The Perfect Chocolate Cake Base: A Master Baker’s Secrets
The foundation of any great Chocolate Cake With Silver Sprinkles is, naturally, the chocolate cake itself. It needs to be moist, rich, and intensely chocolatey, providing the perfect dark backdrop for our silver stars. Here are some pro tips for achieving chocolate cake perfection:
- Cocoa Power: Don’t skimp on quality. Dutch-process cocoa powder often gives a darker crumb and a smoother, less acidic chocolate flavor. Natural cocoa powder can be used but usually requires baking soda to react with its acidity.
- The Coffee Advantage: A secret weapon! Adding a small amount of hot coffee or espresso to your batter doesn’t make the cake taste like coffee, but it profoundly deepens and intensifies the chocolate flavor. It’s magic!
- Buttermilk for Tenderness: The acidity in buttermilk reacts with baking soda (if used) to create a tender, moist crumb. If you don’t have buttermilk, you can make your own by adding a tablespoon of white vinegar or lemon juice to regular milk and letting it sit for 5-10 minutes.
- Don’t Overmix! This is crucial. Overmixing develops gluten, leading to a tough, dry cake. Mix just until the ingredients are combined.
- Room Temperature Ingredients: Butter, eggs, and milk at room temperature emulsify better, creating a smoother batter and a more uniform texture.
Crafting the Silky Smooth Frosting Foundation
The frosting is more than just a delicious topping; it’s the canvas for our dazzling sprinkles! A silky smooth, stable frosting is essential for perfect sprinkle adhesion. While you could go with a chocolate ganache for extra decadence, a classic buttercream (Swiss meringue, Italian meringue, or even a good American buttercream) is often the preferred choice for its texture and ability to hold sprinkles beautifully.
- Butter Quality: Use high-quality, unsalted butter. It makes a difference in flavor and consistency.
- Powdered Sugar Sifting: Sift your powdered sugar! This prevents lumps and ensures a super-smooth frosting. Trust me, you don’t want lumps when you’re going for a flawless finish.
- Achieve the Right Consistency: Your frosting should be spreadable but firm enough to hold its shape. If it’s too soft, the sprinkles might slide off. Too stiff, and it’s hard to spread evenly.
- Crumb Coat First: Always apply a thin “crumb coat” of frosting, chill it, then apply your final, thicker layer. This traps any loose crumbs, ensuring a pristine finish.
Unleashing the Silver Sparkle: Mastering Sprinkles Application
Now for the fun part: the silver sprinkles! This is where your Chocolate Cake With Silver Sprinkles truly comes alive. But not all sprinkles are created equal, and application is an art.
Types of Silver Sprinkles and Their Best Uses
| Sprinkle Type | Description | Best Use for Chocolate Cake With Silver Sprinkles |
|---|---|---|
| Silver Nonpareils | Tiny, round, hard balls. Provide dense, uniform coverage and a satisfying crunch. | Full coverage, borders, sparkling “snow” effect on top. |
| Silver Jimmies (Strands) | Small, elongated rods. Softer texture than nonpareils. | Scattered effect, lighter coverage, great for mixing with other colors. |
| Silver Rods/Dragees | Larger, metallic-coated spheres or rods. Can be harder, check for “edible” status. | Statement pieces, elegant accents, sparingly used for high impact. |
| Edible Silver Glitter/Dust | Super fine powder for a subtle shimmer or intense sparkle. | Sprinkling over frosted areas for an all-over glow, painting designs (when mixed with alcohol extract). |
| Silver Sequin Sprinkles | Flat, round discs for a geometric, disco-ball effect. | Patterned designs, modern aesthetic, full coverage for a “fish scale” look. |
Decorating Like a Pro: Beyond Basic Sprinkles
Here are some techniques to make your Chocolate Cake With Silver Sprinkles truly magnificent:
- The “Press and Roll” Method (for Sides): Place your cake on a cake board slightly larger than the cake. Pour a generous amount of silver sprinkles onto a clean baking sheet or parchment paper. Gently lift and tilt the cake, pressing the frosted sides into the sprinkles. Rotate the cake, pressing firmly but not too hard, until the sides are fully coated. This creates a dense, even application.
- The “Sprinkle Shower” (for Top): Hold a handful of sprinkles over the top of your cake and let them rain down. Use your fingers to gently spread them for even coverage. For more precise placement, use a spoon.
- Ombré Effect: Start with a dense application of silver sprinkles at the base of the cake, gradually decreasing the density as you move upwards, transitioning into plain chocolate frosting or a lighter sprinkle mix.
- Sprinkle Borders: Use a small offset spatula or your fingers to create a neat border of sprinkles around the bottom edge of the cake or around the top circumference.
- Combined Textures: Don’t be afraid to mix different types of silver sprinkles for a more dynamic look. Add a few larger silver dragees among the nonpareils for pops of shine.
- Protection is Key: When applying sprinkles to the sides, place your cake on a wire rack over a large tray to catch excess sprinkles for reuse.
Pairing Perfection: What to Serve With Your Dazzling Creation
A cake this magnificent deserves equally delightful accompaniments:
- Beverages: A tall glass of cold milk, a rich espresso, a sophisticated sparkling wine, or even a playful cream soda will perfectly complement the chocolate’s depth and the cake’s celebratory spirit.
- Dessert Complements: A scoop of good quality vanilla bean ice cream, a dollop of fresh whipped cream, or a side of tart fresh berries (like raspberries or strawberries) can cut through the richness and add another layer of flavor and texture.
Troubleshooting Common Cake Disasters (and How to Avoid Them!)
Even experts face challenges! Here’s how to avoid common pitfalls when making your Chocolate Cake With Silver Sprinkles:
- Dry Cake: Likely overbaked or overmixed. Use an oven thermometer, test for doneness with a toothpick (it should come out with moist crumbs, not wet batter), and mix just until combined.
- Sunken Middle: Often due to opening the oven door too early, too much leavening, or underbaking. Resist peeking, ensure accurate measurements, and bake until a toothpick comes clean.
- Lumpy Frosting: Un-sifted powdered sugar or butter that’s too cold. Always sift powdered sugar and ensure butter is truly at room temperature for smooth results.
- Sprinkles Not Sticking: Your frosting might be too firm or too dry. Apply sprinkles immediately after frosting, while it’s still slightly tacky. If using an already set frosting, lightly mist with water or edible glue before applying.
- Messy Sprinkles: Use a dedicated “sprinkle station” with a large tray or parchment paper to catch the overflow. Clean up any fallen sprinkles before serving for a pristine look.
Storing Your Masterpiece: Keeping the Sparkle Alive
To ensure your Chocolate Cake With Silver Sprinkles remains as delicious as it is beautiful:
- Airtight Container: Always store cake in an airtight container to prevent it from drying out.
- Room Temperature (Short-Term): If your frosting is stable (like a meringue buttercream) and the environment isn’t too warm, the cake can stay at room temperature for 1-2 days.
- Refrigeration (Longer-Term): For longer storage (up to 5 days) or if using a cream cheese or dairy-based frosting, refrigerate the cake. Bring it back to room temperature for 30-60 minutes before serving for the best flavor and texture.
- Freezing: You can freeze unfrosted cake layers wrapped tightly in plastic wrap and foil for up to 2-3 months. Frosted cake can also be frozen, but the sprinkles might lose some of their shine or bleed slightly upon thawing. Freeze solid uncovered, then wrap.
Frequently Asked Questions About Chocolate Cake With Silver Sprinkles
Q1: What kind of chocolate is best for the cake itself?
A: For a rich, deep chocolate flavor, I recommend using a good quality unsweetened Dutch-process cocoa powder. If your recipe calls for melted chocolate, opt for a good quality baking bar (60-70% cacao) for the best taste and texture.
Q2: Are silver sprinkles safe to eat?
A: Most silver sprinkles marketed as “edible” are safe. However, some traditional silver dragees (the hard, metallic balls) were historically non-toxic but not meant for consumption due to their hardness. Always check the packaging for “edible” or “food-safe” labels. Modern silver nonpareils, jimmies, and edible glitter are generally designed for consumption.
Q3: How do I get silver sprinkles to stick perfectly without making a mess?
A: The key is to apply sprinkles to freshly frosted, still-tacky frosting. For the sides, use the “press and roll” method over a large tray to catch excess. For the top, sprinkle over the cake while it’s on a wire rack with a tray underneath. Work quickly and confidently!
Q4: Can I make the Chocolate Cake With Silver Sprinkles ahead of time?
A: Absolutely! You can bake the cake layers 1-2 days in advance, wrap them tightly, and store them at room temperature or refrigerate. Frosting can often be made a day or two ahead and stored in the fridge (then re-whipped). Assemble and decorate the day before or on the day of your event for optimal freshness and sparkle.
Q5: What if I don’t have buttermilk for the chocolate cake?
A: No problem! You can easily make a buttermilk substitute. For every cup of buttermilk needed, measure out 1 tablespoon of white vinegar or lemon juice into a liquid measuring cup, then fill the rest of the way to the 1-cup mark with regular milk (dairy or non-dairy). Stir gently and let it sit for 5-10 minutes until it slightly curdles.
Q6: How can I transport a decorated Chocolate Cake With Silver Sprinkles?
A: For short distances, a sturdy cake carrier is your best friend. For longer journeys, ensure the cake is chilled to firm up the frosting. Place the carrier on a flat surface in your vehicle (like the floorboard or trunk, not on a tilted seat) and drive carefully, avoiding sudden stops. If it’s a hot day, consider a cooler with ice packs (not touching the cake directly) or use air conditioning.
The Grand Finale: Your Dazzling Dessert Awaits!
There you have it – the ultimate guide to creating a Chocolate Cake With Silver Sprinkles that isn’t just a dessert, but a statement piece! From the rich, velvety crumb of the cake to the dazzling dance of silver on its surface, every element comes together to form a truly unforgettable treat. Armed with these expert tips and a sprinkle of enthusiasm, you’re ready to transform a simple chocolate cake into a shimmering sensation. So, gather your ingredients, unleash your inner pastry artist, and prepare to delight. Get baking, experiment with your sprinkle artistry, and most importantly, share the joy! Your next dazzling celebration starts now.
