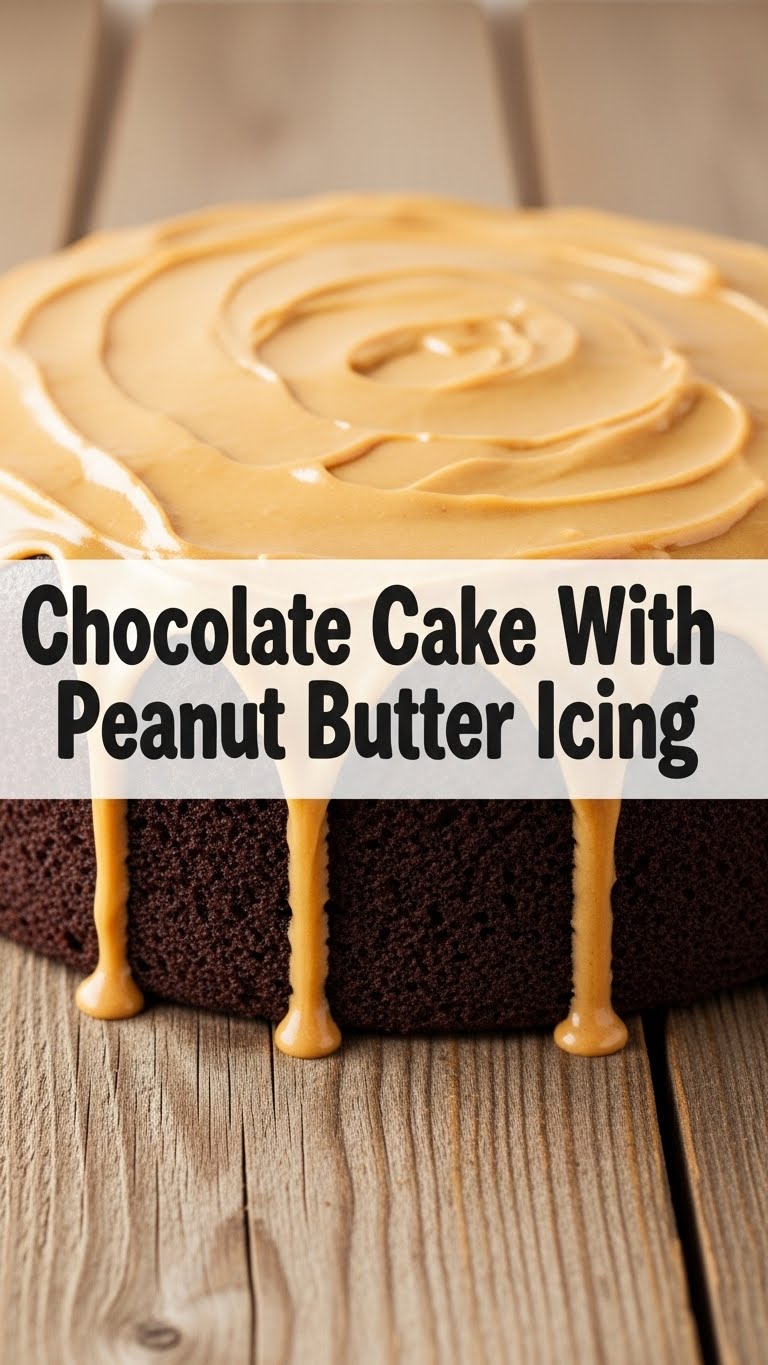
Ever have one of those days where only chocolate and peanut butter can fix everything? Yeah, me too. Or maybe you’re just scrolling, dreaming of something sweet, decadent, and ridiculously easy to make that screams “I’m a kitchen wizard!” (even if your last attempt at toast was questionable). My friend, you’ve stumbled upon destiny. Get ready to bake a chocolate cake so moist, so rich, so perfectly paired with a luscious peanut butter icing, you’ll wonder where this recipe has been all your life.
Why This Recipe is Awesome
Okay, let’s be real. In the vast ocean of recipes out there, why *this* one? Because it’s the culinary equivalent of finding a twenty-dollar bill in your old jeans. It delivers maximum deliciousness with minimum fuss. Seriously, this isn’t one of those “looks easy, then makes you cry into your flour” recipes. It’s:
- Idiot-Proof: If I can make it without setting off the smoke alarm, you absolutely can too.
- Flavor Explosion: Chocolate and peanut butter? Name a more iconic duo. I’ll wait.
- “Wow” Factor: People will think you spent hours slaving away. Spoiler alert: you didn’t.
- Comfort Food Supreme: It’s basically a hug in cake form. A very delicious, chocolatey, peanut buttery hug.
So, ditch the complicated cookbooks and embrace the joy of simple, spectacular baking. Your taste buds (and your ego) will thank you.
Ingredients You’ll Need
Gather your troops! No fancy-schmancy ingredients here, just your everyday kitchen heroes. Make sure everything’s at room temp for the icing, because nobody likes lumpy frosting, right?
For the Chocolate Cake:
- 1 ½ cups all-purpose flour: The white stuff. Don’t worry, you won’t need to sift it unless you’re feeling extra fancy.
- 1 ½ cups granulated sugar: Sweetness personified.
- ¾ cup unsweetened cocoa powder: The darker, the better for that deep chocolate flavor.
- 1 ½ teaspoons baking soda: Our magic leavening agent.
- 1 teaspoon baking powder: Its equally important sidekick.
- 1 teaspoon salt: Enhances all those lovely flavors. Don’t skip it!
- 1 cup milk: Whole milk for extra richness, but whatever you have works.
- ½ cup vegetable oil: Or any neutral oil. Keeps it moist, trust me.
- 2 large eggs: Room temperature, please!
- 1 teaspoon vanilla extract: The soul of baking.
- 1 cup hot water or hot brewed coffee: The secret weapon for an ultra-moist cake. Coffee deepens the chocolate flavor without making it taste like coffee. Shhh!
For the Peanut Butter Icing:
- ½ cup (1 stick) unsalted butter: Softened to room temperature. This is crucial for smooth icing.
- 1 cup creamy peanut butter: The good stuff, like Jif or Skippy. Save the natural, oily stuff for sandwiches.
- 3-4 cups powdered sugar (confectioners’ sugar): Sifted, if you want *extra* smooth, but I’m usually too impatient.
- ¼ cup milk or heavy cream: Add slowly, depending on your desired consistency.
- 1 teaspoon vanilla extract: Always, always.
Step-by-Step Instructions
Alright, apron on! Let’s get this deliciousness started. Follow these steps, and you’ll be a cake boss in no time.
Cake Prep Party:
Preheat your oven to 350°F (175°C). Seriously, don’t skip this. Grease and flour a 9×13 inch baking pan, or two 8 or 9-inch round pans. Line the bottoms with parchment paper if using rounds. It prevents sticking, which is a real joy killer.
Dry Mix Magic:
In a large bowl, whisk together the flour, sugar, cocoa powder, baking soda, baking powder, and salt. Give it a good whisk to break up any lumps and ensure everything is evenly distributed. This is your foundation!
Wet Mix Whisk:
In a separate medium bowl, whisk together the milk, oil, eggs, and vanilla extract until well combined. These are your liquid gold ingredients.
Combine & Conquer:
Pour the wet ingredients into the dry ingredients. Mix on low speed with an electric mixer (or by hand with a whisk/spatula) until just combined. Don’t overmix! Overmixing develops gluten and can make your cake tough. A few lumps are totally fine.
The Hot Secret:
Carefully stir in the hot water or coffee until the batter is smooth. The batter will be quite thin, and that’s exactly what we want. This is where the magic happens for moisture.
Bake It Up:
Pour the batter evenly into your prepared pan(s). Bake for 30-35 minutes for a 9×13 pan, or 25-30 minutes for round pans, or until a wooden skewer or toothpick inserted into the center comes out clean. Don’t open the oven door too early!
Cool Down:
Let the cake cool in the pan for about 10-15 minutes before inverting it onto a wire rack to cool completely. This part is crucial! Do not ice a warm cake, or your icing will melt into a sad, sugary puddle.
Icing Time – Cream It:
While the cake cools, let’s make that glorious peanut butter icing! In a large bowl, beat the softened butter and creamy peanut butter together with an electric mixer until light and fluffy. This can take 2-3 minutes.
Sugar Rush:
Gradually add the powdered sugar, one cup at a time, beating well after each addition. If it gets too thick to mix, add a tablespoon or two of milk. Once all the sugar is in, beat in the vanilla extract.
Achieve Perfection:
Add the remaining milk or cream, a tablespoon at a time, until you reach your desired consistency. You want it smooth, spreadable, but not too runny. Taste it! Adjust sweetness or peanut butteriness if needed (IMO, it’s perfect as is).
Decorate & Devour:
Once the cake is completely, utterly, totally cool, spread that magnificent peanut butter icing all over it. Slice, serve, and accept all the compliments that are about to come your way!
Common Mistakes to Avoid
We’ve all been there. Baking fails happen. But with these insider tips, you can dodge the most common pitfalls like a pro. Think of me as your baking guardian angel.
- Forgetting to Preheat the Oven: Rookie mistake! Your cake needs a hot oven from the get-go to rise properly.
- Overmixing the Batter: This is probably the number one cause of tough, dense cakes. Mix until *just* combined. Lumps are your friends here!
- Icing a Warm Cake: I already warned you, but it bears repeating. Unless you want a melted mess, ensure your cake is stone-cold before even thinking about frosting it.
- Using Cold Butter for Icing: If your butter isn’t softened, your icing will be lumpy and sad. Take it out of the fridge at least an hour before you start.
- Ignoring the Salt: “Just a teaspoon of salt? Pfft.” NO! Salt balances the sweetness and enhances the chocolate flavor. It’s not just for savory dishes.
- Substituting Cocoa Powder for Hot Chocolate Mix: Trust me, it’s not the same. You need unsweetened cocoa for this recipe.
Alternatives & Substitutions
Life happens, and sometimes you don’t have exactly what the recipe calls for. No stress! Here are some easy swaps:
- No Buttermilk? No Problem: If you don’t have buttermilk, you can easily make your own. Add 1 tablespoon of white vinegar or lemon juice to a measuring cup, then fill the rest with regular milk until you reach 1 cup. Let it sit for 5-10 minutes until it curdles slightly. Voila!
- Gluten-Free: Swap out the all-purpose flour for a 1:1 gluten-free baking blend. Just make sure it contains xanthan gum.
- Dairy-Free: Use your favorite plant-based milk (almond, soy, oat) for the cake. For the icing, use dairy-free butter sticks and plant-based milk/cream.
- Nut-Free: If allergies are a concern, swap the peanut butter icing for a sunbutter (sunflower seed butter) icing. It’s surprisingly delicious and has a similar texture.
- Dark Chocolate Lover? Use dark cocoa powder for an even richer, more intense chocolate flavor.
- Crunchy Icing? Feel free to use crunchy peanut butter in the icing if you like a bit of texture!
FAQ (Frequently Asked Questions)
Got questions? I’ve got answers. And maybe a little sass.
- Can I make this cake ahead of time? Absolutely! The cake can be baked a day in advance and stored covered at room temperature. The icing can also be made ahead and stored in the fridge for a few days; just bring it to room temp and give it a good whip before using.
- What if my icing is too thick/thin? Too thick? Add milk or cream, a tablespoon at a time, until it loosens up. Too thin? Add more powdered sugar, a tablespoon at a time, until it thickens. It’s all about playing Goldilocks!
- Does the coffee make the cake taste like coffee? Nope! The coffee simply enhances the chocolate flavor, making it deeper and richer without imparting a distinct coffee taste. It’s a secret weapon for chocolate cakes.
- Can I freeze this cake? You bet! Wrap individual slices or the whole cake (un-iced or iced) tightly in plastic wrap, then foil. It’ll last for up to 2-3 months in the freezer. Thaw overnight in the fridge before serving.
- My cake sank in the middle! What happened? Oh no! Common culprits include opening the oven door too early, too much leavening agent (baking soda/powder), or insufficient baking time. Make sure your oven temperature is accurate (an oven thermometer helps!).
- Is it really as easy as you say? FYI, yes. I wouldn’t lie to you about something this important. It’s designed for maximum impact with minimal effort. You’ll nail it!
Final Thoughts
So there you have it, folks! Your new go-to recipe for a show-stopping chocolate cake with peanut butter icing. This isn’t just a dessert; it’s an experience. It’s the kind of cake that makes people ask for the recipe, then realize they too can be a baking hero. Now go impress someone—or yourself—with your new culinary skills. You’ve earned it!

