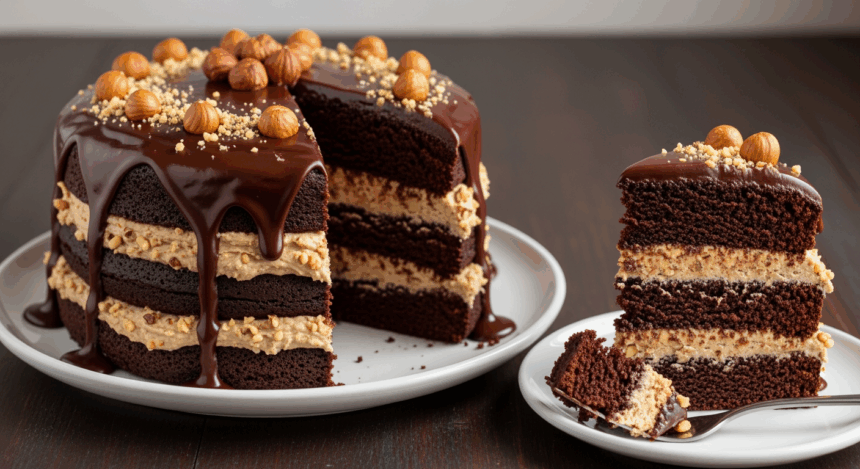
Let’s be honest: when chocolate cravings hit, they hit HARD. And nothing—I repeat, nothing—satisfies that primal urge quite like a homemade chocolate cake with a surprise nutty filling that makes you want to slap the table and shout “HOT DANG, THAT’S GOOD!” So put on your favorite stretchy pants, because we’re about to make something that’s worth every delicious calorie.
Why This Recipe is Awesome
First off, this isn’t just any chocolate cake. It’s the kind of cake that makes people think you spent all day in the kitchen channeling your inner pastry chef, when really you were binge-watching Netflix until 20 minutes before guests arrived. The contrast between the moist chocolate layers and the crunchy, nutty filling is basically a party in your mouth that nobody wants to leave. Plus, it’s surprisingly forgiving if you’re the type who treats recipes more like loose suggestions than actual rules.
Ingredients You’ll Need
For the cake:
- 2 cups all-purpose flour (the regular stuff, nothing fancy)
- 2 cups granulated sugar (yes, two whole cups—this isn’t a health food, people)
- ¾ cup unsweetened cocoa powder (the darker, the better)
- 2 teaspoons baking powder (the stuff that makes things rise, not baking soda!)
- 1½ teaspoons baking soda (okay, you need this too)
- 1 teaspoon salt (to make the sweet stuff taste sweeter—it’s science)
- 2 large eggs (room temperature, but who actually remembers to take them out early?)
- 1 cup buttermilk (or regular milk with a splash of vinegar if you’re not a buttermilk-keeping household)
- ½ cup vegetable oil (keeps it moist for days, if it lasts that long)
- 2 teaspoons vanilla extract (the real stuff, not that imitation nonsense)
- 1 cup hot coffee (brings out the chocolate flavor—trust me on this)
For the nut filling:
- 1½ cups mixed nuts (walnuts, pecans, hazelnuts—whatever makes your heart sing)
- ½ cup brown sugar (packed tight like your jeans after eating this cake)
- 4 tablespoons butter (melted and ready to party)
- 1 teaspoon cinnamon (because warm spices and chocolate are BFFs)
- Pinch of salt (everything needs salt, even sweet stuff)
For the frosting:
- 1 cup butter (softened, just like your resolve to eat “just one slice”)
- 3½ cups powdered sugar (don’t inhale while mixing unless you want to look like a ghost)
- ½ cup cocoa powder (more chocolate because… why not?)
- ¼ cup heavy cream (the good stuff)
- 2 teaspoons vanilla extract (again, real vanilla extract, people)
- Pinch of salt (you know the drill by now)
Step-by-Step Instructions
- Prep your battle station. Preheat oven to 350°F (175°C). Grease and flour two 9-inch cake pans. If you have parchment paper, line the bottoms for extra insurance against cake-sticking disasters.
- Mix the dry ingredients. In a large bowl, whisk together flour, sugar, cocoa, baking powder, baking soda, and salt. Try not to create a dust storm in your kitchen.
- Add the wet team. Add eggs, buttermilk, oil, and vanilla. Mix until just combined. Pour in the hot coffee (slowly, unless you enjoy splashing hot liquid everywhere) and mix again. The batter will be thin—this is normal! Don’t panic and add more flour.
- Bake it, baby. Divide batter between the two pans and bake for 30-35 minutes, or until a toothpick comes out with just a few moist crumbs. If it comes out with wet batter, keep baking. If it comes out clean, you might have overbaked (sad trombone).
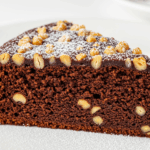
- Make the nut filling. While the cake is baking, chop your nuts into small pieces (but not dust—we want some texture here). Mix with brown sugar, melted butter, cinnamon, and salt. It should be like a coarse, sticky paste.
- Cool your jets. Let the cakes cool in the pans for 10 minutes, then flip onto wire racks to cool completely. I mean COMPLETELY. No cheating, or your frosting will slide right off.
- Frosting time! Beat butter until fluffy. Gradually add powdered sugar and cocoa, alternating with cream. Add vanilla and salt. Beat until it looks so good you want to faceplant into it.
- Assembly required. Place one cake layer on your serving plate. Spread the nut filling evenly, leaving a half-inch border around the edge. Top with the second cake layer.
- Frost like a boss. Cover the top and sides with frosting. You can be neat about it or go for that rustic, “I’m too cool to care” look. Both are valid life choices.
- Garnish (optional). Sprinkle some extra chopped nuts on top if you’re feeling fancy. Or don’t. I’m not your mom.
Common Mistakes to Avoid
Rushing the cooling process: I get it—you want cake NOW. But frosting a warm cake is like putting makeup on during a sauna session. It ain’t gonna stay put.
Overmixing the batter: This isn’t a protein shake. Mix just until combined unless you want a cake with the texture of a rubber tire.
Skipping the coffee: “But I don’t like coffee!” I hear you cry. Trust me, you can’t taste it—it just makes the chocolate taste more…chocolatey. Science!
Opening the oven too early: Peek at your cake before it’s set and it’ll sink faster than my motivation on Monday mornings.
Alternatives & Substitutions
Nut options: Allergic to nuts or just not a fan? Sub in chocolate chips, crushed cookies, or even chopped dried fruit. The texture contrast is what we’re after here.
Gluten concerns? Swap in your favorite cup-for-cup gluten-free flour blend. The cake might be slightly denser, but honestly, with all that chocolatey goodness, who’s gonna notice?
No buttermilk? Add 1 tablespoon of lemon juice or white vinegar to a cup of milk and let it sit for 5 minutes. Boom—fake buttermilk that works just as well.
Coffee alternatives: Not a coffee house? Hot water works too, though you’ll miss some depth of flavor. You could also use hot chai tea for an interesting twist.
IMO, this cake is best with the ingredients listed, but cooking is all about making it work with what you’ve got!
FAQ (Frequently Asked Questions)
Can I make this cake ahead of time?
Absolutely! The flavors actually get better after a day. Just store it in an airtight container at room temperature for up to 3 days, or refrigerate for up to a week (if it lasts that long, which—let’s be real—it won’t).
Is this cake too complicated for beginners?
Nope! If you can read and follow basic directions, you can make this cake. The most technical part is probably waiting for it to cool completely (patience is not my virtue either).
Can I turn this into cupcakes?
You clever thing, yes you can! Fill cupcake liners about 2/3 full, bake for 18-22 minutes, then core out the centers and fill with the nut mixture before frosting. Boom—portable chocolate-nutty goodness!
Does this cake freeze well?
Unfrosted cake layers freeze beautifully for up to 2 months. Wrap them well in plastic wrap and then foil. The completed cake can also be frozen, but the texture of the frosting might change slightly upon thawing.
Do I really need that much sugar?
Look, I’m not going to lie to you—this is not health food. You could reduce the sugar by about 1/4 cup in the cake, but any more than that will affect the texture and moisture. Maybe just eat a smaller slice? (Said no one ever.)
Final Thoughts
There you have it—a chocolate cake that’s basically a love letter to your taste buds. The combination of moist chocolate cake, crunchy nut filling, and smooth frosting is the kind of thing that makes people close their eyes and make inappropriate noises while eating.
The best part? You made it yourself, which means you get all the bragging rights AND the corner piece with extra frosting. So put on some music, pour yourself something nice to drink, and enjoy the fruits (well, nuts) of your labor. You deserve it for reading this far, and your future self will thank you when that chocolate craving hits!
