So, you’ve scrolled past enough fancy desserts and now you’re like, “I want that, but easier,” right? Same, friend, same. We’re diving headfirst into a chocolate cake that’s so good, you’ll think you spent all day on it. But shhh, it’s our little secret how ridiculously simple it actually is. Get ready to bake a chocolate masterpiece with a dreamy mousse filling that practically makes itself. No stress, just deliciousness.
Why This Recipe is Awesome
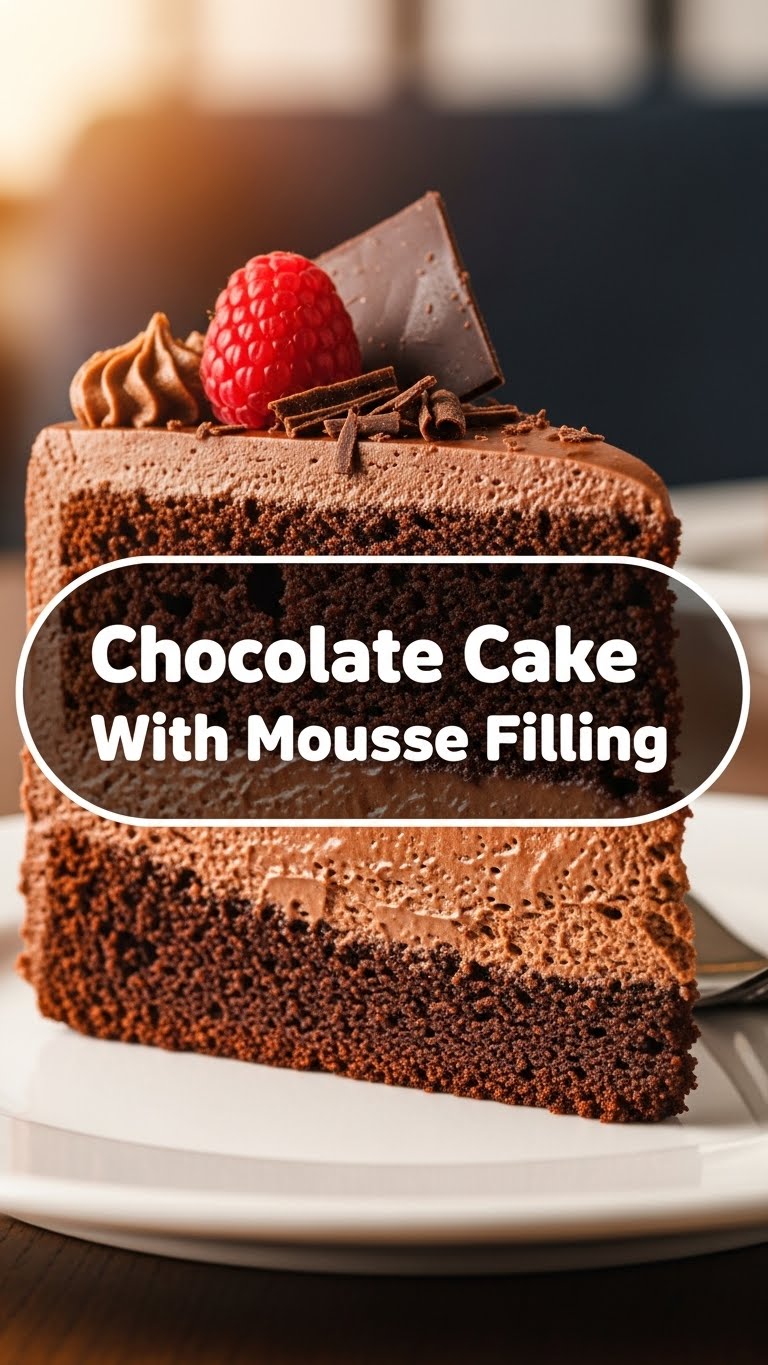
Listen up, buttercup. This isn’t just any chocolate cake. This is “I-pretended-it-took-me-hours-but-really-it-was-a-breeze” chocolate cake. It’s rich, it’s moist (I know, I know, but it is!), and the mousse filling is like a cloud of chocolatey joy. Plus, it’s pretty much **idiot-proof**. Even I, who once mistook salt for sugar (don’t ask), managed to pull this off without setting the kitchen on fire. It’s impressive enough for guests, but simple enough for a Tuesday night craving. What’s not to love?
Ingredients You’ll Need
Gather your troops, folks! Here’s what you’ll need for your chocolatey adventure. Keep it chill, no need to raid a specialty store.
For the Seriously Moist Chocolate Cake:
- All-Purpose Flour: 1 ½ cups. The basic stuff, nothing fancy required.
- Granulated Sugar: 1 ½ cups. Sweetener, duh.
- Unsweetened Cocoa Powder: ¾ cup. Go for good quality, it makes a difference!
- Baking Soda: 1 ½ teaspoons. Our little magic lifter.
- Baking Powder: 1 teaspoon. Its sidekick, making sure we get a good rise.
- Salt: 1 teaspoon. Don’t skip it; it balances the sweetness like a pro.
- Large Eggs: 2. Room temperature is better, but honestly, I rarely remember.
- Milk: 1 cup (any kind will do). Adds moisture and tenderness.
- Vegetable Oil: ½ cup. The secret to keeping it super moist for days.
- Vanilla Extract: 2 teaspoons. Because everything is better with vanilla, IMO.
- Boiling Water or Hot Coffee: 1 cup. This is your secret weapon for deep, intense chocolate flavor. Trust.
For the Dreamy Chocolate Mousse Filling:
- Heavy Cream (cold): 2 cups. The star of the show, ready to be whipped.
- Powdered Sugar: ½ cup. So it’s silky smooth, no grainy bits.
- Unsweetened Cocoa Powder: ¼ cup. More chocolate, always more.
- Vanilla Extract: 1 teaspoon. A little extra somethin’ somethin’.
Step-by-Step Instructions
Alright, apron on, good tunes playing, let’s get this done. Remember, deep breaths, it’s just cake!
Making the Cake:
- Preheat & Prep: Crank your oven to 350°F (175°C). Grab a 9-inch round cake pan, grease it generously, and dust it with cocoa powder (or flour). This helps prevent sticking and gives it a nice finish.
- Whisk the Dry Stuff: In a large bowl, whisk together the flour, granulated sugar, cocoa powder, baking soda, baking powder, and salt. Make sure there are no lumps—nobody wants a surprise pocket of flour.
- Add the Wet Wonders: Dump in the eggs, milk, vegetable oil, and vanilla extract. Beat with an electric mixer on medium speed for about 2 minutes until everything is just combined and smooth.
- The Secret Ingredient: Slowly pour in the boiling water (or hot coffee). The batter will be very thin – don’t panic! It’s supposed to be like that. Stir until just combined.
- Bake It Up: Pour your glorious batter into the prepared pan. Bake for 30-35 minutes, or until a wooden skewer inserted into the center comes out clean. **Don’t overbake!**
- Cool Down: Let the cake cool in the pan for 10-15 minutes, then invert it onto a wire rack to cool completely. This is crucial for successful layering. Seriously, **let it cool completely!**
Whipping Up the Mousse:
- Chill Out: For best results, chill your mixing bowl (and whisk attachments) in the freezer for 10-15 minutes. This helps the cream whip up faster and fluffier.
- Whip It Good: Pour the cold heavy cream into your chilled bowl. Beat on medium-high speed until soft peaks form.
- Sweeten & Flavor: Gradually add the powdered sugar, cocoa powder, and vanilla extract. Continue beating until stiff peaks form. Be careful not to over-whip, or you’ll end up with butter (unless you want butter, then go for it!).
Assembly Time!
- Level Up: Once your cake is totally cool, use a serrated knife to carefully slice it horizontally into two even layers. If your cake has a dome, level it off first.
- Mousse Magic: Place one cake layer on your serving plate. Spread all the chocolate mousse evenly over the top, almost to the edges.
- Stack & Chill: Gently place the second cake layer on top. Lightly press down. If you want a naked cake look, you’re done! Otherwise, you can whip up a simple ganache or buttercream to frost the outside. **Pop it in the fridge for at least 30 minutes** to let the mousse set.
- Serve & Devour: Slice, serve, and prepare for compliments. You earned it!
Common Mistakes to Avoid
Nobody’s perfect, but we can learn from past blunders, right? Here’s how to avoid rookie errors:
- Not Preheating the Oven: Rookie mistake! Your cake won’t rise properly if it goes into a cold oven. Patience, grasshopper.
- Overmixing the Batter: Once you add the wet ingredients, mix until just combined. Overmixing develops the gluten too much, leading to a tough, dry cake. Nobody wants that.
- Opening the Oven Door Too Soon: Curiosity killed the cake! Opening the door before the cake is set can cause it to sink in the middle. Wait until at least 25 minutes in.
- Not Cooling the Cake Completely: Trying to fill a warm cake with mousse is a recipe for a soupy disaster. **Melted mousse, anyone?** Don’t do it.
- Over-whipping the Mousse: Beat until stiff peaks form, then stop! If you go too far, you’ll end up with grainy or even buttery mousse.
Alternatives & Substitutions
Feeling a little rebellious? Here are some ways to switch things up:
- Gluten-Free: Swap the all-purpose flour for a good quality 1:1 gluten-free baking blend. Easy peasy.
- Dairy-Free Cake: Use your favorite plant-based milk (almond, soy, oat) instead of regular milk. The oil already makes it dairy-free otherwise.
- Dairy-Free Mousse: Chill a can of full-fat coconut cream overnight. Scoop out the thick cream (leaving the liquid) and whip it just like heavy cream. Add your cocoa and sugar. It works surprisingly well!
- Coffee Boost: If you’re not using hot coffee for the cake batter, a teaspoon of instant espresso powder mixed into the cocoa powder for both the cake and mousse will seriously deepen that chocolate flavor without making it taste like coffee. Win-win!
- Extra Decadent Mousse: Melt a few ounces of good quality semi-sweet or dark chocolate, let it cool slightly, then fold it into your whipped cream before adding cocoa powder. Pure heaven.
- Different Filling: Not feeling mousse? You could do a simple whipped cream filling, a raspberry jam layer, or even a cream cheese frosting. Your cake, your rules!
FAQ (Frequently Asked Questions)
Got questions? I’ve got (casual) answers!
Can I use margarine instead of butter? Well, technically yes, but why hurt your soul like that? Vegetable oil is specified in this recipe for moisture, and it works beautifully. For the mousse, real heavy cream is non-negotiable for that texture.
My cake sank in the middle, what happened? Oh no! Common culprits are opening the oven door too soon, overmixing the batter, or not enough leavening (baking soda/powder). Make sure your leavening agents aren’t expired!
How long does this cake last? If kept covered in the fridge, it’s good for 3-4 days. But let’s be real, it probably won’t make it past day two. Mine never does.
Do I *have* to chill the mousse before assembling? No, you chill the bowl and whisk to help whip the cream, but the mousse itself is ready to use immediately once whipped. **However, chilling the *assembled cake* is a non-negotiable** to let that mousse firm up properly.
Can I make this as cupcakes instead? Absolutely! Just fill cupcake liners about two-thirds full and bake for about 18-22 minutes. The mousse would be a killer frosting for them!
What if I don’t have boiling water for the cake? You can use hot tap water, but boiling water truly “blooms” the cocoa, intensifying the chocolate flavor. Give it a try if you can!
Is this cake *actually* easy, or are you just saying that? For real, it’s surprisingly simple! It looks fancy, but the process is straightforward. No weird techniques, just deliciousness.
Final Thoughts
There you have it, folks! Your new go-to chocolate cake with a mousse filling that’ll have everyone asking for the recipe. See? I told you it wasn’t rocket science. Now go forth and conquer that craving! Whip up this beauty, take a picture (because if there’s no picture, did it even happen?), and revel in your culinary prowess. You totally crushed it. Now go impress someone—or yourself—with your new culinary skills. You’ve earned it!


