Ever had one of those days where only chocolate can fix it? Yeah, me too. And not just any chocolate, we’re talking full-on, decadent, ‘I-might-marry-this-cake’ chocolate. Forget your troubles, grab your apron, and let’s bake something that’ll make your tastebuds sing arias. No stress, just deliciousness, promise!
Why This Recipe is Awesome
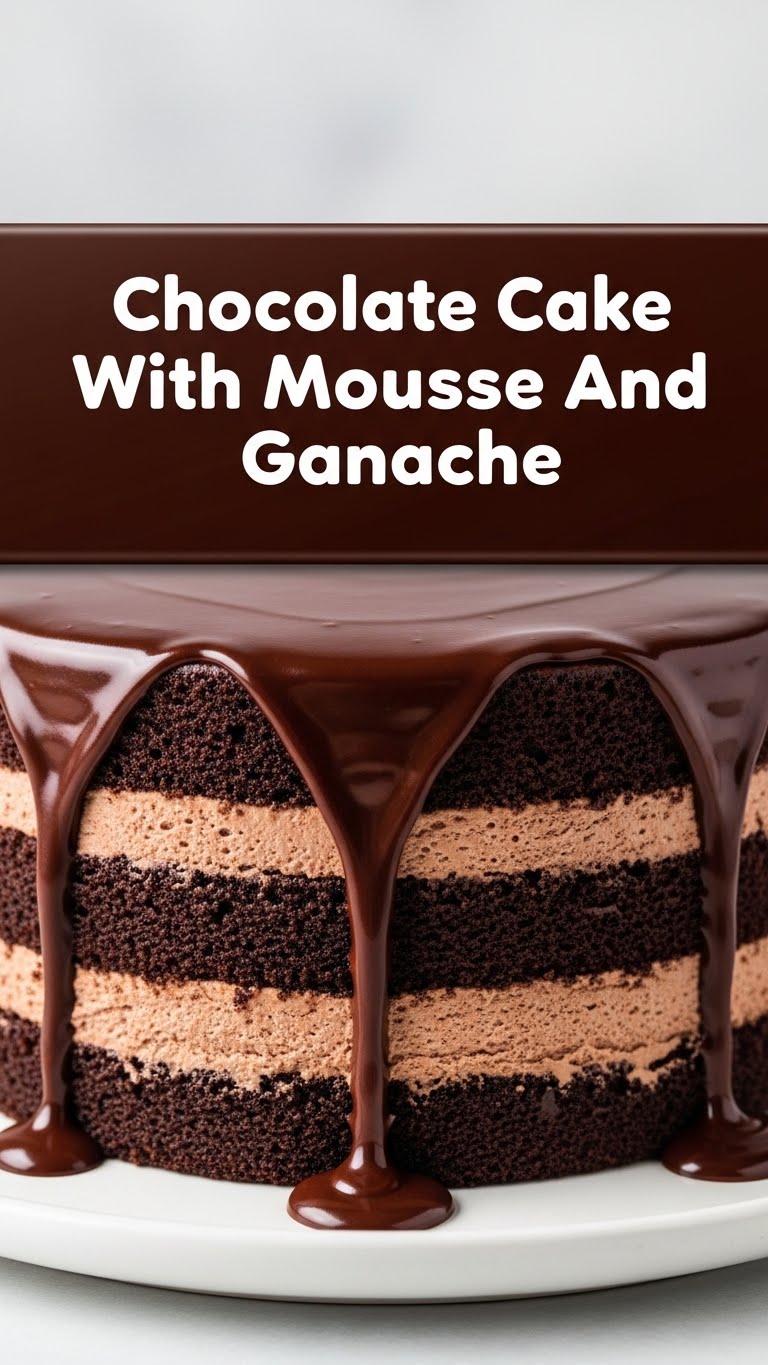
Okay, let’s be real. This isn’t your grandma’s dry chocolate cake (no offense, Grandma, love your cookies though!). We’re talking layers of moist, rich chocolate cake, fluffy, airy chocolate mousse, and a shiny, glorious, rich ganache. It’s basically a chocolate triple threat, a symphony of textures and flavors that will make you look like a pastry genius without actually needing a culinary degree.
And guess what? It’s surprisingly straightforward. Seriously, if *I* can make it look like a Pinterest dream, so can you. It’s the kind of recipe that rewards you with maximum “oohs and aahs” for minimal fuss. Plus, who doesn’t love a cake that screams “I care about you… and also chocolate”?
Ingredients You’ll Need
Time to gather your culinary squad! Don’t fret about fancy stuff; most of these are probably chilling in your pantry already. Or, you know, a quick run to the store. No judgment.
For the Seriously Good Chocolate Cake:
- 2 cups (250g) All-Purpose Flour: The backbone of our cakey dreams.
- 2 cups (400g) Granulated Sugar: Sweetness is key, my friend.
- ¾ cup (65g) Unsweetened Cocoa Powder: Go for good quality; it makes a difference!
- 2 tsp Baking Soda: Our lift-off specialist.
- 1 tsp Baking Powder: Backup lift-off specialist.
- 1 tsp Salt: Don’t skip it; it brings out all the chocolatey goodness.
- 1 cup (240ml) Milk: Any kind works, but whole milk gives it that extra richness.
- ½ cup (120ml) Vegetable Oil (or other neutral oil): Keeps things moist, moist, moist.
- 2 Large Eggs: Binders, baby!
- 2 tsp Vanilla Extract: Essential for rounding out the flavors.
- 1 cup (240ml) Hot Coffee: This is your secret weapon! It intensifies the chocolate flavor without making it taste like coffee, trust me.
For the Dreamy Chocolate Mousse:
- 1 ½ cups (360ml) Heavy Cream (cold): Needs to be super cold to whip up properly.
- ½ cup (60g) Powdered Sugar (confectioners’ sugar): Sweetens and stabilizes.
- ¼ cup (20g) Unsweetened Cocoa Powder: More chocolate, because why not?
- 1 tsp Vanilla Extract: For that sweet aroma.
For the Glossy Chocolate Ganache:
- 1 cup (170g) Good Quality Dark Chocolate Chips (or chopped chocolate): Aim for 60-70% cacao. Quality matters here for shine and flavor!
- ¾ cup (180ml) Heavy Cream: The magic liquid that transforms chocolate into ganache.
- 1 tbsp Unsalted Butter (optional, for extra shine): A little luxury never hurt anyone.
Step-by-Step Instructions
Alright, apron on, game face ready! Let’s get baking!
Part 1: The Glorious Chocolate Cake
- Preheat & Prep: Preheat your oven to 350°F (175°C). Grease and flour two 8-inch round cake pans. Or, line them with parchment paper. Smart move!
- Mix Dry: In a large bowl, whisk together the flour, sugar, cocoa powder, baking soda, baking powder, and salt. Make sure there are no lumpy bits.
- Mix Wet: In another bowl, combine the milk, oil, eggs, and vanilla extract. Whisk until it’s all happy together.
- Combine Forces: Pour the wet ingredients into the dry ingredients. Mix on low speed (or by hand) until just combined. Do not overmix! Overmixing leads to tough cakes, and we want tender cakes.
- Add the Secret Sauce: Carefully pour in the hot coffee. The batter will be thin, don’t panic! Mix until smooth.
- Bake It Up: Divide the batter evenly between your two prepared cake pans. Bake for 30-35 minutes, or until a toothpick inserted into the center comes out clean.
- Cool Down: Let the cakes cool in the pans for about 10-15 minutes, then invert them onto a wire rack to cool completely. This is crucial! Don’t even think about assembling until they are fully, completely cool. Trust me on this one.
Part 2: The Dreamy Chocolate Mousse
- Get Chilly: Make sure your heavy cream is super cold. Pop your mixing bowl and whisk attachment in the freezer for 5-10 minutes if you’re feeling fancy (and efficient!).
- Whip It Real Good: Pour the cold heavy cream into the chilled bowl. Start whipping on medium speed.
- Sweeten & Flavor: Once it starts to thicken slightly, add the powdered sugar, cocoa powder, and vanilla extract. Continue whipping on medium-high speed.
- Peak Perfection: Whip until stiff peaks form. The mousse should hold its shape beautifully. Be careful not to over-whip, or you’ll end up with butter (which is delicious, but not what we’re going for here!).
- Chill Out: Cover and refrigerate until you’re ready to assemble.
Part 3: The Glossy Chocolate Ganache
- Chop Chop: Place your good quality chocolate chips (or finely chopped chocolate) in a heatproof bowl.
- Heat Cream: In a small saucepan, heat the heavy cream over medium heat until it just begins to simmer around the edges. Don’t let it boil furiously.
- Pour & Wait: Pour the hot cream over the chocolate. Let it sit undisturbed for 5 minutes. This allows the chocolate to melt properly.
- Stir to Shine: After 5 minutes, gently whisk the mixture starting from the center and working your way out, until it’s smooth, glossy, and completely combined. Stir in the optional butter for extra shine, if using.
- Cool Down (Again!): Let the ganache cool slightly at room temperature, stirring occasionally, until it’s thick enough to pour over your cake but still liquid. About 15-20 minutes.
Part 4: The Grand Assembly!
- Level Up: If your cake layers have a dome, use a serrated knife to level them. You want nice, flat surfaces for stacking.
- First Layer: Place one cooled cake layer on your serving plate or cake stand.
- Mousse Time: Spread about half of the chocolate mousse evenly over the first cake layer.
- Second Layer: Gently place the second cake layer on top of the mousse.
- More Mousse: Spread the remaining mousse over the top of the second cake layer. Don’t worry about being too neat on the sides; the ganache will cover imperfections.
- Ganache Drip: Slowly pour the slightly cooled ganache over the top of the cake. Let it naturally drip down the sides. You can use an offset spatula to gently guide it if needed.
- The Big Chill: Pop the whole masterpiece in the fridge for at least 30 minutes to allow the ganache to set. This also helps the mousse firm up.
- Serve & Devour: Slice, serve, and prepare for applause. You’ve earned it!
Common Mistakes to Avoid
Listen, we all make mistakes. But let’s try to avoid these common blunders that can turn your chocolate dream into a chocolate… situation.
- Not fully cooling the cake layers: This is a biggie! If your cakes are even slightly warm, your mousse will melt and create a chocolatey, messy avalanche. Patience is a virtue here!
- Overmixing the cake batter: You want a light, tender crumb, not a tough, chewy one. Mix until just combined, then stop. Walk away from the mixer.
- Using low-quality chocolate for ganache: The ganache is front and center! Cheap chocolate can result in a dull, less flavorful, or even grainy ganache. Invest a little in good chocolate; your tastebuds will thank you.
- Over-whipping the mousse: Stiff peaks are good; butter is not. Stop as soon as it’s firm enough to hold its shape.
- Assembling too soon: Rushing the cooling or setting times for any component (cake, mousse, ganache) is a recipe for disaster. Plan ahead and let things chill.
Alternatives & Substitutions
Feeling a little rebellious? Want to make it your own? Here are some simple swaps:
- No coffee? No problem (ish): You can use hot water instead of coffee in the cake. However, IMO, the coffee truly enhances the chocolate flavor, so if you have it, use it!
- Dark chocolate too intense? You *can* use semi-sweet chocolate for the ganache if you prefer a sweeter finish. Just ensure it’s still good quality!
- Dairy-free options: For the cake, use a plant-based milk (almond, soy, oat). For the mousse and ganache, full-fat canned coconut cream (chilled, scoop out the thick part) can work wonders as a heavy cream substitute.
- Add-ins: Fold a handful of fresh raspberries or chopped strawberries into the mousse for a fruity burst. Or sprinkle some chocolate shavings or sprinkles on top for extra flair!
- Different flavor extracts: A touch of almond extract in the mousse could be a fun twist!
FAQ (Frequently Asked Questions)
Got questions? I’ve got (casual) answers!
- Can I make this dairy-free? Absolutely! As mentioned above, plant-based milk for the cake, and full-fat chilled coconut cream for the mousse and ganache are your best friends.
- How long does this cake last? If you can resist eating it all in one go (good luck!), it’ll keep well covered in the fridge for 3-4 days. It actually tastes amazing the next day when all the flavors have melded!
- Do I really need hot coffee in the cake? I don’t like coffee! Yes, you really do! It doesn’t make the cake taste like coffee, rather it amplifies and deepens the chocolate flavor. It’s a culinary secret weapon. Trust the process!
- My ganache is too thick/thin, what happened? If it’s too thick, gently warm it over a double boiler or in the microwave in short bursts, stirring until it loosens up. If it’s too thin, let it sit at room temperature longer, stirring occasionally, or pop it in the fridge for 5-10 minutes (but keep a close eye on it!).
- Can I prepare components ahead of time? You’re a planner, I like that! Yes, you can bake the cakes a day in advance and wrap them tightly. The mousse can be made a few hours ahead and kept refrigerated. Even the ganache can be made ahead and gently rewarmed when needed.
- Can I use a different size cake pan? You can! An 8-inch pan works great. If you use 9-inch pans, the layers will be thinner, and baking time might be a bit shorter (around 25-30 mins). Just keep an eye on it!
Final Thoughts
So, there you have it! Your very own, absolutely stunning, triple-chocolate masterpiece. Take a moment. Breathe it in. Seriously, you just made a dessert that looks like it came from a fancy bakery, and it tastes even better because *you* made it. Pat yourself on the back, grab a fork, and dive in. You totally deserve this moment of pure chocolate bliss.
Now go forth and spread the chocolatey joy (or keep it all to yourself, no judgment here!). Happy baking, my friend!


