So, you’ve got that classic chocolate craving hitting harder than a Monday morning alarm, but the thought of baking a whole cake from scratch makes you want to crawl back under the covers? Been there, bought the T-shirt. Good news, my friend: I’ve got a recipe that’s about to become your new best friend. It’s for a Chocolate Cake Trifle, and it’s basically a hug in a bowl, requiring minimal fuss and maximum deliciousness.
Why This Recipe is Awesome
Let’s be real, who doesn’t love a dessert that looks like you slaved away for hours but actually took less effort than deciding what to watch on Netflix? This Chocolate Cake Trifle is your secret weapon. It’s:
- Idiot-Proof: Seriously, if you can layer things, you can make this. Even I didn’t mess it up, and my kitchen skills sometimes peak at making toast.
- Impressive AF: Whip this out at a party and watch jaws drop. People will think you’re some kind of culinary wizard. Don’t worry, our secret’s safe.
- Chocolate Overload (the good kind): We’re talking cake, pudding, chocolate shavings… it’s a chocolate lover’s dream without the commitment of an actual cake. Plus, it’s cold, which is just superior for chocolate sometimes, IMO.
Ingredients You’ll Need
Gather ’round, buttercup! Here’s what you’ll need for your chocolate masterpiece. Measurements are approximate, because we’re cooking, not doing rocket science.
- 1 Baked Chocolate Cake: (about 9×13 inch) – Box mix, store-bought, or your grandma’s secret recipe, no judgment here! Just make sure it’s cooled and crumbled or cut into cubes.
- 2 (3.9 oz) Boxes Instant Chocolate Pudding Mix: The quick-set kind, because we don’t have all day.
- 4 Cups Cold Milk: For the pudding. Whole milk gives it that extra lushness, but whatever you have will do.
- 1 Large (16 oz) Container Frozen Whipped Topping: (like Cool Whip), thawed. Or, if you’re feeling fancy, make your own: 3 cups heavy cream + 1/2 cup powdered sugar + 1 tsp vanilla extract, whipped to fluffy peaks.
- 1/2 Cup Chocolate Chips or Shavings: For garnish. Because more chocolate is always the answer.
- Optional Fun Stuff: A splash of Kahlua or Bailey’s for an adult version, fresh raspberries or strawberries for a pop of color and tartness.
Step-by-Step Instructions
Okay, pay attention! This is the part where you become a dessert architect. Spoiler: it’s super easy.
- Prep Your Cake: If you baked it, make sure it’s completely cool. Then, either crumble it into bite-sized pieces or cut it into neat cubes. We need it ready to absorb all the goodness!
- Whip Up the Pudding: In a large bowl, whisk together the instant pudding mix and cold milk for about 2-3 minutes. Keep whisking until it starts to thicken up. Let it sit for 5 minutes to fully set.
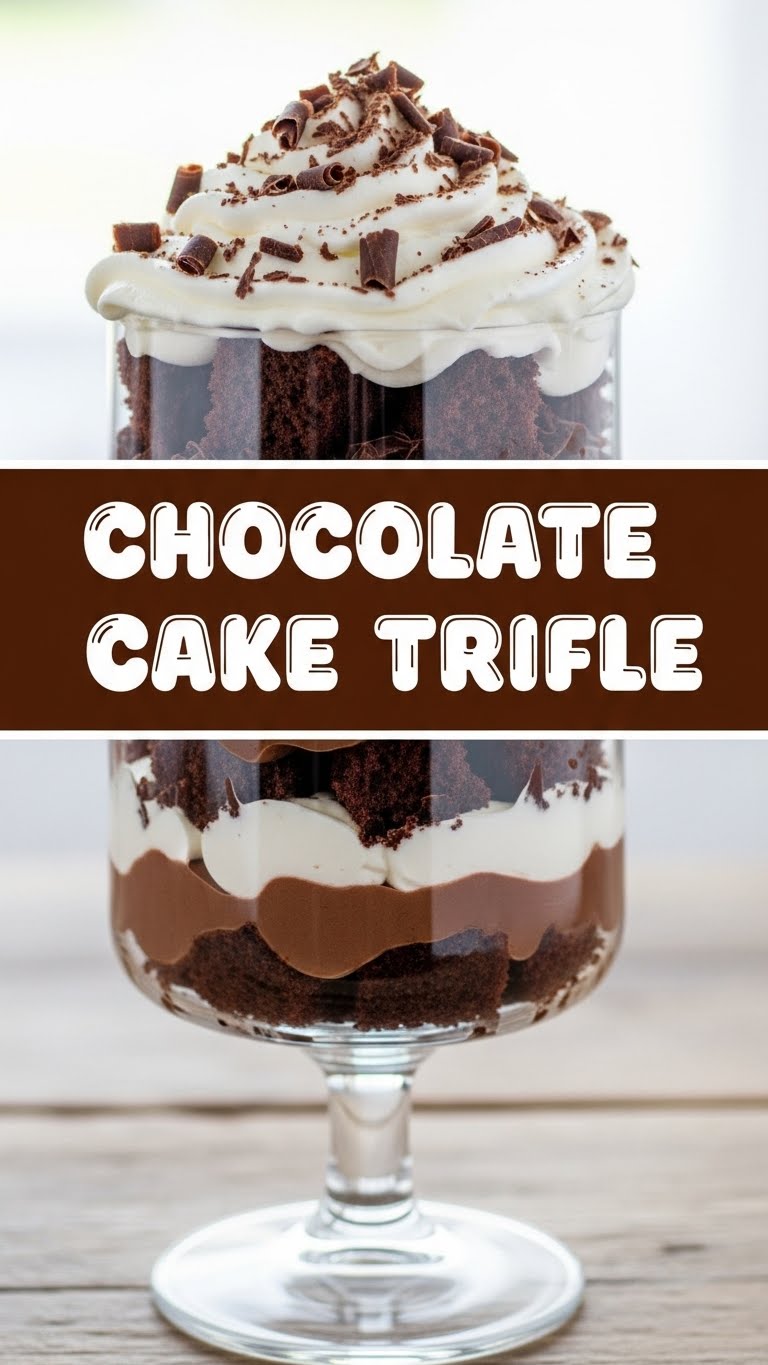
- Assemble Your Layers: Grab your prettiest trifle bowl (or a large clear glass bowl if you don’t have one – no biggie!). Start with about half of your crumbled/cubed chocolate cake at the bottom. Press it down gently.
- Next Up, Pudding! Spoon half of your prepared chocolate pudding over the cake layer, spreading it evenly.
- Add the Cream: Now, gently dollop half of your thawed whipped topping (or homemade whipped cream) over the pudding layer. Smooth it out.
- Repeat the Magic: Do it all again! Another layer of cake, then the remaining pudding, and finally, top it all off with the rest of the whipped cream.
- Garnish & Chill: Sprinkle your chocolate chips or shavings (and any optional fruit) over the top. Now, this is the crucial step: Cover your trifle and chill it in the fridge for at least 4 hours, preferably overnight. This allows all the flavors to meld and the cake to get nice and moist.
- Serve & Bask in Glory: Grab a big spoon and dig in! Prepare for compliments.
Common Mistakes to Avoid
We’re all about making life easier, so here are a few rookie errors to steer clear of:
- Not Chilling Enough: This isn’t a suggestion; it’s a command! A warm trifle is a sad, soupy trifle. Give it time in the fridge. Patience is a virtue, especially in trifle-making.
- Using Warm Cake: Make sure your cake is COMPLETELY cool before layering. Warm cake + cold pudding/cream = disaster.
- Overmixing Pudding: Whisk until thickened, but don’t go crazy. You want creamy, not rubbery, pudding.
- Forgetting a Layer: You’re creating a symphony of flavors and textures, not a minimalist art piece. Each layer plays a vital role!
Alternatives & Substitutions
Feeling adventurous? Or just working with what you’ve got? Here are some ways to shake things up:
- Cake Swaps: Not feeling chocolate cake? Use brownies, oreo crumbs, or even red velvet cake! A pound cake would also be delicious if you want a lighter flavor profile.
- Pudding Power-Ups: Vanilla pudding for a classic combo, coffee pudding for a mocha vibe, or even white chocolate pudding. Your kitchen, your rules!
- Cream Dreams: Instead of whipped topping, you could use a mascarpone cream or even Greek yogurt mixed with a little honey and vanilla for a “healthier” (shhh!) twist.
- Garnish Galore: Crushed nuts, sprinkles, coconut flakes, a drizzle of caramel or hot fudge – go wild!
- Boozy Boost: A splash of Irish cream, coffee liqueur, or even a berry-flavored liqueur soaked into the cake layer can elevate this to an adult-only indulgence.
FAQ (Frequently Asked Questions)
Got questions? I’ve got answers (and probably a joke or two).
- “Can I make this ahead of time?” Absolutely! This trifle actually tastes *better* the next day once all the flavors have had a chance to mingle. Make it up to 24 hours in advance.
- “How long will it last in the fridge?” Usually 2-3 days, though it rarely lasts that long in my house!
- “I don’t have a trifle bowl. What now?” Any large clear glass bowl will work perfectly! Even individual dessert cups can be super cute for mini trifles.
- “Can I use real chocolate instead of pudding mix?” Technically yes, you’d make a ganache or a homemade chocolate custard, but the beauty of this recipe is its *ease*. Stick with instant pudding for the quick win, unless you’re feeling extra ambitious.
- “What if my whipped topping isn’t thawing properly?” Pop it in the fridge a few hours before you plan to use it, or even the microwave for 10-15 seconds at a time if you’re in a hurry (watch it closely!).
- “Is it possible to make this dairy-free?” Yup! Use dairy-free chocolate cake, dairy-free instant pudding mix (made with plant milk), and a dairy-free whipped topping. Boom, inclusive dessert!
Final Thoughts
See? I told you it was easy! You’ve just whipped up a show-stopping dessert with minimal effort and maximum reward. Now go impress someone—or yourself—with your new culinary skills. You’ve earned it! Grab a spoon, kick back, and enjoy your delicious creation. And maybe send me a slice? Just kidding… mostly.


