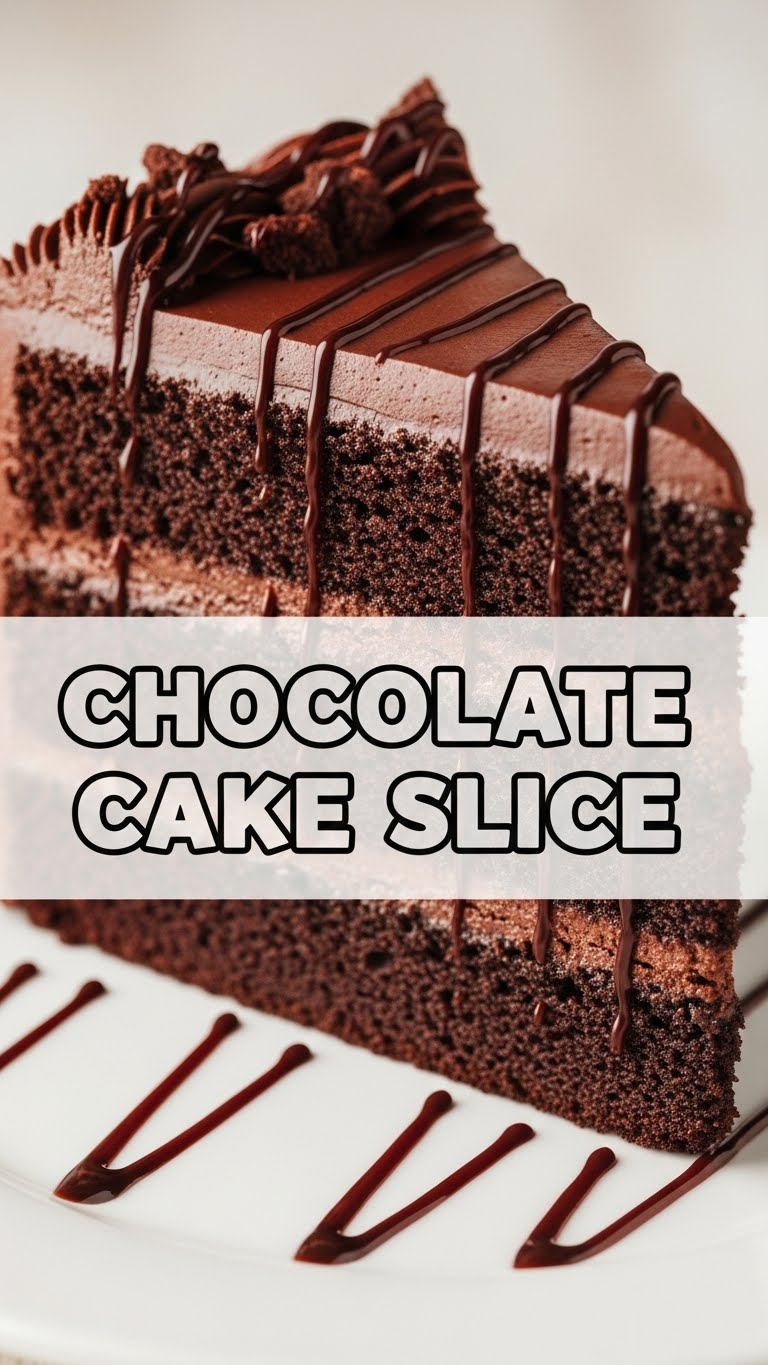
So you’re craving something utterly delicious, chocolatey, and comforting, but the thought of baking a whole, giant cake for *just you* (or a couple of lucky friends) seems like too much adulting, huh? Same, friend, same. Sometimes you just need that perfect **chocolate cake slice** without the fuss of a full-blown culinary marathon. Good news: I’ve got your back. This isn’t just a recipe; it’s your new secret weapon for instant chocolate gratification.
Why This Recipe is Awesome
Let’s be real, life’s too short for complicated recipes unless you’re aiming for a Michelin star. This chocolate cake slice recipe is for the rest of us. It’s practically **idiot-proof** – and trust me, I’ve tested that theory extensively. You don’t need fancy equipment, just a bowl, a whisk (or a fork, no judgment), and an oven. It’s quick, uses super basic pantry staples, and delivers a moist, rich, chocolatey slice that will make you question why you ever bothered with those huge, multi-layer monstrosities. Plus, since it’s a smaller batch, you won’t be staring at an entire cake for days, wrestling with your willpower. It’s basically guilt-free indulgence, IMO.
Ingredients You’ll Need
Gather ’round, fellow chocolate fiends! Here’s what you’ll need to whip up this little slice of heaven. Don’t worry, no obscure ingredients that require a quest to a magical forest.
- All-Purpose Flour: Just your regular flour power. About 1 cup.
- Granulated Sugar: Sweetness is key! 1 cup should do the trick.
- Unsweetened Cocoa Powder: The star of the show! Make sure it’s unsweetened, unless you’re aiming for a sugar rush that sends you to another dimension. ½ cup.
- Baking Soda: Our fluffy-maker. ½ teaspoon.
- Salt: A pinch, just to make all the other flavors sing. ¼ teaspoon.
- Egg: One large egg, for structure and binding everything into deliciousness.
- Milk: Any milk works – dairy, almond, oat, whatever’s chilling in your fridge. ½ cup.
- Vegetable Oil: For that ultimate moistness. ¼ cup. You can use melted butter too, if you’re feeling fancy.
- Vanilla Extract: Don’t skip this! It makes everything taste better. 1 teaspoon.
- Hot Water or Coffee: This is our secret weapon for deep chocolate flavor. Coffee really amplifies the cocoa! ½ cup.
For the Quick Chocolate Glaze/Frosting (Optional, but highly recommended):
- Powdered Sugar: 1 cup.
- Unsweetened Cocoa Powder: 2 tablespoons.
- Milk: 2-3 tablespoons (add slowly!).
- Melted Butter: 1 tablespoon (optional, but adds richness).
- Vanilla Extract: ¼ teaspoon.
Step-by-Step Instructions
- Preheat & Prep: First things first, turn your oven to **350°F (175°C)**. And please, for the love of all that is holy, **grease and flour a small baking dish** (an 8×8 inch pan is perfect, or a small loaf pan for thicker slices). This stops your cake from becoming one with the pan.
- Dry Mix Magic: In a medium bowl, whisk together the flour, sugar, cocoa powder, baking soda, and salt. Give it a good whisk until there are no lumpy bits. We’re aiming for smooth sailing here.
- Wet Mix Whatchamacallit: In another, separate bowl (yeah, two bowls, it’s fine), whisk the egg, milk, oil, and vanilla extract until they’re nicely combined.
- Combine & Conquer: Pour the wet ingredients into the dry ingredients. Mix gently with a spatula or spoon until just combined. Don’t overmix, or your cake will be tough and sad. A few small lumps are totally fine.
- The Hot Stuff: Now, carefully pour the hot water (or coffee!) into the batter. Whisk it in until the batter is smooth and a bit thin. This is normal, don’t panic! It’s what gives the cake its incredible moistness and rich flavor.
- Bake It Up: Pour the batter into your prepared baking dish. Pop it into the preheated oven and bake for **25-30 minutes**, or until a toothpick inserted into the center comes out clean.
- Cool Down: Once baked, let your cake cool in the pan for about 10-15 minutes. Then, carefully invert it onto a wire rack to cool completely. Patience, young padawan!
- Glaze Time (if you’re feeling it): While the cake cools, whisk together all the glaze ingredients in a small bowl until smooth. Add milk one tablespoon at a time until you get your desired drizzly consistency.
- Slice & Devour: Once the cake is fully cooled (or mostly cooled, we’re not judging), drizzle with the chocolate glaze, slice, and enjoy your culinary masterpiece!
Common Mistakes to Avoid
- **Thinking you don’t need to preheat the oven:** Rookie mistake! Cold ovens lead to uneven baking and sad, dense cakes. Always preheat, FYP (For Your Perfection).
- **Overmixing the batter:** This is a biggie. Once you add the wet to the dry, mix *just* until combined. Overmixing develops the gluten too much, making your cake tough and chewy instead of light and fluffy.
- **Opening the oven door constantly:** Resist the urge! Every time you open the door, the temperature drops, and your cake might sink in the middle. Give it at least 20 minutes before peeking.
- **Not letting it cool:** I know, I know, it smells amazing, and you want to dive in immediately. But cutting into a warm cake can make it crumbly and difficult to handle, and the frosting will just melt into a messy puddle. Be strong!
- **Skipping the hot water/coffee:** This isn’t just for fun; it blooms the cocoa powder, bringing out its deepest chocolate flavor. Don’t skip this crucial step!
Alternatives & Substitutions
Feeling adventurous or just missing an ingredient? No worries, we’ve got options!
- **Milk:** Out of dairy milk? Almond milk, soy milk, or even buttermilk (if you have it, it makes cakes extra tender!) work beautifully.
- **Oil:** If you prefer, you can swap the vegetable oil for melted butter or even a mild olive oil. The oil usually gives a really moist texture, though.
- **Hot Water/Coffee:** If you absolutely detest coffee, just use hot water. But seriously, the coffee just enhances the chocolate, it doesn’t make the cake taste like a latte. Give it a shot!
- **No Cocoa Powder for Glaze?:** You can make a simple powdered sugar glaze (powdered sugar + milk + vanilla). Or, if you’re feeling extra, melt some chocolate chips with a splash of cream for a quick ganache.
- **Gluten-Free:** Swap the all-purpose flour for a 1:1 gluten-free baking blend. Results may vary slightly, but it generally works well for this kind of simple cake.
FAQ (Frequently Asked Questions)
Got questions? I’ve got (casual) answers!
Can I make this dairy-free? Absolutely! Use a dairy-free milk (almond, soy, oat) and ensure your chocolate chips (if using any add-ins) are dairy-free. Easy peasy lemon squeezy.
How long does this cake last? If kept covered at room temperature, it’ll be good for 2-3 days. In the fridge, maybe 4-5 days. But honestly, it’s so good, it probably won’t last that long!
Can I add chocolate chips to the batter? Oh, you sweet genius! Yes, please do! A handful of chocolate chips makes everything better. You’re welcome.
My cake turned out dry, what happened? A few culprits: too much flour (always spoon and level!), oven too hot, or overbaking. Keep an eye on your bake time, friend!
Do I *have* to use hot water/coffee? Can’t I just use cold? Well, technically you *can*, but why hurt your chocolate’s full potential like that? The hot liquid helps to “bloom” the cocoa, releasing its rich, deep flavor. Trust me on this one.
Can I make this in a mug in the microwave? While this specific recipe is for an oven-baked cake, the concept is similar to many microwave mug cakes! For best results, I’d suggest finding a recipe specifically tailored for the microwave to avoid any sad, rubbery outcomes.
Can I make a bigger batch? Definitely! Just double the ingredients and bake it in a 9×13 inch pan. You might need to adjust the baking time slightly, probably around 30-35 minutes.
Final Thoughts
See? That wasn’t scary at all, was it? You’ve just whipped up a delightful chocolate cake with minimal fuss and maximum flavor. Now go impress someone—or more realistically, just yourself—with your new culinary skills. You’ve earned that cozy, chocolatey slice of happiness. Go on, grab a fork, and dive in. You deserve it!


