So, you’re staring at your phone, scrolling through endless reels, and suddenly BAM! A craving for chocolate cake hits you like a rogue asteroid. But wait, the thought of a multi-tiered, fondant-covered masterpiece makes you want to crawl under a blanket? Fear not, my friend! I’ve got your back with the ultimate ‘I-want-chocolate-cake-NOW-and-also-I’m-lazy’ solution: the Sheet Pan Chocolate Cake.
Why This Recipe is Awesome
Okay, let’s be real. We all love a fancy cake, but sometimes… no. This sheet pan cake is basically the superhero of desserts for the time-crunched, effort-averse, and frankly, anyone who values their sanity. It’s practically idiot-proof, seriously, even I managed not to burn the house down. It bakes evenly (hello, sheet pan magic!), cools quickly, and frosting it is a breeze – no precarious stacking or crumb-coat drama. Plus, it feeds a crowd without making you feel like you just ran a marathon. Winning!
Ingredients You’ll Need
Gather ’round, my sweet-toothed companions. Here’s what you’ll need for the cake itself:
- All-purpose flour: The backbone of all good things. About 1 ½ cups.
- Granulated sugar: Because happiness is sweet. 1 ½ cups should do it.
- Unsweetened cocoa powder: Go for good quality; it makes a difference. Don’t be shy! ½ cup.
- Baking soda & baking powder: Our trusty leavening agents. They do the heavy lifting. 1 teaspoon of each.
- Salt: Balances all that sweetness. Don’t skip it! ½ teaspoon.
- Large eggs: Two, room temp, please. They mix better, trust me.
- Milk: 1 cup. Whole milk if you’re feeling extra indulgent, but any milk works.
- Vegetable oil: ½ cup. Or any neutral oil. Keeps things moist.
- Vanilla extract: 1 teaspoon. A splash of magic.
- Hot water or coffee: 1 cup. The secret weapon! It deepens the chocolate flavor like nobody’s business.
And for the frosting (because cake without frosting is just sad bread):
- Unsalted butter: ½ cup (1 stick), softened. Key for creamy frosting.
- Powdered sugar: 3 cups, sifted. The fine stuff, no lumps!
- Unsweetened cocoa powder: ½ cup. Again, good quality for maximum choccy impact.
- Milk or cream: 3-4 tablespoons. Just a splash to get the right consistency.
- Vanilla extract: 1 teaspoon. More magic!
Step-by-Step Instructions
- Preheat & Prep: Get that oven to 350°F (175°C) and grab a 9×13 inch sheet pan. Grease and flour it, or line with parchment paper. Don’t be lazy here, a well-prepped pan prevents sticky situations!
- Dry Mix Fun: In a large bowl, whisk together your flour, granulated sugar, cocoa powder, baking soda, baking powder, and salt. Give it a good whisk to make sure there are no lumpy bits lurking.
- Wet Mix Wonders: In another medium bowl (or a big measuring cup), whisk together the eggs, milk, vegetable oil, and vanilla extract.
- Combine & Conquer: Pour the wet ingredients into the dry. Mix until just combined. **Do NOT overmix**, or your cake will be tough, and we’re aiming for tender, fluffy goodness!
- Hot Stuff: Slowly pour in the hot water or coffee. Mix until the batter is smooth. It’ll be thin – that’s totally normal, don’t panic! This hot liquid really works wonders for the chocolate flavor.
- Bake It Off: Pour the batter into your prepared sheet pan. Pop it into the oven for 25-30 minutes. **Check with a toothpick:** if it comes out clean when inserted into the center, it’s done!
- Cool Down: Let the cake cool completely in the pan on a wire rack. Seriously, COMPLETELY. Hot frosting = melted mess. Patience, grasshopper.
- Frosting Time: While the cake cools, whip up your frosting! In a medium bowl, beat the softened butter until creamy. Gradually add the powdered sugar and cocoa powder, alternating with splashes of milk and vanilla. Beat until fluffy and smooth. Add more milk if needed for desired consistency.
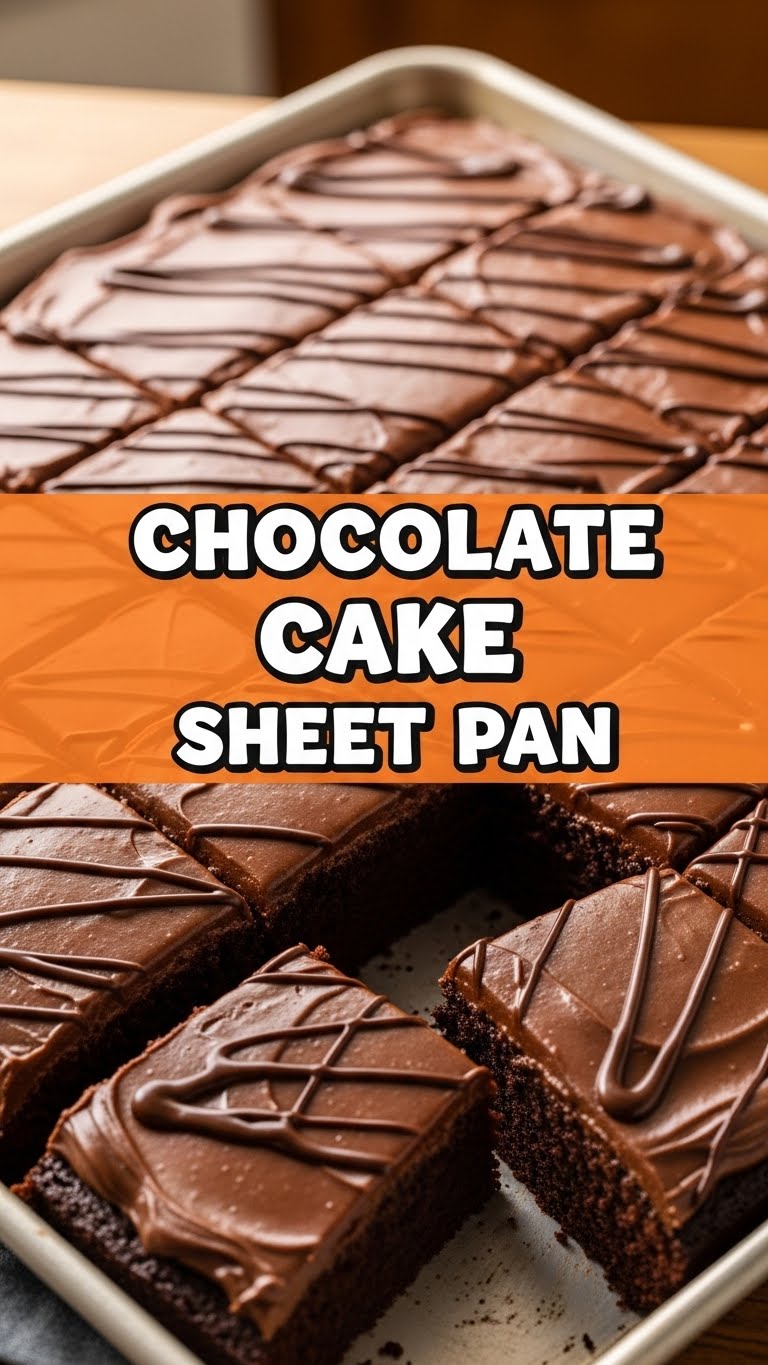
- Spread the Love: Once the cake is completely cool, spread that glorious frosting all over. Go wild! Use an offset spatula or the back of a spoon.
- Devour! Cut into squares and enjoy the fruits of your not-so-laborious labor. You earned this!
Common Mistakes to Avoid
Nobody’s perfect, but we can try to avoid these classic blunders, right?
- Not preheating the oven: Rookie mistake. Your cake won’t bake evenly, and you’ll end up with a sad, dense hockey puck instead of fluffy cake.
- Overmixing the batter: This activates too much gluten, making your cake tough and chewy. We want light and fluffy, so mix just until the ingredients are combined.
- Skipping the hot liquid: That hot water/coffee really blooms the cocoa, making for a richer chocolate flavor. Don’t deny your taste buds this crucial step!
- Frosting a warm cake: Unless you’re going for a lava cake vibe (which is a whole different recipe), warm cake + frosting = sad, soupy mess. Patience, young padawan, patience.
- Using cold ingredients: Especially eggs and milk. Room temperature ingredients combine more easily and make for a smoother, more uniform batter. Plan ahead a bit, FYI.
Alternatives & Substitutions
Got a fridge that’s looking a little bare? No worries, we can usually make it work!
- Milk: Any milk works, honestly. Almond, oat, soy – go for what you’ve got. Whole milk just adds a little extra richness, IMO.
- Oil: Melted butter works too if you prefer, but oil usually makes for a moister cake, so keep that in mind.
- Coffee: No coffee? Hot water is perfectly fine. But if you have instant coffee, a spoonful dissolved in hot water is a **game-changer** for chocolate flavor.
- Frosting: Not a fan of chocolate frosting? A simple vanilla buttercream or cream cheese frosting would be divine. Or, if you’re *really* feeling lazy, a dusting of powdered sugar is elegant and simple.
- Add-ins: Get creative! Sprinkle some chocolate chips on top of the batter before baking, or chopped nuts, shredded coconut, or sprinkles after frosting.
FAQ (Frequently Asked Questions)
- “Can I make this in a different size pan?”
Sure, but adjust baking time! A smaller, thicker cake will take longer; a larger, thinner one, less. Keep an eye on it and use the toothpick test. It’s more about visual cues than strict timings sometimes.
- “My cake is dry! What went wrong?”
You probably overbaked it, friend. Ovens vary, so start checking earlier than the recipe suggests. Or, maybe you overmixed the batter, which can also make it tough. Practice makes perfect!
- “Can I make this dairy-free/vegan?”
Absolutely! Use plant-based milk, oil (check for vegan cocoa powder), and a flax egg or other egg substitute (though I’d recommend a recipe specifically designed for vegan if you’re new to it). For frosting, use vegan butter and plant milk.
- “How long does this cake last?”
Covered tightly at room temperature, about 3-4 days. In the fridge, up to a week. Honestly, if it lasts that long, you’re stronger than I am and deserve a medal.
- “Why the hot water/coffee? Does it make it taste like coffee?”
Ah, the secret sauce! Hot liquid helps “bloom” the cocoa powder, bringing out a much deeper, more intense chocolate flavor. Unless you use a LOT of coffee, you won’t taste it, just a richer chocolate. Trust the process!
Final Thoughts
And there you have it! Your ticket to chocolate cake heaven, no stress required. This sheet pan wonder is perfect for impromptu cravings, last-minute gatherings, or just a Tuesday night when you deserve a treat. So go forth, bake this beauty, and maybe share a slice (or five) with someone special. Or don’t. No judgment here! Now go impress someone—or yourself—with your new culinary skills. You’ve earned it!


