So, your sweet tooth is screaming for chocolate, but your patience is whispering ‘nope, not today’? I hear you. We all want that show-stopping dessert without, you know, actually stopping our lives to make it. Enter the Chocolate Cake Roll: a dessert that looks like you spent hours slaving away but is secretly so simple, your kitchen aid mixer might judge you for not giving it a real workout. 😉
Why This Recipe is Awesome
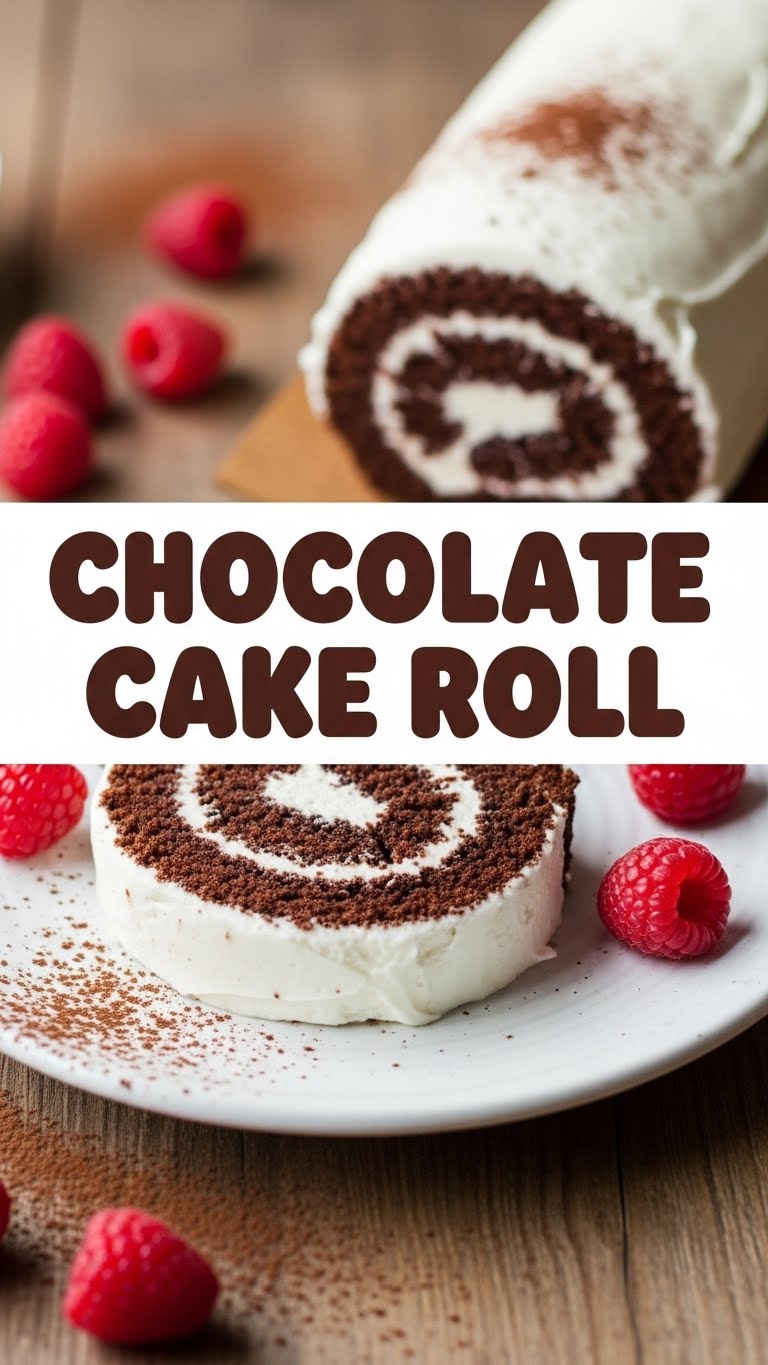
Okay, let’s be real. This isn’t just a recipe; it’s a magic trick. You’re taking a simple cake, rolling it up like a tiny, delicious yoga mat, and filling it with creamy goodness. It’s the perfect combo of light chocolate sponge and a dreamy filling that’ll make you question all your life choices (in a good way!). Plus, it’s idiot-proof. Seriously, even if your baking skills usually end in a smoke alarm concert, you’ve got this. It looks super impressive, but it’s actually easier than parallel parking. Trust me on this one.
Ingredients You’ll Need
Get ready to raid your pantry. Here’s what you’ll be gathering for your chocolate masterpiece:
- For the Cake:
- ¾ cup all-purpose flour (the basic stuff, no fancy flours needed)
- ½ cup unsweetened cocoa powder (go dark, or go home!)
- 1 teaspoon baking soda
- ½ teaspoon salt (just a pinch to make everything pop)
- 4 large eggs (room temp, they just work better)
- 1 cup granulated sugar (for that sweet, sweet goodness)
- ½ cup milk (any kind works, seriously)
- ¼ cup vegetable oil (or any neutral oil)
- 1 teaspoon vanilla extract (because everything needs vanilla)
- For the Cream Cheese Filling:
- 8 ounces cream cheese, softened (full fat, please, don’t skimp on happiness)
- ½ cup unsalted butter, softened (again, full fat is your friend here)
- 3-4 cups powdered sugar (start with 3, add more if you like it super sweet)
- 1 teaspoon vanilla extract
- Pinch of salt
- For Dusting:
- Extra powdered sugar or cocoa powder (for that professional finish, darling!)
Step-by-Step Instructions
Alright, apron on, let’s get baking! Don’t overthink it; just follow along.
- Prep Your Pan & Oven: Preheat your oven to 375°F (190°C). Line a 15×10-inch jelly roll pan with parchment paper, making sure it hangs over the sides a bit. Give it a light spray with non-stick spray. This is key!
- Mix Dry Ingredients: In a medium bowl, whisk together the flour, cocoa powder, baking soda, and salt. Set it aside.
- Beat Eggs & Sugar: In a large bowl (or stand mixer), beat the eggs and granulated sugar on high speed for about 5 minutes, until light, thick, and fluffy. This adds air and makes your cake spongy.
- Add Wet Ingredients: Gently fold in the milk, oil, and vanilla extract into the egg mixture until just combined. Don’t overmix!
- Combine All: Gradually fold the dry ingredients into the wet ingredients until no streaks of flour remain. Be gentle to keep all that lovely air in there.
- Bake It Up: Pour the batter evenly into your prepared pan. Bake for 12-15 minutes, or until a toothpick inserted into the center comes out clean. Don’t overbake! A dry cake cracks.
- Roll It While Warm: While the cake is still warm (like, within 2 minutes of coming out of the oven!), carefully invert it onto a clean kitchen towel dusted with powdered sugar or cocoa. Peel off the parchment paper.
- The Big Roll: Starting from a short end, tightly roll the cake and the towel together. Let it cool completely in this rolled position on a wire rack for about an hour. This trains the cake to roll without cracking.
- Make the Filling: While the cake cools, beat the softened cream cheese and butter until smooth. Gradually add the powdered sugar, vanilla, and salt. Beat until light and fluffy.
- Unroll & Fill: Once the cake is completely cool, gently unroll it. Spread the cream cheese filling evenly over the entire surface, leaving a small border at one end.
- Roll It Back Up: Re-roll the cake (this time without the towel!) nice and tight.
- Chill Out: Wrap the cake roll tightly in plastic wrap and chill for at least 1 hour (or overnight!). This helps it set and makes it easier to slice.
- Serve in Style: Dust with extra powdered sugar or cocoa powder before slicing and serving. Ta-da!
Common Mistakes to Avoid
Look, we’ve all been there. Learn from my past (chocolate-covered) blunders:
- Overbaking the Cake: This is the number one culprit for cracks. A dry cake doesn’t want to roll, it wants to snap! Keep an eye on it.
- Trying to Roll a Cold Cake: Don’t do it! The cake needs to be warm so it’s pliable. Otherwise, it’s like trying to bend a stale cracker.
- Skipping the Powdered Sugar/Cocoa on the Towel: This is crucial! It prevents the cake from sticking to the towel, which is just a nightmare, IMO.
- Not Chilling Enough: Impatience is a virtue… but not here. Give it time to firm up; otherwise, your slices will be sad, smooshy messes.
- Using Cold Eggs/Cream Cheese/Butter: Room temperature ingredients combine better, resulting in a smoother batter and filling. Science!
Alternatives & Substitutions
Feeling rebellious? Here are some tweaks for ya:
- Flavor the Filling: Instead of plain vanilla, try peppermint extract for a mint chocolate roll, or a touch of espresso powder for a mocha kick. Or go wild with orange zest!
- Add-ins: Sprinkle mini chocolate chips or chopped nuts over the filling before re-rolling for extra texture.
- Different Sponge: Want something lighter? Use a vanilla sponge instead of chocolate. Just omit the cocoa powder and replace it with an equal amount of flour. It’s still totally delish!
- Dairy-Free: You can often find dairy-free cream cheese and butter alternatives. Just make sure they’re the block kind, not the spreadable tubs, for best results in the filling.
FAQ (Frequently Asked Questions)
Got questions? I’ve got (casual) answers!
- “My cake cracked! What did I do wrong?” Probably overbaked it, or didn’t roll it fast enough while warm. FYI, a little crack is character; a big one means you learned a lesson for next time!
- “Can I make this ahead of time?” Absolutely! It actually tastes better the next day once the flavors meld. Just keep it wrapped tight in the fridge.
- “How long does it last?” Stored properly in the fridge, it’s good for 3-4 days. But let’s be honest, it won’t last that long.
- “Do I *have* to use a kitchen towel?” Yes, seriously, use a clean kitchen towel. It provides the right friction and flexibility to roll the cake without it sticking or tearing.
- “Can I freeze it?” You bet! Wrap the chilled, unfrosted cake roll tightly in plastic wrap, then foil. It’ll last up to a month. Thaw in the fridge overnight.
- “My filling is too runny/too stiff!” If runny, add more powdered sugar. If too stiff, add a tiny splash of milk or cream until it loosens up. Easy peasy!
Final Thoughts
So there you have it, folks! Your new favorite chocolate dessert that says “I’m fancy” but shouts “I’m easy!” Now go forth and create some chocolate magic. Don’t be afraid to get a little messy; that’s half the fun. Plus, there’s always the spatula to lick. You’ve earned it, superstar. Go impress someone—or yourself—with your new culinary skills!


