So, you’re craving something rich, chocolatey, and utterly decadent, but the thought of turning on your oven right now makes you want to curl up in a ball and cry? Or maybe your oven and you are just… on a break? Been there, done that, ate the entire pint of ice cream. But fear not, my friend, because I’ve got a secret weapon that’s about to change your dessert game: a no-bake chocolate cake that’s so good, you’ll wonder why you ever bothered with heat. Get ready to impress yourself (and anyone else lucky enough to be around) without breaking a sweat!
Why This Recipe is Awesome
Let’s be real, turning on an oven can feel like a commitment. This recipe? It’s the ultimate commitment-phobe’s dream. No oven means no preheating, no worrying about burning, and no heating up your entire kitchen. Plus, it’s practically idiot-proof. Seriously, if I can make this without a culinary disaster, you’re golden. It’s also incredibly forgiving, meaning you can tweak it to your heart’s content. And the best part? It looks fancy enough to fool anyone into thinking you slaved away for hours. Win-win-win!
Ingredients You’ll Need
Gather your treasures, aspiring no-bake chef! We’re keeping it simple and delicious.
* **200g Digestive Biscuits (or any plain tea biscuits):** These are the unsung heroes of the no-bake world. They’re your cake base. Get the good ones, you deserve it.
* **100g Unsalted Butter:** The glue that holds your dreams together. Melted, please!
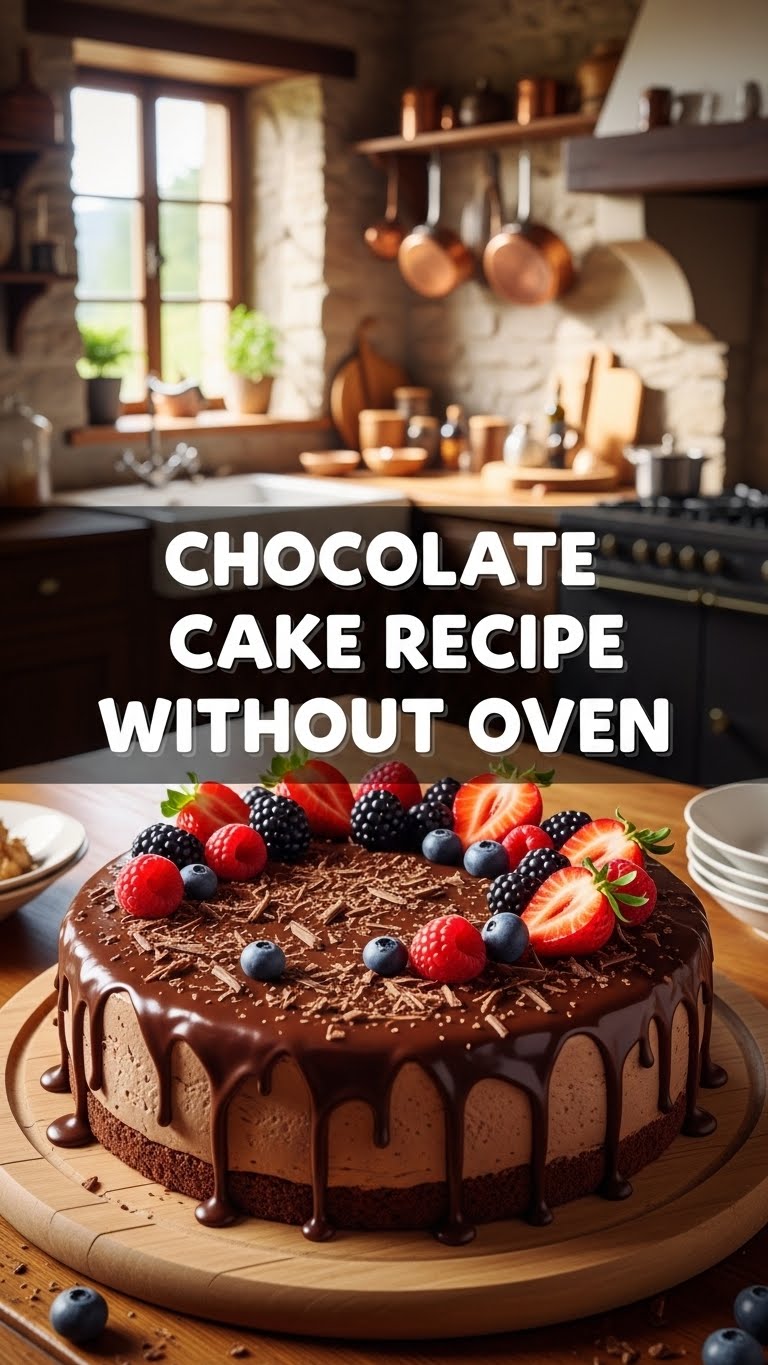
* **200g Dark Chocolate (good quality, please!):** This is where the magic happens. Don’t skimp here; a better chocolate means a better cake. Think 60-70% cocoa.
* **200ml Double Cream (Heavy Cream):** The luxurious blanket for our chocolate.
* **50g Caster Sugar (Superfine Sugar):** Just a touch of sweetness to balance the dark chocolate.
* **1 tsp Vanilla Extract:** A little hug for your taste buds.
* **Pinch of Salt:** Don’t skip it! It surprisingly enhances the chocolate flavour.
* **Optional Toppings:** Cocoa powder, chocolate shavings, fresh berries, a dollop of whipped cream – go wild!
Step-by-Step Instructions
Let’s get this delicious show on the road!
1. **Crush Your Biscuits:** Grab those digestive biscuits and put them in a zip-top bag. Now, take out all your stress on them with a rolling pin until they’re fine crumbs. No chunky bits allowed unless you’re into that kind of thing. Alternatively, a food processor makes quick work of this!
2. **Melt and Mix:** In a microwave-safe bowl or small saucepan, melt your 100g of butter. Pour the melted butter over your biscuit crumbs in a medium bowl and mix thoroughly until all the crumbs are coated and look like wet sand.
3. **Press the Base:** Line a 20cm (8-inch) springform cake tin with baking paper (this makes removal SO much easier, **trust me**). Press the buttered biscuit mixture firmly and evenly into the bottom of the tin. Use the back of a spoon or your fingers. Pop this base into the fridge to chill while you make the filling.
4. **Make the Ganache:** Break your dark chocolate into small pieces and place them in a heatproof bowl. In a separate saucepan, gently heat the double cream and caster sugar until it just starts to simmer around the edges – don’t boil it! Remove from heat.
5. **Pour and Stir:** Pour the hot cream mixture over the chocolate pieces. Let it sit for about 5 minutes to melt the chocolate, then stir gently from the centre outwards until you have a smooth, glossy, irresistible ganache. Stir in the vanilla extract and that crucial pinch of salt.
6. **Assemble and Chill:** Pour the chocolate ganache over your chilled biscuit base in the springform tin. Gently tap the tin on the counter a few times to release any air bubbles and ensure an even top.
7. **The Hardest Part (Waiting!):** Cover the cake tin loosely with cling film and transfer it to the fridge. **Chill for at least 4-6 hours**, or even better, overnight. This is crucial for the cake to set properly.
Common Mistakes to Avoid
Even in the no-oven world, there are pitfalls! Here are a few to steer clear of:
* **Skipping the Chilling Time:** I know, I know, instant gratification. But seriously, **do NOT skip the chilling time!** You’ll end up with a delicious chocolate puddle instead of a sliceable cake. Patience, young grasshopper.
* **Using Low-Quality Chocolate:** This recipe is all about the chocolate. If you use waxy, cheap chocolate, your cake will taste… well, waxy and cheap. Invest in good stuff, IMO.
* **Not Crushing Biscuits Enough:** We want fine crumbs for a smooth base. Big chunks make for a crumbly, uneven base that might disappoint. Get those aggressions out!
* **Overheating the Cream:** Simmering is good; a rolling boil is not. Overheated cream can scorch the chocolate and make your ganache seize. Keep it gentle.
Alternatives & Substitutions
Feeling adventurous? Here are some ways to shake things up:
* **Biscuit Base:** Not a fan of digestives? Try Graham crackers, Oreos (without the cream, though some like it in!), shortbread, or even Biscoff cookies for a spiced twist.
* **Chocolate Choice:** Milk chocolate will make a sweeter cake; white chocolate would create a whole different vibe (and might need less sugar). You could also mix dark and milk chocolate for a balance.
* **Flavour Boosts:** Add a shot of espresso powder to the ganache for a mocha kick, a splash of orange zest for a chocolate-orange delight, or a tablespoon of your favourite liqueur (rum, Kahlua, Cointreau) for an adult version.
* **Cream Alternatives:** While double cream gives the best texture, you *could* try full-fat coconut cream (chilled overnight and just scoop out the thick cream) for a dairy-free option.
FAQ (Frequently Asked Questions)
* **Can I use margarine instead of butter?** Well, technically yes, but why hurt your soul like that? Butter just tastes better and sets more reliably. For the best result, stick with butter!
* **My ganache looks oily/split, what did I do wrong?** Uh oh! This usually happens if your cream was too hot, or you stirred too vigorously. Try adding a tablespoon of hot water (or cream) and whisking gently until it comes together again.
* **How long does this cake last?** If you can resist eating it all in one go, it’ll happily hang out in the fridge for 3-4 days. Store it in an airtight container for peak freshness.
* **Can I freeze this cake?** Absolutely! Once set, wrap it tightly in cling film and then foil. It’ll keep in the freezer for up to a month. Thaw in the fridge overnight before serving.
* **Do I have to use a springform pan?** Not necessarily, but it makes life way easier. You could use a regular cake pan lined with baking paper that hangs over the sides (to lift it out), or individual ramekins for single servings.
* **Can I make this dairy-free?** Yes! Use a plant-based butter alternative, dairy-free biscuits, and a good quality dairy-free dark chocolate. For the cream, full-fat coconut cream works wonderfully (chill a can overnight, scoop off the thick cream).
Final Thoughts
And there you have it! A seriously impressive, utterly delicious, no-bake chocolate cake that’s perfect for when you want maximum flavour with minimal fuss. Now go impress someone—or yourself—with your new culinary skills. You’ve earned it! Seriously, go make this. Your taste buds will send you a thank you card. You’re basically a wizard now. You’re welcome!


