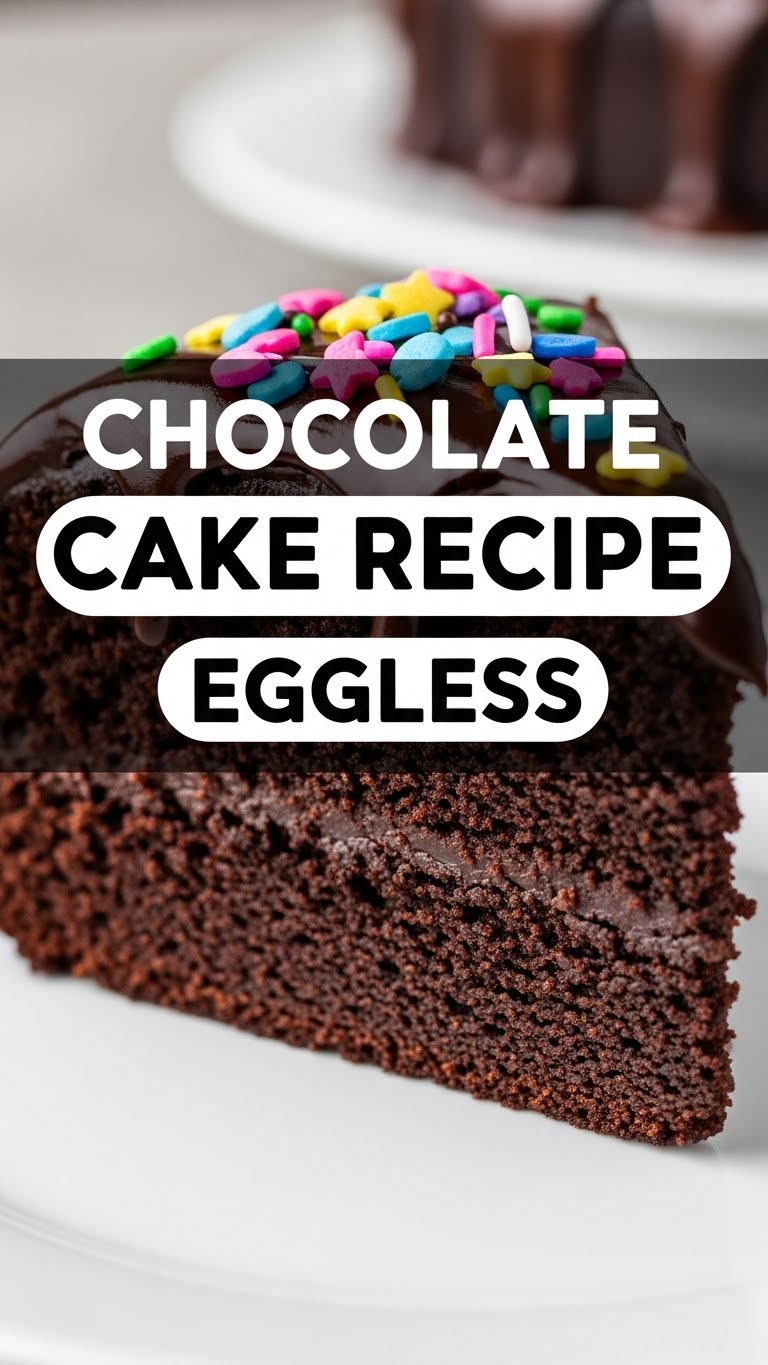
So you’re craving something decadently chocolatey but your egg carton is playing hide-and-seek, or maybe you just prefer your baked goods sans chicken offspring, huh? Same, friend, *same*. Forget the drama, the fuss, and the existential crisis over missing ingredients. We’re diving headfirst into an eggless chocolate cake recipe that’s so ridiculously easy and delicious, you’ll wonder why you ever bothered with eggs in the first place. Get ready to bake a cake that’s basically a warm, chocolatey hug you can eat!
Why This Recipe is Awesome
Okay, let’s be real. This isn’t just *another* eggless chocolate cake recipe. This is *the* eggless chocolate cake recipe. Why? Because it’s practically **idiot-proof**. Seriously, if I didn’t mess it up, you’re golden. It comes together faster than you can say “where did all the chocolate chips go?”, uses super basic pantry staples, and the resulting cake is incredibly moist, rich, and ridiculously chocolatey. No fancy techniques, no standing mixer required (unless you’re feeling extra fancy), and zero eggs means it’s perfect for those with allergies or when your fridge is just… well, empty of eggs. Plus, the texture? Divine. Not dry, not dense, but perfectly tender. It’s a miracle, I tell ya!
Ingredients You’ll Need
Gather ’round, my fellow kitchen adventurers! Here’s your treasure map to chocolate nirvana:
- 1 ½ cups All-Purpose Flour: The backbone of our operation. Don’t skip sifting if you’re feeling ambitious, but let’s be honest, who has time for that?
- 1 cup Granulated Sugar: Because life’s too short for unsweetened sadness.
- ½ cup Unsweetened Cocoa Powder: Go for good quality here. It makes a difference, trust me.
- 1 teaspoon Baking Soda: Our main lift-off agent.
- ½ teaspoon Salt: Just a pinch, to make all that chocolate flavor pop like a culinary fireworks show.
- 1 cup Milk (or dairy-free milk): Any kind works – whole, 2%, almond, soy, oat. Your cake, your choice!
- ½ cup Vegetable Oil (or melted butter): For that lovely, moist texture. Canola, sunflower, or any neutral oil will do.
- 1 teaspoon Vanilla Extract: The secret handshake of delicious desserts. Don’t cheap out on this!
- 1 tablespoon White Vinegar: “Vinegar?!” you shriek. Yes! It reacts with the baking soda to give us that glorious lift. You won’t taste it, promise.
- ½ cup Hot Water (or hot coffee): This activates the cocoa powder and makes the chocolate flavor sing. Coffee makes it sing like a full gospel choir.
Step-by-Step Instructions
Ready to get your hands a little dirty? Let’s make some magic happen:
- Prep Your Battle Station: First things first, preheat your oven to **350°F (175°C)**. Grease and flour a 9-inch round cake pan. If you’re fancy, line the bottom with parchment paper. If you’re like me, a good spray of non-stick is usually enough.
- Whisk the Dry Squad: In a large mixing bowl, whisk together the flour, sugar, cocoa powder, baking soda, and salt. Give it a good whisk until there are no visible lumps. We want smooth sailing here!
- Introduce the Wet Crew: In a separate bowl (or directly into the dry ingredients if you’re a daredevil), whisk together the milk, oil (or melted butter), and vanilla extract.
- Combine Forces: Pour the wet ingredients into the dry ingredients. Stir just until combined. **Do not overmix!** A few lumps are totally fine. We’re aiming for cake, not concrete.
- The Secret Weapon: Add the vinegar to the batter, then pour in the hot water (or coffee). Stir quickly until everything is just incorporated. The batter will be quite thin, and that’s exactly what we want.
- Bake It ‘Til You Make It: Pour the batter into your prepared cake pan. Pop it into the preheated oven and bake for **30-35 minutes**, or until a wooden skewer inserted into the center comes out clean.
- Chill Out: Let the cake cool in the pan for about 10-15 minutes before inverting it onto a wire rack to cool completely. **Patience is a virtue here!** Seriously, don’t try to frost a warm cake unless you want a melty, crumbly disaster.
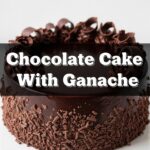
- Frosting Fun (Optional): Once cool, frost with your favorite chocolate frosting, ganache, or just a dusting of powdered sugar. Or eat it plain, because it’s that good.
Common Mistakes to Avoid
Because nobody wants a cake flop! Learn from my past kitchen mishaps, comrades:
- Overmixing the Batter: This is the cardinal sin of baking. Mix too much, and you’ll end up with a dense, rubbery cake instead of a light, fluffy dream. Stir until *just* combined, then back away from the whisk!
- Opening the Oven Door Early: Resist the urge to peek! Opening the oven door lets out heat and can cause your cake to sink in the middle. Give it at least 25 minutes before you even consider looking.
- Not Greasing Your Pan Properly: A crime against cake, really. You want your masterpiece to come out easily, not stick stubbornly to the pan. **Grease and flour generously**, or use parchment paper.
- Not Using Hot Water/Coffee: This step is key for activating the cocoa and making your chocolate flavor truly sing. Cold water just won’t give you the same depth.
- Ignoring the Vinegar: “It smells weird!” you might think. But it’s crucial for the leavening process. Trust the science, you won’t taste it in the final product.
Alternatives & Substitutions
Feeling adventurous or just missing an ingredient? No stress, we’ve got options:
- Milk: Any plant-based milk (almond, soy, oat, cashew) works perfectly here for a fully dairy-free cake. Feel free to experiment!
- Oil: If you don’t have vegetable oil, melted coconut oil (neutralized in flavor) or even applesauce (for a slightly denser, healthier cake) can work. You could also use an equal amount of melted butter, but then it won’t be dairy-free, FYI.
- Vinegar: No white vinegar? Lemon juice is a fantastic substitute! It serves the same purpose in activating the baking soda.
- Hot Water: As mentioned, hot coffee is my personal MVP here. It deepens the chocolate flavor without making the cake taste like coffee. Seriously, try it.
- Mix-ins: Want more chocolate? Throw in **½ cup of chocolate chips** with the dry ingredients. Feeling nutty? A handful of chopped walnuts or pecans works too!
- Frosting: If chocolate frosting isn’t your jam, a simple powdered sugar glaze, a dollop of whipped cream (dairy or non-dairy), or even fresh berries are delightful companions.
FAQ (Frequently Asked Questions)
Got questions? I’ve got (casual) answers!
- “Can I make this cake fully dairy-free?” Absolutely! Just swap out the regular milk for your favorite plant-based milk (almond, soy, oat) and ensure you’re using oil instead of butter. Easy peasy!
- “How long does this cake last?” If you manage not to eat it all in one sitting (impressive!), it’ll keep well covered at room temperature for 3-4 days, or up to a week in the fridge. But, IMO, it rarely lasts that long!
- “Why the vinegar? Will my cake taste like salad dressing?” Haha, nope! The vinegar reacts with the baking soda to create carbon dioxide, which helps the cake rise and gives it that light, fluffy texture. You won’t taste it, I promise! It’s a key ingredient for eggless baking.
- “Can I bake this in cupcake form?” Yes, you genius! Fill cupcake liners about two-thirds full and bake for 18-22 minutes. Keep an eye on them; baking times will vary.
- “My cake came out dry. What went wrong?” Oh no! Common culprits are overbaking (keep an eye on that skewer!), not measuring ingredients accurately (especially flour), or opening the oven door too often. Next time, try reducing the baking time slightly or investing in an oven thermometer!
- “Can I use whole wheat flour?” You *can*, but the texture might be a bit denser and the flavor different. For best results with this recipe, all-purpose flour is your go-to.
Final Thoughts
And there you have it! You’ve officially conquered the mighty eggless chocolate cake. Go ahead, pat yourself on the back. You’ve earned it. This cake isn’t just a dessert; it’s a testament to your newfound (or rediscovered) kitchen prowess and your ability to make deliciousness happen with minimal fuss. Now, go impress someone—or just yourself, honestly, that’s what I do—with your magnificent creation. You deserve a slice (or three). Happy baking, my friend!

