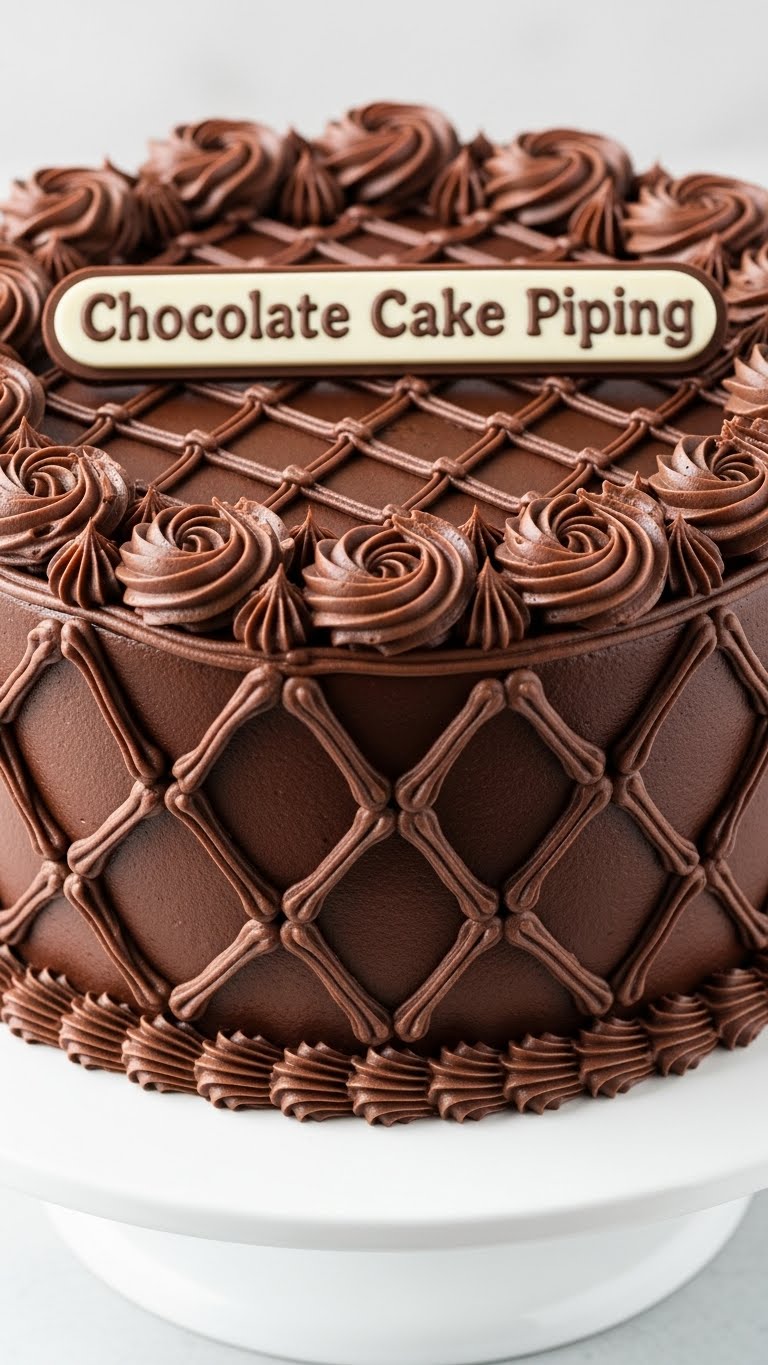
So, you’ve conquered the chocolate cake baking mission, huh? Congrats! The hard part (mostly waiting for it to cool, because patience is a myth) is over. Now, for the *really* fun bit that makes it look like you actually know what you’re doing, even if you just watched a 30-second TikTok on repeat: piping! Forget those Pinterest fails; we’re about to make your cake look like it belongs in a bakery window, without the meltdown.
Why This Piping Adventure is Awesome
Because frankly, a naked cake is a sad cake. And a cake slathered with a spatula looks like, well, *I* did it when I was 5. This guide? It’s your secret weapon for transforming “homemade” into “homemade-but-could-be-store-bought-for-like-$50.” Seriously, it’s pretty idiot-proof. Even if your artistic skills peak at stick figures (mine too, don’t worry), you’ll nail this. It’s all about simple techniques that give maximum *oomph* with minimal effort. Plus, who doesn’t love squeezing pretty patterns out of a bag? It’s therapeutic, IMO.
Ingredients You’ll Need (For the Frosting, Duh!)
Assuming your glorious chocolate cake is chilling (or cooling, no judgment), let’s whip up some buttercream that’s perfect for piping. You’ll need:
- 1 cup (2 sticks) unsalted butter, softened. Not melted, not rock-hard. Goldilocks-style softened is key!
- 3-4 cups powdered sugar (aka icing sugar, confectioners’ sugar). Sifted, unless you like lumpy frosting (you don’t).
- 1/2 cup good quality cocoa powder. The darker, the better for that deep chocolatey vibe.
- 1/4 cup heavy cream or whole milk. Or a splash more if it’s too thick.
- 1 teaspoon vanilla extract. Don’t skip it; it makes everything taste like a hug.
- Pinch of salt. Balances the sweetness and makes the chocolate sing. Trust me on this one.
Oh, and obviously, your already-baked and cooled chocolate cake. We’re not making cake from scratch today, friend!
Step-by-Step Instructions: Let’s Get Piping!
- Whip the Butter: In a large bowl, beat your softened butter with an electric mixer until it’s light and fluffy, about 2-3 minutes. This incorporates air and makes it dreamy.
- Add the Dry Stuff: Gradually add the sifted powdered sugar and cocoa powder to the butter, beating on low speed until combined. Once it’s mostly mixed, crank up the speed to medium-high and beat for another 2 minutes.
- Liquid Magic: Pour in the heavy cream (or milk) and vanilla extract. Beat on medium-high until the frosting is super light, fluffy, and spreadable. If it’s too thick, add more cream a tablespoon at a time. Too thin? Add a bit more sifted powdered sugar. You want it firm enough to hold its shape but soft enough to pipe easily.
- Prep Your Bag: Get your piping bag ready. If you’re using a coupler and tip, insert the coupler into the bag, snip the end, and then twist on your chosen piping tip. If no coupler, just drop your tip in and snip the end so the tip peeks out. Stand the bag up in a tall glass and fold the edges over – makes filling SO much easier, FYI.
- Fill ‘Er Up: Spoon your glorious chocolate buttercream into the piping bag. Don’t overfill! Aim for about two-thirds full to avoid frosting explosions (been there, done that, wore the frosting). Twist the top of the bag shut.
- Practice Makes (Almost) Perfect: Before attacking your masterpiece, try a few practice squeezes on a piece of parchment paper or a plate. Get a feel for the pressure and how the frosting comes out.
- Pipe Away! Hold the bag at a 90-degree angle to the cake for dots or stars, or a 45-degree angle for shells or rosettes. Apply even pressure as you move the bag. Start simple: borders, dots, or small rosettes are great for beginners. Go slow!
- Chill Out: Once your cake is looking fabulous, pop it in the fridge for 15-30 minutes to let the frosting firm up. This helps set those beautiful piped designs.
Common Mistakes to Avoid (Unless You Want a Frosting Disaster)
- Butter temperature is key: Trying to pipe with rock-hard butter frosting? Good luck. Too melted? It’ll be a soupy mess. Softened butter is your best friend.
- Overfilling the piping bag: This is how you end up with frosting oozing from the top, all over your hands, and probably your hair. Fill it two-thirds max.
- Not sifting powdered sugar: Lumps in your frosting will clog your piping tip and make you want to throw the whole thing out the window. Annoying, trust me.
- Using too much pressure: You’re not milking a cow; a gentle, consistent squeeze is all you need. Let the frosting do the work.
- Going too fast: Slow and steady wins the piping race. Take your time, embrace the zen.
- Thinking you need fancy tips for everything: A simple star tip (like 1M or 21) or a round tip (12) can do wonders. Don’t overcomplicate it from the start.
Alternatives & Substitutions: Because We Like Options!
Life’s too short for just one way of doing things, right?
- Store-Bought Frosting: Listen, no shame in the game! If you’re really short on time or just feeling lazy (we’ve all been there), grab a tub of good quality chocolate frosting from the store. You might need to whip it for a minute or two with a splash of milk to get it to piping consistency.
- Cream Cheese Frosting: Not a fan of buttercream? A well-chilled cream cheese frosting can also be piped beautifully. Just make sure it’s firm enough!
- Different Chocolate Frosting Flavors: Want to get wild? Add a dash of espresso powder for mocha frosting, or a hint of almond extract for a nutty twist. Orange zest would be delicious too!
- Piping Bag Alternatives: No piping bag? No problem! A sturdy Ziploc bag with a corner snipped off can work in a pinch. Just be careful not to make the hole too big!
- Tips, Tips, Tips: While I recommend a star tip (like Wilton 1M) for beginners, don’t be afraid to experiment. A round tip gives smooth dots, a leaf tip makes, well, leaves! The world is your oyster (or, rather, your frosting bag).
FAQ (Frequently Asked & Funnily Answered Questions)
- My frosting is too stiff! What do I do? Add a tiny splash of milk or cream, a teaspoon at a time, and beat until smooth. Think of it as giving your frosting a hydrating spa treatment.
- It’s too runny! Help! This means it’s either too warm or needs more structure. Pop it in the fridge for 15-20 minutes, then re-beat. If still runny, add a tablespoon or two of sifted powdered sugar.
- Do I *have* to use unsalted butter? Technically no, but why hurt your soul with salty frosting? Unsalted gives you control over the flavor. If using salted, just skip the extra pinch of salt in the recipe.
- Can I just use a Ziploc bag? Yep, totally! Just use a sturdy freezer bag and snip a small corner. It’s not as precise as a proper piping bag, but it absolutely gets the job done.
- How long does piped frosting last on a cake? If it’s buttercream, it’s pretty stable at room temperature for a day or two. If it’s a hot day or contains perishables (like cream cheese), keep that beauty chilled!
- What’s the easiest piping design for beginners? Dots! Seriously. Or simple stars with a star tip. They look impressive without much effort.
Final Thoughts: Go Forth & Conquer!
And there you have it! Your ticket to turning a humble chocolate cake into a showstopper. Remember, practice makes permanent (not perfect, because who needs perfect when you have delicious?). Don’t stress if your first few attempts aren’t Instagram-ready. It’s all part of the fun! Now go impress someone—or yourself—with your new culinary *and* artistic skills. You’ve earned it!

