So you’ve baked the most epic chocolate cake (or, let’s be real, bought one from the store – no judgment here!), and now it’s sitting there, looking a little… naked. You want it to scream “Eat Me!” not “I tried my best.” Right? That’s where garnishes swoop in like a superhero with sprinkles and a serious glow-up strategy. Let’s make that beautiful cake even more beautiful!
Why This Garnish Guide Is Awesome
This isn’t a “recipe” recipe in the traditional sense, but more like a “how-to make your cake look like a million bucks with minimal effort” guide. Think of it as putting lipstick on a pig… except the “pig” is a delicious chocolate cake. And it’s totally idiot-proof, promise. Even if your artistic skills are limited to stick figures, you got this. This guide is all about maximizing visual impact with minimal fuss. It’s the ultimate cheat code for turning a good cake into a showstopper, and it takes like, five minutes. Seriously, it’s that easy. You’ll look like a baking genius, and no one has to know your secret. 😉
Ingredients You’ll Need
You don’t need a lot, just a few fun bits and bobs to dress up your chocolate masterpiece. Pick and choose based on what you have or what mood you’re in!
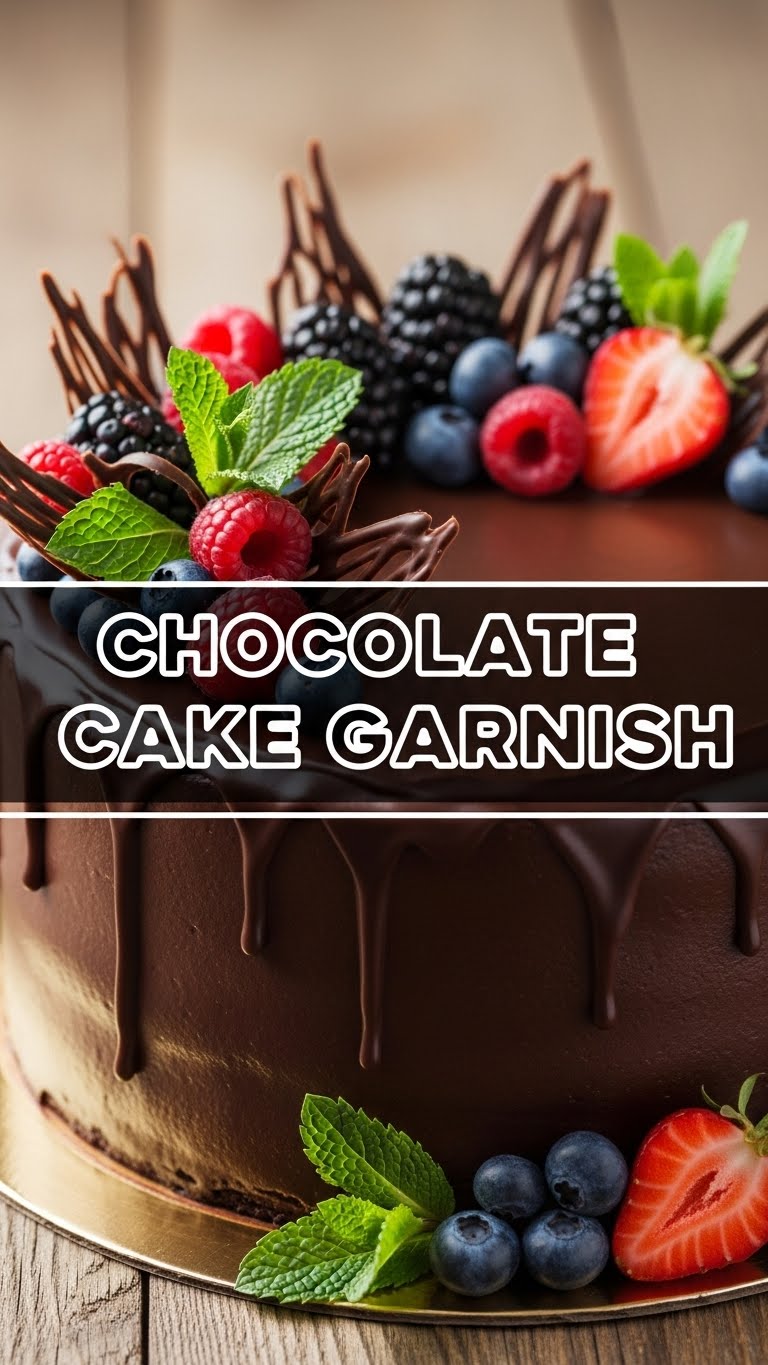
- Fresh Berries: Think raspberries, strawberries, or blueberries. Anything that screams “fancy” and adds a pop of color.
- Chocolate: A bar of chocolate (dark, milk, white – your call!) or even some chocolate chips for shaving.
- Powdered Sugar: AKA fairy dust. For that elegant, snowy finish.
- Whipped Cream: Store-bought in a can is totally fine, unless you’re feeling ambitious and want to whip your own.
- Sprinkles: Because why not? Life’s too short for sprinkle-less cake.
- A Mint Leaf or Two: For that “chef’s touch” and a fresh burst of green.
Step-by-Step Instructions
Time to get your garnish game on! These steps are super simple, so no overthinking allowed.
- Chill Out, Cake: First things first, make sure your chocolate cake is completely cool. A warm cake + garnish = melty disaster. No one wants a chocolate soup, trust me.
- Berry Blast: Arrange your fresh berries artfully on top of or around the cake. Don’t worry about being too perfect; a slightly random, natural look is usually best. Pile ’em up, spread ’em out – it’s your edible masterpiece!
- Chocolate Shavings Magic: Grab a chocolate bar and a vegetable peeler. Gently scrape the peeler along the edge of the chocolate bar, allowing the delicious curls to fall like edible snow onto your cake. Pro tip: Room temperature chocolate shaves much better than cold chocolate.
- Powdered Sugar Dusting: Put a tablespoon or two of powdered sugar into a small sieve. Hold it over the cake and tap gently. Watch the magical, delicate frost appear. Instant elegance! Remember, **less is often more here!**
- Whipped Cream Swirls: If you’re using whipped cream, either dollop it strategically in a few spots or pipe some pretty swirls. A little cloud of cream makes everything feel a bit more luxurious.
- Sprinkle Party: Now for the fun part! Go wild with sprinkles if you’re feeling festive, or just add a subtle border for a touch of fun. Your cake, your rules.
- Minty Fresh Finish: Pop a mint leaf or two here and there. It adds a vibrant pop of color and gives off serious “I really know what I’m doing” vibes.
Common Mistakes to Avoid
We’ve all been there, folks. Learn from my (and others’) garnish blunders!
- Over-Garnishing: Don’t turn your beautiful cake into a garnish avalanche. We want *enhancement*, not *burial*. The cake is still the star, after all.
- Garnishing a Warm Cake: As mentioned, this is a one-way ticket to a hot, gooey mess. Patience, young padawan, let that cake cool!
- Messy Powdered Sugar Dusting: Too much powdered sugar in one spot looks like a snowdrift, not a delicate dusting. **Tap, don’t dump!** It’s a subtle art.
- Ignoring Texture & Color: Don’t just throw everything on. Think for a sec about how the textures (crunchy, soft) and colors will complement each other. Variety is the spice of life (and cake!).
Alternatives & Substitutions
Feeling creative or just working with what you’ve got? No problem, here are some ideas!
- Citrus Zest: A little orange or lemon zest can really brighten up a rich chocolate cake. It’s like a secret flavor weapon that adds a lovely aroma too!
- Toasted Nuts: Chopped almonds, pecans, or walnuts add a fantastic crunch. **Toast ’em first** in a dry pan for a few minutes for maximum flavor and aroma, trust me on this one.
- Edible Flowers: Feeling super fancy? A few edible flowers (like pansies or violas) make your cake look like it belongs in a high-end magazine. Check your local grocery or specialty store.
- Caramel or Chocolate Drizzle: If you have some caramel or extra chocolate sauce lying around, a quick drizzle adds a decadent touch. Store-bought is perfectly acceptable and delicious.
- Coconut Flakes: Toasted or untoasted, coconut flakes can add a tropical twist and lovely texture.
FAQ (Frequently Asked Questions)
Got questions? I’ve got (casual) answers!
- Do I *have* to use fresh berries?
Nope, frozen berries work too, but let them thaw a bit first unless you like an ice-cold crunch on your cake. Just pat them dry a little to avoid extra moisture.
- Can I use cocoa powder instead of powdered sugar?
Absolutely! It gives a more intense chocolate look, obviously. Just be gentle when dusting, as it can be potent and a bit messy if you’re not careful.
- My chocolate isn’t shaving well. Help!
Your chocolate might be too cold. Let it warm up to room temperature for about 10-15 minutes. If it’s still stubborn, just chop it finely – chocolate *bits* are still delicious and look great!
- How long will garnished cake last?
It totally depends on the garnish. Berries and whipped cream are best added just before serving for peak freshness. Dry garnishes like sprinkles or chocolate shavings will last as long as the cake itself.
- What if I only have one type of garnish? Is that okay?
Totally okay! One good garnish can be incredibly elegant and impactful. Sometimes simplicity is the most sophisticated. Don’t stress it, just make it look good!
- Is it okay to use store-bought frosting for a little extra piped border or design?
OMG YES. Use a piping bag (or even a Ziploc bag with the corner snipped off) and go for it. Don’t let anyone tell you otherwise. We’re all about convenience here, IMO.
- Should I refrigerate the cake after garnishing?
If your garnish is perishable (like fresh berries or whipped cream), then yes, for sure, pop it in the fridge. Otherwise, for dry garnishes, room temperature is usually fine for a few hours if your kitchen isn’t super hot.
Final Thoughts
See? That wasn’t so hard, was it? You just elevated your chocolate cake from “yum” to “WOW, who made this?!” without breaking a sweat. Go ahead, bask in the compliments. You deserve it. You didn’t just bake a cake; you transformed it into a masterpiece ready for its close-up. Now go impress someone—or yourself—with your new culinary *artistry*. You’ve earned it!


