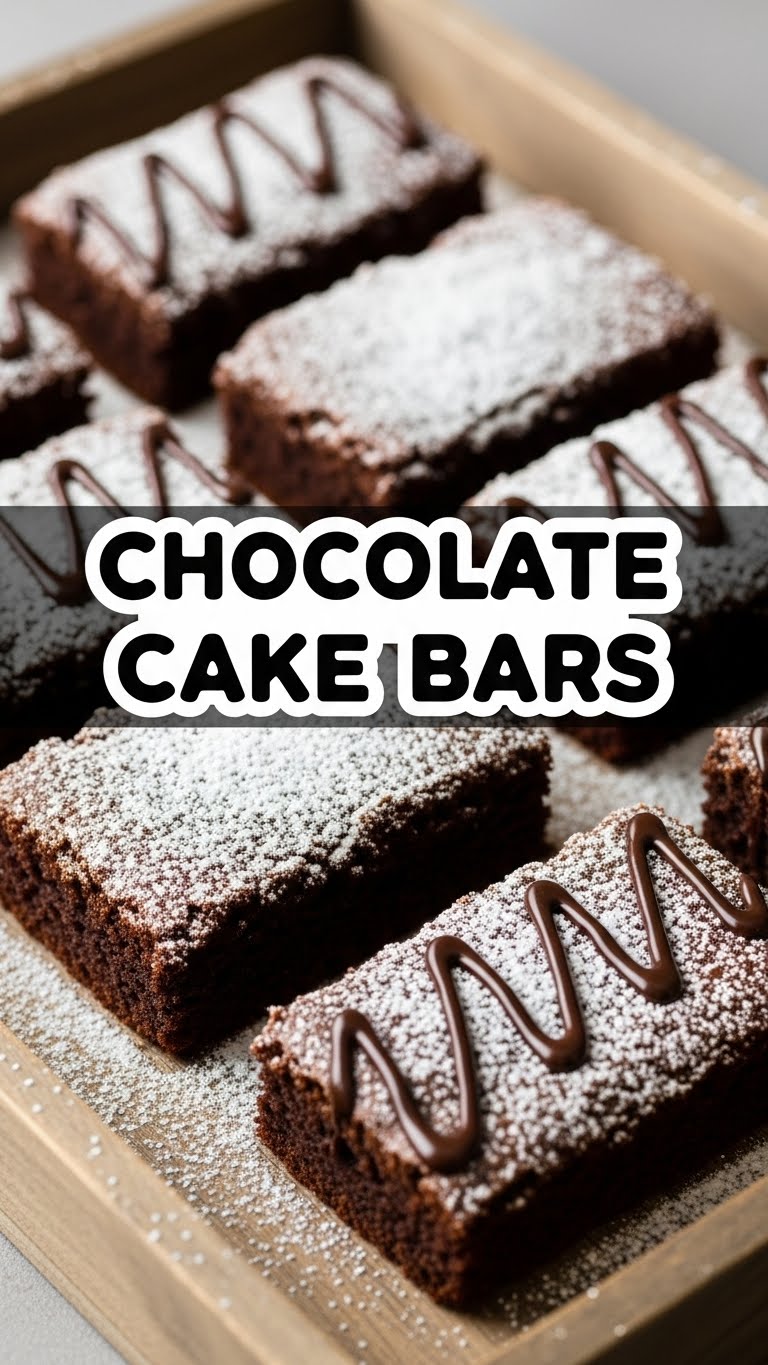
So you’re craving something ridiculously tasty but too lazy to spend forever in the kitchen, huh? Same, friend, same. We’ve all been there: a chocolate craving hits with the force of a thousand suns, but the thought of a full-blown cake situation (measuring, leveling, frosting perfection, ugh) just makes you want to lie down. Well, buckle up, buttercup, because I’ve got the answer to your prayers, your chocolatey dreams, your “I need dessert NOW” emergencies: **Chocolate Cake Bars!** They’re basically all the joy of a chocolate cake, but in a far less fussy, much more chill bar form. You’re welcome.
Why This Recipe is Awesome
Let me count the ways! First off, it’s pretty much idiot-proof. Seriously, even I, a person known for occasionally setting off smoke alarms while boiling water, can make these without a hitch. Second, they come together faster than you can say “I need more chocolate.” We’re talking minimal effort, maximum reward. Think rich, fudgy, moist chocolate cake in an easily shareable (or not, no judgment!) bar. It’s perfect for potlucks, Netflix binges, or just Tuesday. Plus, no fancy frosting skills required – just slather it on and call it art. Win-win-win!
Ingredients You’ll Need
Gather ’round, my sweet-toothed companions! Here’s what you’ll need to whip up these bad boys. Most of these are probably already lurking in your pantry, waiting for their moment to shine.
- All-Purpose Flour: About 1 ½ cups. The backbone of our deliciousness.
- Granulated Sugar: 1 cup. Because sweet things are the best things.
- Unsweetened Cocoa Powder: ½ cup. Make it a good quality one, for peak chocolatey vibes!
- Baking Soda: 1 teaspoon. Our magical leavening agent, giving us that perfect lift.
- Salt: ½ teaspoon. Don’t skip it; it balances the sweetness like a pro.
- Unsalted Butter: ½ cup (1 stick), melted. The melty goodness that makes everything better.
- Large Eggs: 2, at room temperature. They bind everything together with love.
- Vanilla Extract: 1 teaspoon. A splash of pure happiness.
- Milk: ½ cup (any kind works!). Adds moisture and tenderness.
For the optional (but highly recommended) Chocolate Fudge Frosting:
- Powdered Sugar (Confectioners’ Sugar): 2 cups. The base of our silky-smooth frosting.
- Unsweetened Cocoa Powder: ¼ cup. More chocolate, because why not?
- Unsalted Butter: ¼ cup (½ stick), softened. For that dreamy, creamy texture.
- Milk: 2-3 tablespoons, or as needed. To get it to the perfect spreadable consistency.
- Vanilla Extract: ½ teaspoon. Another little flavour boost.
Step-by-Step Instructions
- Preheat & Prep: First things first, preheat your oven to 350°F (175°C). Grab a 9×13 inch baking pan and give it a good spray with non-stick cooking spray, or grease it with butter and dust with flour. Trust me, you want those bars to come out smoothly.
- Whisk the Dry Stuff: In a large mixing bowl, whisk together the flour, sugar, cocoa powder, baking soda, and salt. Make sure there are no lumpy bits. You want all those dry ingredients playing nice together.
- Wet Ingredients Wake Up: In a separate bowl (or a very large measuring cup), whisk together the melted butter, eggs, vanilla extract, and milk. Give it a good swirl until everything is well combined.
- Marry Them Up: Pour the wet ingredients into the dry ingredients. Mix everything with a spatula or a wooden spoon until just combined. **Don’t overmix!** A few small lumps are totally fine; overmixing develops gluten and can make your bars tough.
- Bake It Off: Pour the batter evenly into your prepared baking pan. Pop it into the preheated oven and bake for 20-25 minutes, or until a toothpick inserted into the center comes out with moist crumbs, not wet batter.
- Cool Down: Let the cake bars cool completely in the pan on a wire rack before you even *think* about frosting them. This is crucial, unless you want melted frosting. Nobody wants melted frosting.
- Frosting Time (if you dare!): While the bars cool, whip up that frosting! In a medium bowl, combine the powdered sugar, cocoa powder, softened butter, milk, and vanilla extract. Beat with an electric mixer until smooth and creamy. If it’s too thick, add a tiny bit more milk; if too thin, add more powdered sugar. Spread generously over the cooled cake bars.
- Slice and Devour: Once frosted (and optionally, allowed to set a little), slice into squares or rectangles. Serve them up and watch them disappear!
Common Mistakes to Avoid
Listen, we’ve all made culinary blunders. Here are a few to steer clear of, so your chocolate cake bar journey is smooth sailing:
- Not Preheating the Oven: Rookie mistake! Your oven needs to be at the correct temperature from the start for proper baking. It’s like jumping into a cold pool – just wrong.
- Overmixing the Batter: I mentioned it, but it bears repeating. Mix until just combined. Too much mixing makes for tough, dense bars instead of light, tender ones.
- Overbaking: Keep an eye on the clock and use the toothpick test. Overbaked bars are dry and sad. We want moist and fudgy, not crumbly desert.
- Frosting Warm Bars: Oh honey, no. Resist the urge. Your beautiful frosting will melt into a chocolatey puddle. Patience, young padawan, patience.
- Skimping on Quality Cocoa: Since chocolate is the star here, a good quality unsweetened cocoa powder makes a HUGE difference in flavor. Don’t cheap out!
Alternatives & Substitutions
Feeling adventurous? Or just missing an ingredient? No stress, we can totally improvise!
- Flour Power: You can swap out some (or all, if you’re brave) of the all-purpose flour for a 1:1 gluten-free flour blend. I haven’t tried it myself for this specific recipe, but generally it works!
- Butter Swaps: No butter? You can use an equal amount of vegetable oil or melted coconut oil. The texture might be slightly different, but still delicious. For the frosting, margarine technically works, but IMO, butter just tastes better.
- Milk Options: Any milk works here! Dairy, almond, oat, soy – whatever you have on hand.
- Extra Chocolate Kick: Feel free to stir in ½ cup of chocolate chips (milk, dark, or white) into the batter before baking for extra pockets of melty joy.
- Frosting Variations: Not a fan of chocolate frosting? A simple cream cheese frosting, or even just a dusting of powdered sugar, would be delightful. Or, if you’re feeling fancy, a quick ganache (warm heavy cream poured over chocolate chips, stirred until smooth).
FAQ (Frequently Asked Questions)
Got questions? I’ve got (casual, humorous) answers!
- Can I use margarine instead of butter? Well, technically yes, but why hurt your soul like that? Butter provides a richer flavor and texture, especially in the frosting. But in a pinch, margarine will do the job for the bars themselves.
- How do I know if the cake bars are baked through? Use the toothpick test! Stick a toothpick into the center of the bars. If it comes out with moist crumbs, you’re golden. If it’s wet batter, give it a few more minutes. If it comes out completely clean, you might have overbaked slightly, but it should still be yummy!
- Can I make these ahead of time? Absolutely! These bars keep well at room temperature in an airtight container for 3-4 days, or in the fridge for up to a week. They’re actually even better the next day, FYI, once the flavors have had a chance to meld.
- My bars turned out dry! What went wrong? Most likely, you overbaked them! Next time, start checking for doneness a few minutes earlier. It could also be from too much flour or not enough liquid – always measure carefully!
- Do I *have* to frost them? Nope! If you’re going for minimalist chic (or just really lazy), a simple dusting of powdered sugar is perfectly acceptable and still delicious. But the frosting really takes them to the next level, just sayin’.
- Can I freeze these cake bars? You bet! Let them cool completely, frost if desired, then slice into individual portions. Wrap each bar tightly in plastic wrap, then place in a freezer-safe bag or container for up to 2-3 months. Thaw at room temperature when the craving strikes!
Final Thoughts
And there you have it, folks! Your new go-to recipe for chocolatey bliss without the fuss. These Chocolate Cake Bars are proof that you don’t need to spend all day in the kitchen to create something truly delicious. They’re perfect for satisfying that sudden sweet tooth, impressing friends (or your cat), or just treating yourself because, frankly, you deserve it.
So go on, preheat that oven, get mixing, and prepare for a wave of chocolatey goodness. Now go impress someone—or yourself—with your new culinary skills. You’ve earned it!

