So, you’ve got a birthday coming up (yours, a friend’s, your pet rock’s – no judgment here!), and you want to whip up something that screams “I’m amazing and I bake!” without actually spending an entire weekend chained to the oven, right? High five, friend. You’ve hit the jackpot. This isn’t just any chocolate cake; it’s a chocolate cake that basically moonlights as a summer party. And yes, it involves popsicles. Because why choose when you can have both?
Why This Recipe is Awesome
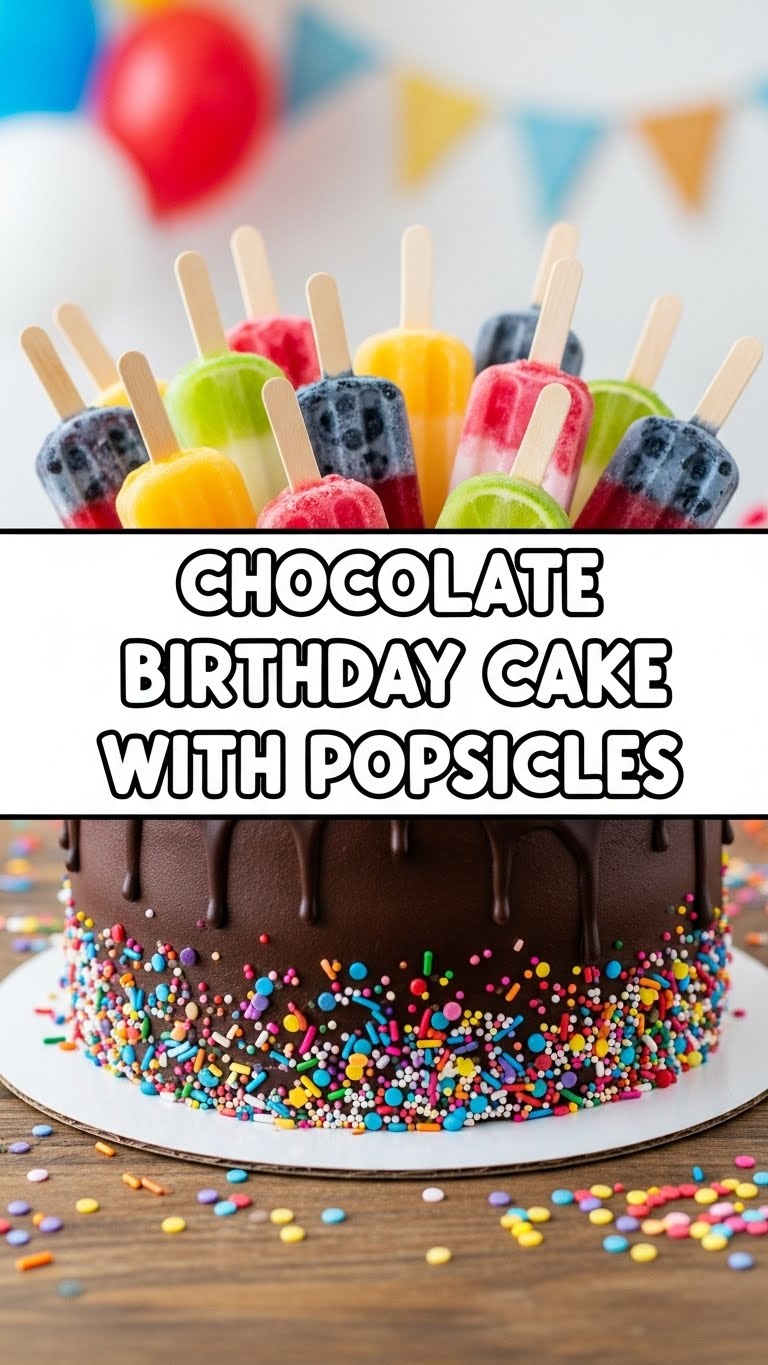
Let’s be real, most recipes promise the moon and deliver a slightly burnt biscuit. Not this one! This recipe for Chocolate Birthday Cake with Popsicles is so ridiculously easy, it’s practically foolproof. We’re talking minimal stress, maximum “wow!” factor. It’s the kind of cake that makes people ask, “You *made* this?!” with genuine awe, not polite surprise. Seriously, even if your baking track record involves more smoke alarms than masterpieces, you got this. It’s got deep, dark chocolate flavor, a moist crumb, and then we just stick a bunch of frozen goodness right into it. **It’s a cake, it’s a dessert station, it’s pure genius.** And a total game-changer for anyone who likes to look fancy without the effort.
Ingredients You’ll Need
Gather your troops! Here’s what you’ll need to make this masterpiece happen. Don’t worry, no obscure ingredients that require a quest to the Himalayas.
For the Cake:
- 2 cups (240g) All-Purpose Flour: The usual suspect.
- 2 cups (400g) Granulated Sugar: Happy dust, makes everything better.
- ¾ cup (75g) Unsweetened Cocoa Powder: Go for good quality; it makes a difference! This is where the magic happens.
- 2 tsp Baking Soda: Our fluffy-maker.
- 1 tsp Baking Powder: Another fluffy-maker, they work as a team.
- 1 tsp Salt: Don’t skip it! It balances all that sweetness.
- 1 cup (240ml) Milk: Any kind works – whole, 2%, even plant-based if you’re feeling adventurous.
- ½ cup (120ml) Vegetable Oil: Or canola. This keeps things super moist.
- 2 Large Eggs: The binders of our cakey destiny.
- 1 tsp Vanilla Extract: The soul of all good desserts.
- 1 cup (240ml) Boiling Water or Hot Coffee: Your secret weapon for intense chocolate flavor. Trust me on the coffee; you won’t taste it, just boosted chocolate goodness.
For the Frosting:
- 1 cup (226g) Unsalted Butter: Softened. The creamy dream maker.
- 3-4 cups (360-480g) Powdered Sugar (Confectioners’ Sugar): Sifted, unless you like lumps (who likes lumps?).
- ¾ cup (75g) Unsweetened Cocoa Powder: Again, good quality, please!
- ¼ cup (60ml) Milk or Cream: Or more, to get that perfect consistency.
- 1 tsp Vanilla Extract: More vanilla, because why not?
For the Fun (aka Decoration):
- 6-10 Assorted Popsicles: Grab your favorite flavors! These are the stars of the show.
- Sprinkles, chocolate shavings, or extra chocolate candies: Because glitter makes everything better.
Step-by-Step Instructions
Alright, apron on, game face ready! Let’s get baking. These steps are short, sweet, and to the point. You’ll be a cake boss in no time.
- Preheat and Prep: Preheat your oven to 350°F (175°C). Grease and flour two 8-inch or 9-inch round cake pans. Or, line with parchment paper circles if you’re feeling extra fancy. **Don’t skip this step – nobody likes a stuck cake!**
- Whisk Dry Stuff: In a large bowl, whisk together the flour, sugar, cocoa powder, baking soda, baking powder, and salt. Make sure there are no lumpy bits.
- Add Wet, Then Mix: Add the milk, oil, eggs, and vanilla extract to the dry ingredients. Beat with an electric mixer on medium speed for about 2 minutes, scraping down the sides of the bowl as needed.
- The Secret Ingredient: Carefully pour in the boiling water (or hot coffee). The batter will be thin – don’t panic! It’s supposed to be like that. Stir until just combined. Overmixing makes for tough cakes, and we’re aiming for fluffy cloud status.
- Bake It Up: Divide the batter evenly between your prepared pans. Bake for 30-35 minutes, or until a wooden skewer inserted into the center comes out clean.
- Cool Down: Let the cakes cool in the pans for about 10-15 minutes before inverting them onto a wire rack to cool completely. **This is crucial before frosting!**
Now for the Frosting!
- Beat the Butter: In a large bowl, beat the softened butter with an electric mixer until it’s light and fluffy, about 2-3 minutes.
- Add the Goods: Gradually add the sifted powdered sugar, cocoa powder, milk (or cream), and vanilla extract. Start on low speed to avoid a sugar cloud, then increase to medium-high and beat until smooth, creamy, and spreadable. Add more milk/cream a teaspoon at a time if it’s too thick, or a little more powdered sugar if it’s too thin.
Assemble Your Masterpiece!
- Stack ‘Em Up: Once the cakes are completely cool, place one layer on your serving plate or cake stand. Spread about a third of the frosting evenly over the top.
- Layer Up: Place the second cake layer on top and spread the remaining frosting over the top and sides of the cake. Smooth it out with an offset spatula or knife.
- Popsicle Party! This is the fun part! Unwrap your popsicles and strategically stick them right into the top of the cake. You can do a circle, a random pattern, or even stick some around the sides for extra flair.
- Sprinkle Magic: Finish with a generous showering of sprinkles, chocolate shavings, or whatever makes your heart sing.
- Serve Immediately: Because popsicles don’t wait for anyone!
Common Mistakes to Avoid
We’ve all been there – kitchen blunders are part of the learning curve! But here are a few rookie errors to steer clear of:
- **Thinking you don’t need to preheat the oven:** Rookie mistake, my friend. Your oven isn’t psychic; it needs time to get to temp. A cold oven means a dense, sad cake.
- **Overmixing the batter:** Once you add the wet ingredients, mix until just combined. Think “just enough,” not “let’s beat this into submission.” Overmixing develops too much gluten, making your cake tough like a hockey puck.
- **Opening the oven door constantly:** Resist the urge! Every time you peek, you let precious heat escape, causing your cake to potentially sink in the middle. Wait until at least the 25-minute mark.
- **Frosting a warm cake:** Unless you’re going for a lava cake aesthetic (which isn’t what we’re doing here), wait until your cake layers are **completely, utterly cool**. Otherwise, your beautiful frosting will melt into a chocolatey puddle.
- **Decorating with melted popsicles:** I mean, unless you’re aiming for an abstract art piece, make sure those popsicles are frozen solid when you stick them in. Keep them in the freezer until the very last minute!
Alternatives & Substitutions
Life’s too short for rigid recipes! Feel free to mix things up a bit.
- **Oil:** Don’t have vegetable oil? Melted butter works too, you fancy pants. It’ll give it a slightly richer flavor.
- **Milk:** Buttermilk can replace regular milk for an extra moist and slightly tangy cake. Or, any plant-based milk (almond, oat, soy) works wonderfully if you’re catering to dietary needs.
- **Hot Coffee:** If you’re really not a coffee person (gasp!), just use boiling water. But honestly, the coffee enhances the chocolate flavor without making it taste like coffee. It’s like a secret superhero.
- **Frosting:** No time for homemade? Grab a tub of store-bought chocolate frosting. We’re friends here, no judgment. You can always whip it with a little extra powdered sugar and cocoa to make it taste more “homemade.”
- **Popsicles:** Any flavor, any brand! Fruit, fudge, rainbow, creamy. This is your chance to go wild and create a truly unique birthday cake experience. FYI, fruit-flavored ones add a nice pop of color and tartness.
- **Cake shape:** Don’t have round pans? Make cupcakes! Or a sheet cake! Just adjust baking times accordingly.
FAQ (Frequently Asked Questions)
Got questions? I’ve got (casual) answers!
Q: Can I make this gluten-free?
A: Absolutely! Just swap out the all-purpose flour for a good quality 1:1 gluten-free baking blend. Easy peasy lemon squeezy.
Q: How far in advance can I make the cake?
A: The cake layers can be baked 1-2 days in advance, wrapped tightly in plastic wrap, and kept at room temp (or fridge). You can even freeze them for up to a month! The frosting is best made the day of, or a day ahead and stored in the fridge (bring to room temp and re-whip before frosting). Assembly with popsicles should be done right before serving.
Q: Do I *have* to use popsicles?
A: Well, technically no, but why rob yourself of such joy? The popsicles are the MVP here! If you skip them, it’s just a really good chocolate cake. Add some fun candles and sprinkles instead, I guess, but the popsicles are a showstopper, IMO.
Q: My cake sank in the middle, what gives?
A: Oh no! This often happens due to old leavening agents (check those expiration dates on your baking soda/powder!), oven temperature fluctuations, or opening the oven door too soon. It’s okay! Just fill the crater with extra frosting and call it “rustic.” No one will ever know.
Q: Can I use margarine instead of butter for the frosting?
A: You *can*, but why hurt your soul like that? Margarine results in a less rich, sometimes greasy frosting. For the best flavor and texture, stick with good old butter. Your taste buds will thank you.
Q: Why boiling water for the cake? Seems weird.
A: It’s science, baby! The boiling water “blooms” the cocoa powder, making the chocolate flavor incredibly deep and rich. Plus, it helps create that super moist crumb we all crave. Don’t question the magic, just embrace it!
Q: How do I store leftovers?
A: With popsicles, it’s a serve-and-devour situation. If you magically have leftovers (doubtful!), remove any remaining popsicles as they’ll melt. Cover the cake tightly and store at room temperature for up to 2-3 days, or in the fridge for up to 5 days. It’s best eaten quickly though!
Final Thoughts
Boom! You just made a showstopper. Seriously, pat yourself on the back, grab a slice, and bask in the glory of your culinary prowess. This isn’t just a cake; it’s a statement. A delicious, fun, and totally-not-stressful statement. Now go impress someone – or yourself, which is arguably more important – with your new culinary skills. You’ve earned it!


