Okay, confession time. Is there anything better than a chocolate cake that screams “I love you (and also chocolate is life)” especially when it’s for an amazing woman in your life? Nope, didn’t think so. So you’re here because you want to whip up something truly special without pulling an all-nighter in the kitchen, right? Good, because I’ve got your back. Let’s talk chocolate cake that’s less ‘meh’ and more ‘OMG, where has this been all my life?!’ This isn’t just a recipe; it’s a love language in edible form, perfect for celebrating her.
Why This Recipe is Awesome
First off, this isn’t just *any* chocolate cake. This is THE chocolate cake. It’s moist, it’s rich, it’s got that deep chocolate flavor that makes you close your eyes and do a little happy dance. Plus, it’s pretty much **idiot-proof**. Seriously, if I can make it look good after a long Tuesday, so can you. No fancy techniques, no obscure ingredients, just pure chocolatey bliss that’ll make her feel like the queen she is. And honestly, who doesn’t love a cake that impresses without making you stress? This one’s a winner, trust me.
Ingredients You’ll Need
Grab your apron, put on some tunes, and let’s get down to business. Here’s what you’ll need for this chocolatey masterpiece. Nothing too wild, I promise!
- For the Cake:
- All-purpose flour: About 1 ¾ cups. The usual suspect, keeping things together.
- Granulated sugar: 2 cups. For that sweet, sweet joy.
- Unsweetened cocoa powder: ¾ cup. The darker, the better, IMO. This is where the magic happens!
- Baking soda: 2 teaspoons. Our trusty lift-off crew.
- Baking powder: 1 teaspoon. More lift, because nobody likes a flat cake.
- Salt: 1 teaspoon. Don’t skip it, it brings out all that glorious chocolate flavor!
- Large eggs: 2, at room temperature. Happy little binders.
- Milk: 1 cup (whole or 2%). For tenderness and a lovely crumb.
- Vegetable oil: ½ cup. Moisture, baby! This keeps it super moist.
- Vanilla extract: 2 teaspoons. Because everything needs a little vanilla hug.
- Hot water or freshly brewed hot coffee: 1 cup. **This is our secret weapon!** Seriously, coffee deepens the chocolate flavor like nobody’s business without making it taste like coffee.
- For the Chocolate Buttercream Frosting:
- Unsalted butter: 1 cup (2 sticks), softened. The foundation of all good frostings.
- Powdered sugar: 3-4 cups, sifted. No lumpy frosting, please!
- Unsweetened cocoa powder: ½ cup. More chocolate, because why not?
- Milk or heavy cream: 3-5 tablespoons. To get that perfect, spreadable consistency.
- Vanilla extract: 1 teaspoon. Again, for that extra warmth.
- A pinch of salt: Balances the sweetness.
Step-by-Step Instructions
Alright, let’s turn these simple ingredients into a showstopper. Follow these steps, and you’ll be golden. Or, you know, chocolatey brown.
- **Preheat & Prep:** First things first, get that oven toasty! Preheat your oven to 350°F (175°C). Lightly grease and flour two 9-inch round cake pans. You can also line the bottoms with parchment paper if you’re feeling extra fancy and want zero stickage.
- **Dry Mix It Up:** In a large bowl, whisk together the flour, sugar, cocoa powder, baking soda, baking powder, and salt. Make sure there are no lumps—we want smooth sailing!
- **Wet Ingredients Unite:** In another medium bowl, whisk together the eggs, milk, vegetable oil, and vanilla extract until they’re well combined.
- **Combine Forces:** Gradually add the wet ingredients to the dry ingredients, mixing on low speed with an electric mixer (or by hand with a whisk) until just combined. **Don’t overmix!** Overmixing is a rookie mistake that can lead to a tough cake.
- **The Secret Weapon Reveal:** Carefully stir in the hot water or hot coffee. The batter will be thin, but don’t panic! This is exactly what we want for that super moist crumb.
- **Bake Time!** Divide the batter evenly between your two prepared cake pans. Pop them into the preheated oven and bake for 30-35 minutes, or until a wooden skewer inserted into the center comes out clean.
- **Cool Down:** Let the cakes cool in their pans on a wire rack for about 10-15 minutes. Then, carefully invert them onto the wire rack to cool completely. **Patience is key here!** Don’t even *think* about frosting warm cakes unless you want a melted mess.
- **Frosting Frenzy:** While the cakes are cooling, whip up your buttercream! In a large bowl, beat the softened butter until creamy. Gradually add the sifted powdered sugar and cocoa powder, alternating with the milk/cream and vanilla, beating until light and fluffy. Add a pinch of salt to round out the flavors. If it’s too thick, add a tiny bit more milk; too thin, a bit more powdered sugar.
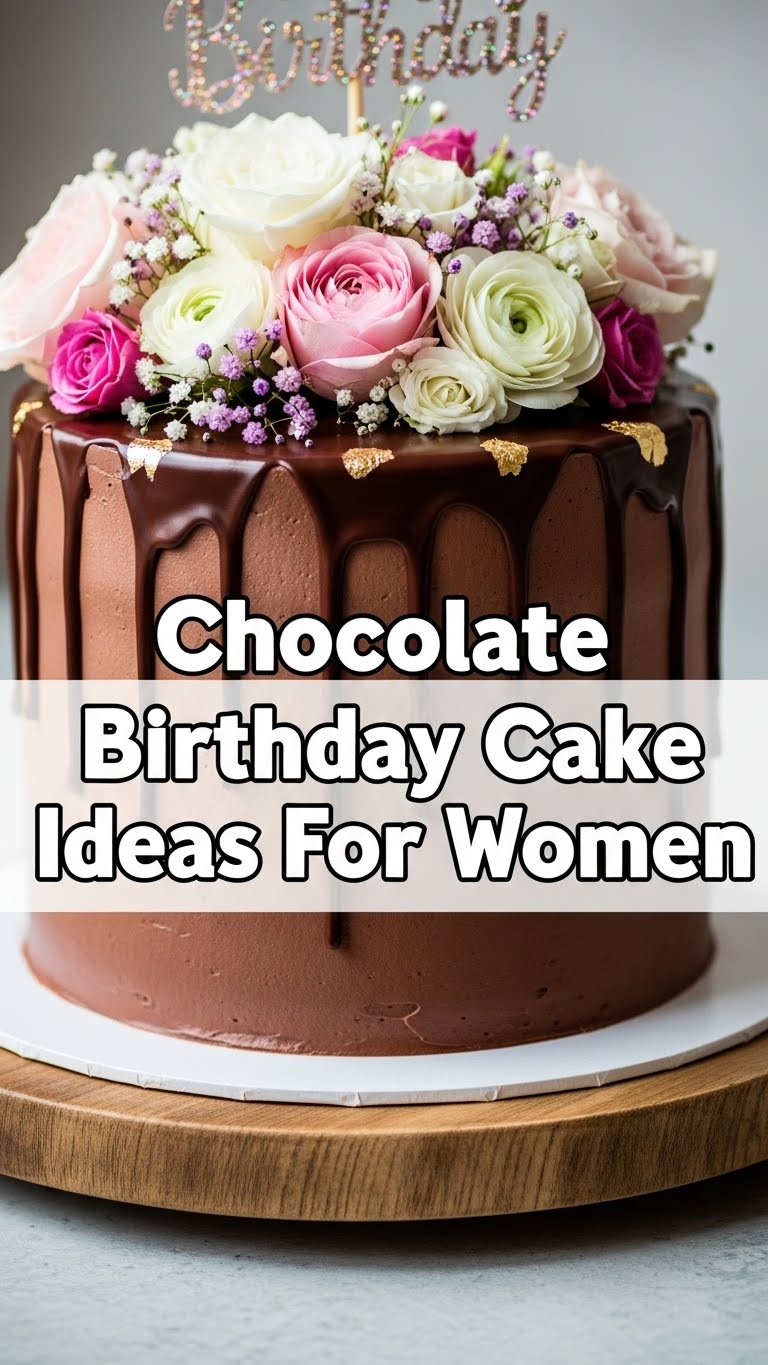
- **Assemble & Decorate:** Once your cakes are completely cool (and I mean *completely*), place one layer on your serving plate. Spread a generous amount of frosting on top. Place the second cake layer on top, then frost the top and sides of the entire cake. Now for the fun part: decorate! Sprinkles, fresh berries, chocolate shavings, or even a few edible flowers can make it truly special for her.
Common Mistakes to Avoid
Nobody’s perfect, but we can definitely sidestep some common cake catastrophes. Here’s what not to do:
- **Not preheating the oven:** Thinking you don’t need to preheat? Rookie mistake! An even temperature from the start ensures even baking.
- **Overmixing the batter:** I know it’s tempting to keep beating, but stop as soon as everything is just combined. Overmixing develops too much gluten, leading to a tough, dry cake.
- **Not cooling cakes completely:** Attempting to frost a warm cake is a recipe for a melted, sliding disaster. Seriously, just wait. Go watch an episode of your favorite show.
- **Eyeballing ingredients:** Baking is a science, not an art (at least, not entirely). Use proper measuring cups and spoons for accuracy, especially for things like flour and leavening agents.
- **Skipping the coffee:** If you’re using water instead of coffee, that’s fine, but if you’re just omitting the hot liquid altogether, you’ll end up with a dry cake. **FYI, that hot liquid is crucial!**
Alternatives & Substitutions
Feeling adventurous or missing an ingredient? No worries, we can totally tweak this. It’s your cake, after all!
- **Dairy-Free Delight:** For a dairy-free version, use unsweetened almond milk or oat milk, and swap out the butter in the frosting for a good quality dairy-free butter alternative.
- **Gluten-Free Glory:** You can definitely make this GF! Just use a 1:1 gluten-free all-purpose flour blend (like Bob’s Red Mill or King Arthur’s). You might need a tiny bit more liquid if your blend is particularly absorbent, so keep an eye on the batter consistency.
- **Amp Up the Indulgence:** Want to go next-level? Stir in a cup of chocolate chips into the batter before baking. Or, for a richer frosting, add a teaspoon of instant espresso powder to the cocoa in the buttercream.
- **Frosting Variations:** Not a buttercream fan? Try a decadent chocolate ganache (equal parts hot cream and chopped chocolate, poured over) or a cream cheese frosting for a tangy twist.
- **Decoration Ideas:** Beyond sprinkles, think fresh raspberries or strawberries for a pop of color, finely chopped nuts around the sides, or even some edible gold dust if she’s extra glam! A simple “Happy Birthday” written in melted chocolate can also be super charming.
FAQ (Frequently Asked Questions)
Got questions? I’ve got (casual and hopefully helpful) answers!
- **Can I use regular water instead of coffee?** Yes, absolutely! The coffee just enhances the chocolate flavor without making the cake taste like coffee. But plain hot water works perfectly fine to create that wonderfully moist crumb.
- **My cake sank in the middle, what happened?** Oh no! This usually means the oven door was opened too early (let that cake do its thing!), or the cake was underbaked. Make sure your oven temperature is accurate and that the skewer comes out clean.
- **Can I make this as cupcakes instead?** You betcha! This recipe yields about 24 standard cupcakes. Just reduce the baking time to about 18-22 minutes. Keep an eye on them!
- **How long does this cake keep?** Covered tightly at room temperature, it’s usually good for 2-3 days. In the fridge, it’ll last up to 5 days, but let it come to room temperature before serving for the best taste and texture.
- **What if I don’t have buttermilk?** No problem! You can easily make your own. Just add 1 tablespoon of white vinegar or lemon juice to a measuring cup, then fill the rest of the way to 1 cup with regular milk. Let it sit for 5-10 minutes until it curdles a bit. Voila, homemade buttermilk!
- **Any tips for a super smooth frosting?** Sift your powdered sugar and cocoa powder! This is crucial for avoiding lumps. Also, make sure your butter is truly softened, not melted. Beat the butter alone for a minute or two before adding other ingredients for extra fluffiness.
- **Can I make the cake layers ahead of time?** You’re a planner, I like that! Yes, you can bake the layers, let them cool completely, then wrap them tightly in plastic wrap and store them at room temp overnight, or freeze them for up to a month. Just thaw before frosting!
Final Thoughts
There you have it, superstar! You’re now equipped to bake a chocolate birthday cake that’s not just a cake, but a full-on experience for that special woman in your life. It’s rich, it’s gorgeous, and it’s proof that you don’t need to be a Michelin-starred chef to make something truly special. So go forth, bake this beauty, and watch her face light up. You’ve totally got this! Now go enjoy that slice (or three). You’ve earned it! 😉


