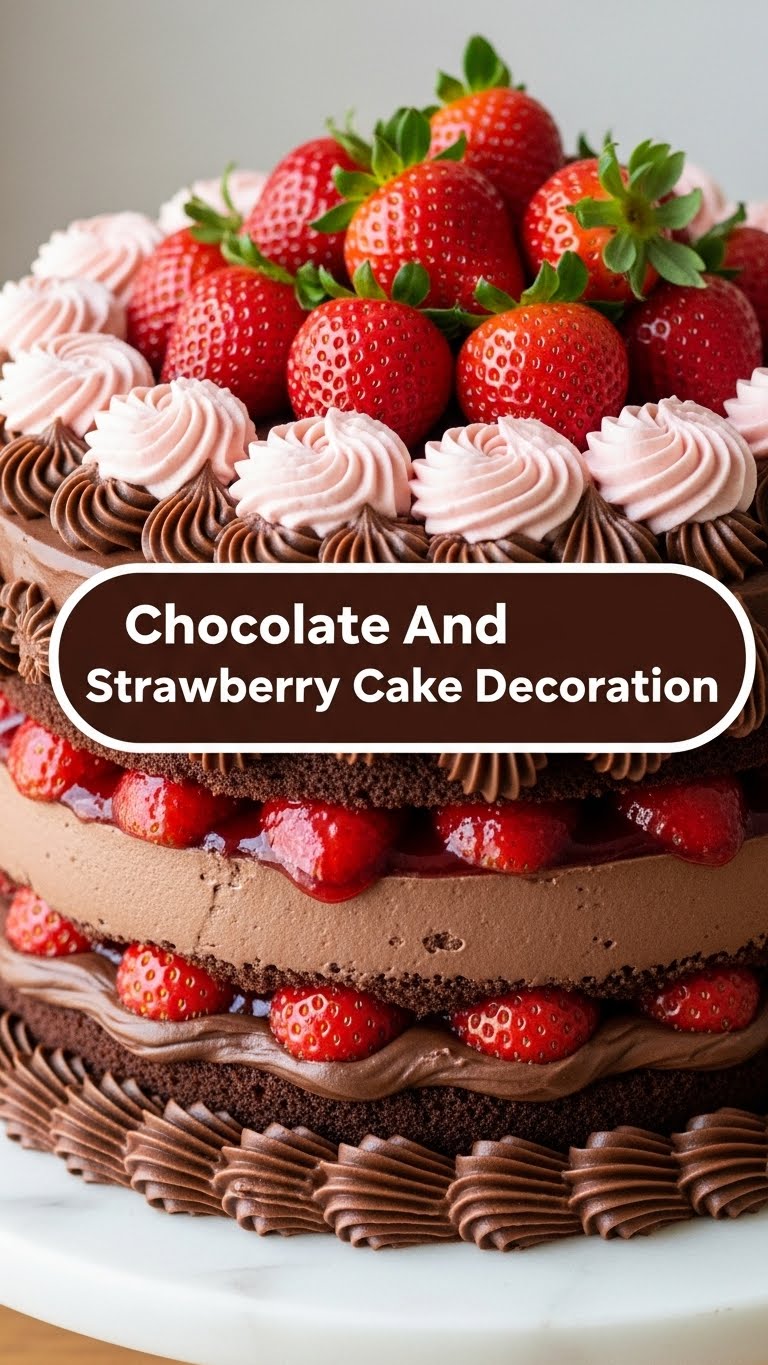
So, you’ve either just baked a masterpiece of a cake (go you!) or, like me, you’ve charmingly “rescued” a perfectly good one from the supermarket bakery aisle. And now it’s sitting there, looking a bit… well, plain. A blank canvas, if you will, just begging for a glow-up. Don’t worry, my friend, we’re about to transform that humble cake into a showstopper that screams “I know what I’m doing!” without actually requiring you to *know what you’re doing*. Get ready for some chocolate and strawberry magic that’s ridiculously easy and incredibly delicious.
Why This Decoration Is Awesome
Because who has time for complicated stuff, honestly? This isn’t just a “decoration”; it’s an experience. It’s the kind of cake embellishment that makes people gasp (in a good way!) and ask, “Did *you* do that?!” Yes, you did, and with minimal effort. It’s the perfect blend of rich chocolate and fresh, juicy strawberries—a combo so classic, it’s practically royalty. Plus, it’s **idiot-proof**, I swear. Even I managed to make it look decent, and my last attempt at “culinary artistry” involved me burning toast… twice.
Ingredients You’ll Need
Gather ’round, fellow kitchen adventurers! Here’s your loot list:
- Your Cake Canvas: A chocolate, vanilla, or even red velvet cake. No judgment if it’s store-bought; we’re here to decorate, not judge your baking prowess! (Around 8-9 inches is ideal, but adapt as needed.)
- Glorious Frosting: One big tub of chocolate frosting (or homemade, if you’re feeling extra fancy). You can also grab some strawberry or cream cheese frosting for a delightful contrast. Think thick, delicious layers.
- Fresh Strawberries: About 1-2 punnets, depending on how “berry-licious” you want your cake to be. Look for the plump, vibrant ones. They’re basically nature’s jewels.
- Chocolate for Shavings/Drizzle: A good quality bar of dark or milk chocolate (around 50-100g). Because more chocolate is always the answer. IMO.
- Optional Sparkle: A few sprinkles, edible glitter, or fresh mint leaves if you want to get *really* extra.
Step-by-Step Instructions
- Chill Out, Cake: First things first, make sure your cake is completely cool. **Seriously, don’t skip this part.** Trying to frost a warm cake is like trying to ice-skate on butter – a messy, melty disaster.
- Frost It Up! Generously spread your chosen frosting all over your cooled cake. Don’t be shy! A palette knife or offset spatula works wonders, but a plain old butter knife is totally fine too. Don’t aim for perfection; a rustic, homemade look is super chic right now.
- Strawberry Power! Wash your strawberries gently and pat them thoroughly dry with a paper towel. Decide on your “berry strategy”:
- Halves: For a classic look, cut them in half and arrange them around the edge or in a pretty pattern.
- Whole: If they’re small and cute, leave some whole for a more rustic vibe.
- Slices: For fanning effects or a more delicate touch, slice a few thinly.
Start arranging them on top of your frosted cake. You can make a neat ring, a cluster in the center, or go wild and cover the entire top. Get creative!
- Chocolate Shenanigans: Now for the chocolatey goodness!
- Shavings: Use a vegetable peeler or a sharp knife (carefully!) to make delicate chocolate curls from your chocolate bar. Sprinkle these generously over the strawberries and cake. They look fancy AF with zero effort.
- Drizzle: Melt a bit of your chocolate bar (microwave in 15-30 second bursts, stirring well in between). Drizzle it artistically over the top of the cake and strawberries. Don’t overthink it; messy, swirly lines look amazing here!
- Finishing Touches (Optional, but Fun): If you have sprinkles, edible glitter, or a few fresh mint leaves, now’s the time to scatter them for that extra “oomph.” And just like that, you’re basically a professional patissier. Boom!
Common Mistakes to Avoid
Listen up, buttercup! Learn from my past kitchen mishaps:
- The “Warm Cake Disaster”: Trying to frost a warm cake. It’s like trying to put sunscreen on a melting snowman. Your frosting will slide off, and you’ll be left with a sad, streaky mess. **Patience, my friend, is a virtue.**
- Wet Berries, No Thanks: Not drying your strawberries properly. Excess water can make your frosting weep, or the berries look dull. Give those beauties a good pat-down!
- Skimping on the Frosting: Don’t be afraid to use a good amount. This isn’t the time for calorie counting (we’re decorating cake, remember?). **Generous frosting makes everything better.**
- Chasing Perfection: Seriously, stop. This isn’t a competition. The beauty of this decoration is its slightly imperfect, homemade charm. Embrace the “artfully messy” look; it’s what makes it *yours*.
Alternatives & Substitutions
Feeling rebellious? Here are some ways to shake things up:
- Berry Swap: Not a strawberry fan? **Sacrilege!** Kidding (mostly). You could totally use raspberries, cherries, blueberries, or even a mix of berries. Just make sure they’re fresh and dry.
- Chocolate Variations: White chocolate drizzle instead of dark? Milk chocolate shavings? Go for it! Or skip the melted chocolate and just do shavings. Your cake, your rules.
- Frosting Fun: While chocolate frosting is a classic, a cream cheese frosting or even a simple vanilla buttercream would also be divine. Or layer different frostings for a surprise!
- Nutty Nudges: A sprinkle of toasted slivered almonds, chopped pistachios, or even some shredded coconut could add a nice crunch and textural contrast.
FAQ (Frequently Asked Questions)
Got questions? I’ve got answers (mostly humorous ones):
- “Can I decorate my cake straight from the oven?”
Oh, bless your enthusiastic heart. No. Please, for the love of all that is delicious, let it cool completely. Otherwise, you’ll have a frosting slip-n-slide. - “How long will my beautifully decorated cake last?”
In my house? About 15 minutes. Realistically, if stored in the fridge, it’s best eaten within 2-3 days, especially with fresh fruit. The strawberries might get a bit soft after day one, but it’ll still taste amazing. - “Do I have to use fresh strawberries?”
For this specific look, yes. Frozen berries will release too much water as they thaw and make a glorious, watery mess. Save those for smoothies! - “Can I use store-bought cake and frosting?”
**Absolutely!** That’s half the genius of this “recipe.” We’re just elevating it to superstar status. No judgment here, only deliciousness. - “What if my chocolate shavings aren’t perfect?”
Honey, “perfect” is overrated. Rustic, slightly chunky, or even broken bits of chocolate are just as charming. It’s all about the flavor and the love, right? - “Can I prepare the strawberries ahead of time?”
You can wash and dry them a few hours in advance and keep them in the fridge, but it’s best to slice/hull them right before decorating to keep them looking their freshest. - “Is it okay if I eat some of the frosting/strawberries while decorating?”
Is the Pope Catholic? It’s practically a requirement. Consider it quality control.
Final Thoughts
See? That wasn’t so hard, was it? You just turned a regular cake into a showstopper, and probably didn’t even break a sweat (unless you were aggressively taste-testing the frosting). Now go impress someone—or yourself, which is arguably more important—with your new culinary *art* skills. You’ve totally earned that slice (or three). Enjoy!

