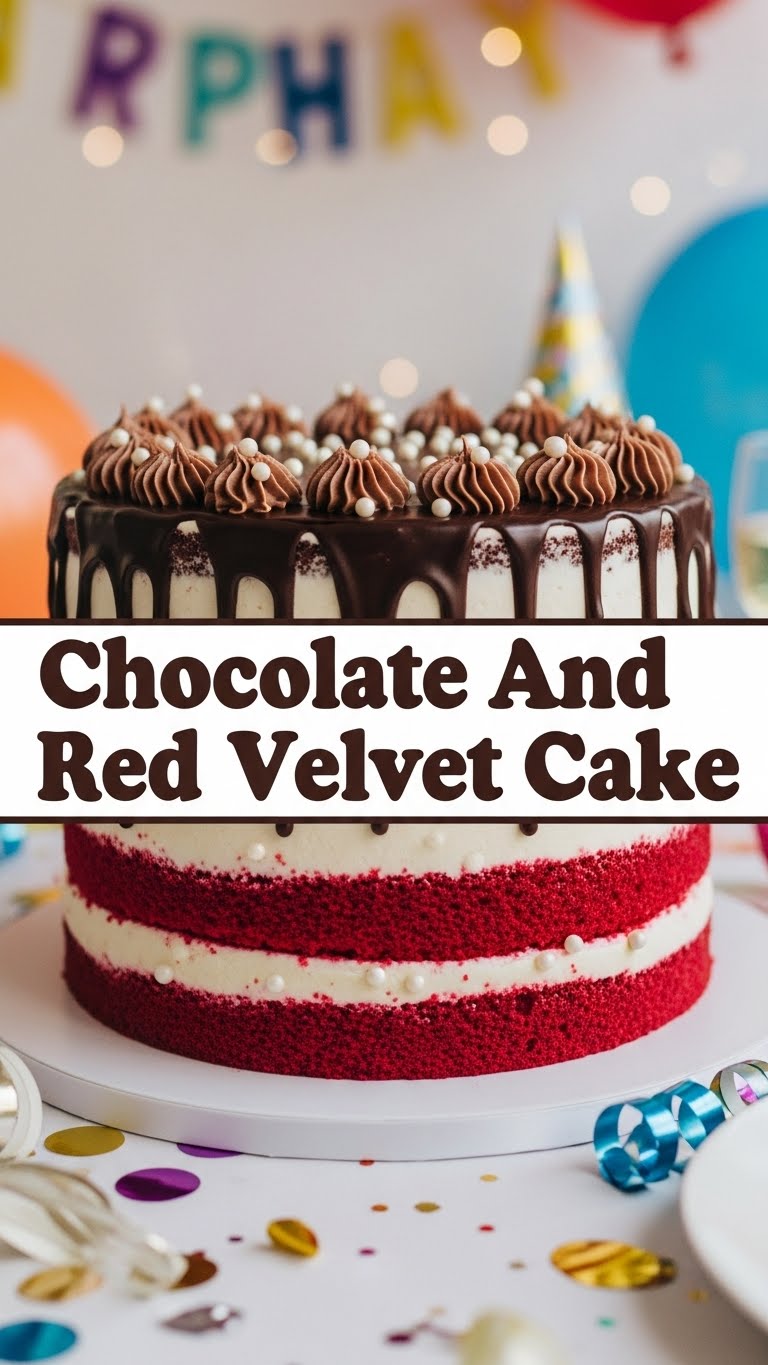
Ever stare at your pantry, then your phone, then back at your pantry, wondering how to make something epic without, like, *effort*? Me too, friend. Life’s too short for complicated recipes, but definitely not too short for cake. Especially when that cake is a dreamy mashup of rich chocolate and tangy red velvet. Yeah, you heard me. We’re talking about a Chocolate & Red Velvet Dream Cake. Get ready to impress yourself (and maybe some friends, if you’re feeling generous).
Why This Recipe is Awesome
Okay, so why this cake and not, like, a store-bought one? Simple. This isn’t just a cake; it’s a statement. It’s the culinary equivalent of wearing sweatpants but still looking fabulous. First off, it’s basically two cakes in one. Who needs to choose when you can have both? Secondly, it’s surprisingly straightforward. I swear, it’s practically **idiot-proof** – even *I* didn’t mess it up, and my kitchen skills sometimes involve setting off the smoke alarm with toast. You get that moist, decadent chocolate layer, paired with the iconic, slightly tangy red velvet, all wrapped up in a cloud of creamy, dreamy frosting. It’s a flavor party, and everyone’s invited. Plus, the compliments? Oh, they’ll roll in. You’re welcome.
Ingredients You’ll Need
Before we dive into the deliciousness, let’s gather our edible arsenal. Don’t stress, most of these are pantry staples, or easily found at your local grocery store. No obscure dragon’s breath or unicorn tears required, promise.
For the Chocolate Cake Layer:
- 1 ½ cups All-purpose flour: The unsung hero, the OG.
- 1 ½ cups Granulated sugar: Sweetness incarnate.
- ¾ cup Good quality cocoa powder: Because sad cocoa makes sad cake. Get the dark stuff if you’re feeling feisty.
- 1 ½ tsp Baking soda: The lift-off agent.
- ¾ tsp Salt: Don’t skip it! It brings out all the flavors.
- ¾ cup Buttermilk: Tangy goodness. If you don’t have it, mix 1 tbsp white vinegar or lemon juice with regular milk and let it sit for 5 mins. Voila!
- ¾ cup Hot water or coffee: Seriously, coffee enhances chocolate like nobody’s business.
- ½ cup Vegetable oil: For that beautiful moisture.
- 1 large Egg: Binder extraordinaire.
- 1 tsp Vanilla extract: A must for any cake.
For the Red Velvet Cake Layer:
- 1 ½ cups All-purpose flour: Again, the MVP.
- 1 ½ cups Granulated sugar: Sweet, sweet sugar.
- 1 tbsp Unsweetened cocoa powder: Just a touch, for that classic red velvet depth.
- 1 tsp Baking soda: Lift, baby, lift!
- ½ tsp Salt: Flavor balancer.
- 1 cup Buttermilk: See above for the quick DIY trick!
- ½ cup Vegetable oil: Moisture, moisture, moisture.
- 1 large Egg: Another binder.
- 1 tsp Vanilla extract: Essential.
- 1 tbsp White vinegar: Reacts with the baking soda for that signature red velvet tang and texture.
- 2-3 tbsp Red food coloring (gel works best!): The star of the show! Don’t be shy, we want *RED* velvet.
For the Cream Cheese Frosting:
- 1 (8 oz) package Cream cheese: Softened, brick style. Not the spreadable kind, unless you like soup-frosting.
- ½ cup (1 stick) Unsalted butter: Softened. Because you control the salt, not some factory.
- 4-5 cups Powdered sugar (confectioners’ sugar): Sifted, to avoid lumps. Lumpy frosting is a no-go.
- 1-2 tsp Vanilla extract: Frosting needs love too!
- 1-2 tbsp Milk (optional): To adjust consistency, if needed.
Step-by-Step Instructions
Alright, ovens on! Let’s get baking. We’re going to make two separate batters, then bake them, and finally, smother them in frosting. Easy peasy, lemon squeezy.
Prep Work (for both cakes):
- First things first: **Preheat your oven to 350°F (175°C)**.
- Grease and flour two 8-inch or 9-inch round cake pans. Or line them with parchment paper, whatever floats your boat.
Chocolate Cake Time:
- In a large bowl, whisk together the flour, sugar, cocoa powder, baking soda, and salt. Make sure there are no lumps, we want smooth sailing.
- In a separate bowl, whisk together the buttermilk, hot water (or coffee), vegetable oil, egg, and vanilla extract until well combined.
- Pour the wet ingredients into the dry ingredients. Mix on low speed (or by hand) until *just* combined. **Do NOT overmix!** Overmixing leads to tough cake, and we hate tough cake.
- Pour the chocolate batter into one of your prepared cake pans.
Red Velvet Rendezvous:
- In another large bowl, whisk together the flour, sugar, cocoa powder, baking soda, and salt for the red velvet.
- In a separate bowl, whisk together the buttermilk, vegetable oil, egg, vanilla extract, and white vinegar.
- Now for the fun part: add the red food coloring to the wet ingredients. Start with 2 tablespoons and add more if you want a deeper red. Mix well until it’s beautifully vibrant.
- Pour the red velvet wet ingredients into the dry ingredients. Mix on low speed (or by hand) until *just* combined. Again, **no overmixing!**
- Pour the red velvet batter into your second prepared cake pan.
Bake & Cool:
- Place both cake pans into your preheated oven. Bake for 30-35 minutes, or until a toothpick inserted into the center of each cake comes out clean.
- Once baked, remove the cakes from the oven and let them cool in the pans for about 10-15 minutes. This is crucial!
- After 10-15 minutes, carefully invert the cakes onto a wire rack to **cool completely**. Seriously, they need to be completely cool before frosting, or you’ll have a melty, sliding mess.
Frosting Fun:
- While the cakes cool, let’s make that glorious cream cheese frosting. In a large bowl, using an electric mixer, beat the softened cream cheese and softened butter together until smooth and creamy.
- Gradually add the sifted powdered sugar, one cup at a time, beating after each addition until fully incorporated. Start on low speed to avoid a sugar cloud!
- Stir in the vanilla extract. If your frosting seems too thick, add milk a tablespoon at a time until it reaches your desired consistency. If it’s too thin, add more powdered sugar.
Assemble Your Masterpiece:
- Once both cakes are **completely chilled** (you can even pop them in the fridge for a bit to speed this up), it’s time to assemble!
- Place one cake layer (your choice which one goes on the bottom, I like chocolate first) on your serving plate or cake stand. Spread about a third of the frosting evenly over the top.
- Carefully place the second cake layer on top. Apply the remaining frosting to the top and sides of the cake. Use an offset spatula or knife for a smooth finish. Get creative!
- Optional: Decorate with some chocolate shavings, red velvet crumbs, or sprinkles if you’re feeling extra fancy.
- Slice, serve, and bask in the glory of your delicious creation!
Common Mistakes to Avoid
Even the best of us slip up sometimes, but with these tips, you’ll dodge the most common cake-baking blunders like a pro. Think of me as your baking fairy godmother, but with more sarcasm.
- Not Preheating the Oven: Rookie mistake! Your oven needs to be at the correct temperature *before* the cakes go in. Otherwise, your cake won’t rise properly, and you’ll end up with dense, sad hockey pucks.
- Overmixing the Batter: I can’t stress this enough. Mix until *just* combined. Overmixing develops the gluten too much, resulting in a tough, chewy cake. We want tender and moist, not “arm workout in a slice.”
- Opening the Oven Door Too Soon: Patience, young padawan! Opening the oven door lets out heat and can cause your cakes to collapse in the middle. Wait until at least ¾ of the baking time has passed before peeking.
- Not Cooling Cakes Completely Before Frosting: This is a cardinal sin. If your cakes are even slightly warm, your beautiful frosting will melt and slide right off, creating a sad, sticky mess. Seriously, chill out.
- Using Cold Ingredients (for frosting): Your cream cheese and butter *must* be at room temperature for the frosting to be smooth and lump-free. Otherwise, you’ll be fighting lumps forever, and no one has time for that.
Alternatives & Substitutions
Baking is an art, but it’s also about making it work for *you*. Here are a few swaps and tweaks if you’re missing something or just want to experiment:
- Buttermilk: No buttermilk? No problem! Mix a tablespoon of lemon juice or white vinegar into regular milk and let it sit for 5 minutes. Boom, instant buttermilk!
- Cocoa Powder: If you only have regular unsweetened cocoa, that’s fine. For a deeper, darker chocolate, use Dutch-processed cocoa powder.
- Vegetable Oil: You can typically use any neutral-flavored oil like canola oil or even melted coconut oil (if you don’t mind a slight coconut flavor). Butter can be swapped, but oil often makes for a moister cake.
- Red Food Coloring: For a more natural approach, you can try beetroot powder or juice, but be warned, the color won’t be as vibrant, and it might impart a slight earthy taste. IMO, sometimes you just gotta embrace the artificial for that iconic red.
- Frosting Flavors: Not a fan of cream cheese? You could do a classic buttercream, or even a chocolate ganache. You could also add a touch of almond extract to your cream cheese frosting for a subtle twist.
FAQ (Frequently Asked Questions)
Got questions? I’ve got answers. Mostly. Don’t worry, these are common queries, and I’m here to help you navigate them without judging your cake-making prowess.
Q: Can I make this cake in advance?
A: Absolutely! The unfrosted cake layers can be wrapped tightly in plastic wrap and stored at room temperature for up to 2 days, or frozen for up to 2-3 weeks. Just thaw them before frosting. The frosted cake keeps well in the fridge for 3-4 days. Perfect for planning ahead!
Q: Why did my red velvet cake turn brown instead of red?
A: A few culprits here: not enough red food coloring (don’t be shy!), or you might have overbaked it. Overbaking can dull the color. Also, if your cocoa powder is too dark, it can overpower the red. Use just a tablespoon as specified!
Q: Can I use oil instead of butter in the cake batter?
A: This recipe actually *uses* oil for superior moisture! If you’re thinking about swapping for butter, you can, but the texture might be slightly different. Oil-based cakes are usually more moist and tender.
Q: Is red velvet just chocolate cake with red dye?
A: Nope! That’s a common misconception. While it contains cocoa, red velvet cake has a distinct tang from the buttermilk and vinegar, which react with the baking soda to create its unique flavor and often a tender crumb. It’s a whole different vibe!
Q: How do I know when the cake is done baking?
A: The classic toothpick test! Insert a toothpick into the center of the cake. If it comes out clean (maybe with a few moist crumbs clinging to it), your cake is done. If it’s gooey, give it a few more minutes.
Q: My frosting is too thin/thick! Help!
A: No stress! If it’s too thin, gradually add more sifted powdered sugar until it thickens up. If it’s too thick, add milk (a teaspoon at a time) until it reaches your desired spreadable consistency. Easy fix!
Q: Can I use margarine instead of butter in the frosting?
A: Well, technically yes, but why hurt your soul like that? Butter provides a richer flavor and better texture for frosting. Margarine can work, but the taste and creaminess won’t be quite the same. IMO, splurge on the butter for this one.
Final Thoughts
You did it! You just baked a masterpiece, friend! Whether you’re sharing this glorious Chocolate & Red Velvet Dream Cake with loved ones or hoarding it all for yourself (no judgment here!), you’ve earned every single delicious bite. This cake is proof that amazing things don’t always require a culinary degree or hours of slaving away. Now go impress someone—or yourself—with your new culinary skills. You’ve earned it!


