So you’re scrolling, maybe procrastinating (definitely guilty!), and suddenly BAM! Chili Rellenos cravings hit hard. But also, your couch is just *so* comfy, right? And the thought of deep-frying anything right now just feels like too much adulting. Same, friend, same.
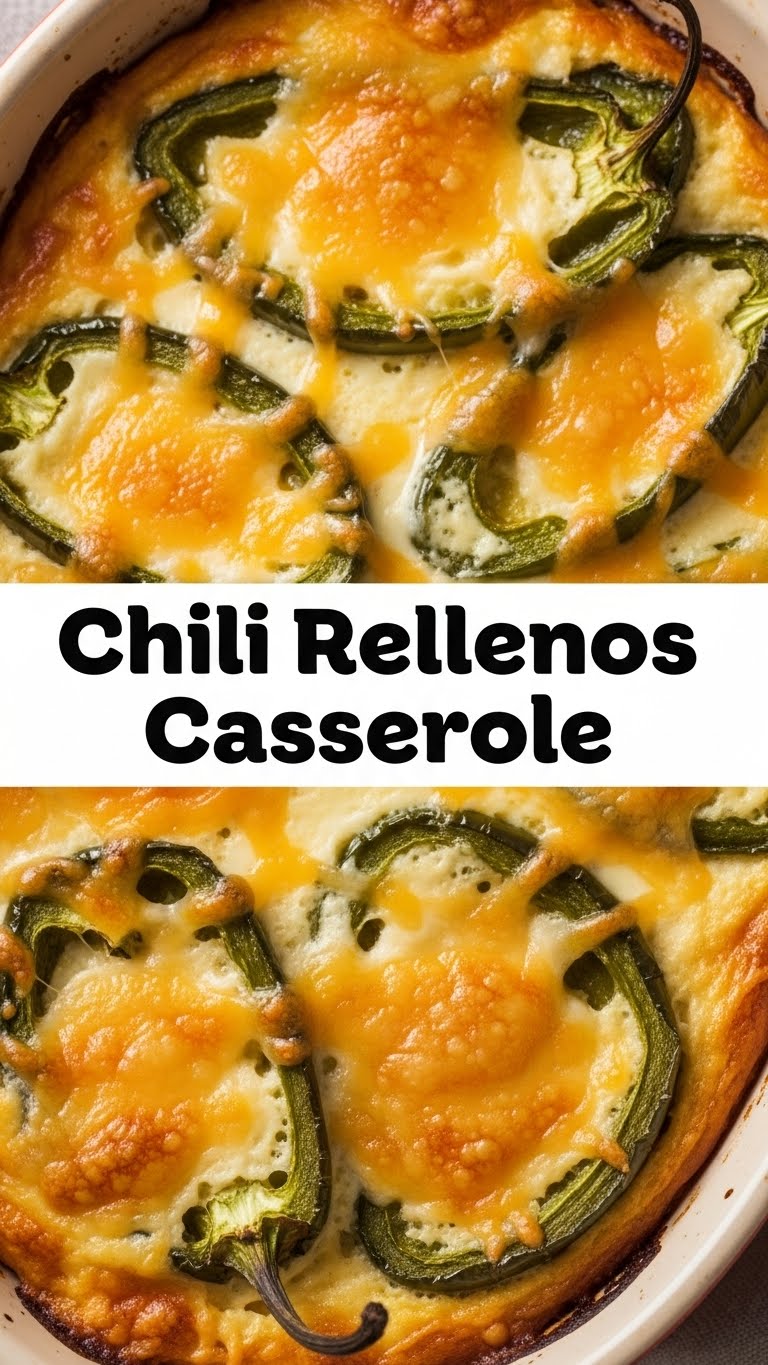
Enter the hero of our story: the **Chili Rellenos Casserole**. All the cheesy, spicy, comforting goodness you dream of, without the oil splatters or the “will it hold together?” anxiety. It’s basically a hug in a casserole dish, and honestly, don’t we all need one of those?
Why This Recipe is Awesome
Seriously, this isn’t just a recipe; it’s a culinary cheat code. You get that authentic chili rellenos flavor but in a ridiculously easy, oven-baked format. It’s like, you wanted a gourmet meal, but your effort level was stuck on ‘ordering pizza,’ and this recipe magically meets you in the middle. It’s virtually impossible to mess up, even if your usual kitchen adventures involve setting off the smoke detector. Plus, it’s a brilliant excuse to eat a giant pile of cheese and chiles for dinner. And who needs an excuse for that, really? Not us, that’s for sure. It’s perfect for a weeknight, a potluck, or just a Tuesday when you feel like being awesome.
Ingredients You’ll Need
Gather your troops, because we’re about to make magic. No fancy stuff, just pure, unadulterated deliciousness.
- **Whole Green Chiles (4 oz cans, 2-3 cans):** Get the whole ones, friends, not diced. We’re layering here, not making a salsa. Gently flatten them out. Drain ’em well!
- **Shredded Cheese (2 cups total):** A mix of Monterey Jack and sharp Cheddar is my personal MVP combo, but honestly, any good melty cheese works. Don’t skimp; this is your life force.
- **Large Eggs (6):** The glorious glue that holds our cheesy, chile dreams together.
- **Whole Milk (1/2 cup):** Whole milk, because flavor. We’re already eating a mountain of cheese, don’t pretend you’re on a diet now.
- **All-Purpose Flour (1/4 cup):** Just a tiny bit, to give our egg custard a lovely, light body.
- **Salt (1/2 teaspoon):** Crucial for flavor, obviously.
- **Black Pepper (1/4 teaspoon):** A little kick.
- **Garlic Powder (1/4 teaspoon, optional):** Because garlic makes everything better, IMO.
- **Cooking Spray or Butter:** For greasing that dish like a pro.
Step-by-Step Instructions
Alright, apron on (or not, we’re informal here), let’s get cooking! These steps are so easy, you’ll wonder why you ever hesitated.
- **Preheat Your Oven & Prep Your Dish:** Crank that oven to **350°F (175°C)**. While it’s warming up, grab a 9×13 inch baking dish and give it a good spray with cooking spray or smear it with butter. We want zero stickage.
- **First Layer of Chiles:** Take about half of your drained, flattened green chiles and arrange them in a single layer on the bottom of your prepared dish. Overlap them a bit, like you’re making a cozy blanket for the cheese.
- **Cheese, Glorious Cheese:** Sprinkle about 1 cup of your shredded cheese blend evenly over the chiles. Because, cheese.
- **Second Layer of Chiles & Cheese:** Now, lay the remaining chiles over the cheese. Top that with another generous cup of shredded cheese. You’re building a cheesy tower of deliciousness!
- **Whip Up the Custard:** In a medium bowl, whisk together the eggs, milk, flour, salt, pepper, and garlic powder (if using). Whisk until everything is just combined and smooth, but don’t overdo it—we’re not making soufflé.
- **Pour & Bake:** Carefully pour this eggy mixture evenly over your layered chiles and cheese in the baking dish. Gently tilt the dish a bit to make sure it seeps into all the nooks and crannies.
- **Bake Until Golden:** Pop that beauty into your preheated oven and bake for **40-50 minutes**, or until the top is golden brown, bubbly, and a knife inserted near the center comes out clean.
- **Rest & Serve:** This is the hardest part: let it rest for at least **10-15 minutes** after taking it out of the oven. This helps it set properly so you get nice, clean slices (or messy, enthusiastic scoops—your call!). Then, dig in!
Common Mistakes to Avoid
Listen, we all make mistakes. But with this recipe, we’re gonna try to dodge the common pitfalls. Consider this your cheat sheet to casserole perfection.
- **Not Draining Your Chiles Properly:** This is a biggie! If your chiles are swimming in liquid, your casserole will be watery and sad. Squeeze out that excess moisture like your life depends on it. Nobody wants a soggy bottom, especially not your casserole.
- **Over-mixing the Egg Mixture:** Whisk, don’t whip! We’re creating a gentle binding custard, not trying to achieve peaky stiff meringue. Over-mixing can make it tough.
- **Skipping the Resting Period:** Patience, my friend, is a virtue. And it prevents your casserole from collapsing into a tragic, delicious mess when you try to serve it too soon. Give it those 10-15 minutes!
- **Forgetting to Grease the Dish:** This one seems obvious, but hey, it happens! A properly greased dish means easy serving and less scrubbing later. Your future self will thank you.
Alternatives & Substitutions
Feeling creative? Or just working with what you’ve got? No problem! This casserole is super flexible, like a yoga instructor but way more delicious.
- **Cheese Swap:** Not a fan of Monterey Jack? Try Colby Jack, Pepper Jack (if you want an extra kick!), or even a blend with some mild Swiss. Just make sure it’s a good melty cheese.
- **Add Some Meat:** Want to make it a heartier meal? Cooked and crumbled ground beef, shredded chicken, or even some spicy chorizo would be amazing. Just brown it, drain any fat, and spread it as an additional layer (maybe under the first cheese layer).
- **Spice It Up!** For those who like it hot, sprinkle some diced fresh jalapeños or a pinch of cayenne pepper into the egg mixture. A dash of your favorite hot sauce is also a good idea.
- **Different Chiles:** If you’re feeling ambitious, roast and peel your own poblano peppers! They have a fantastic flavor, but frankly, canned whole green chiles are a fantastic, convenient stand-in.
- **Dairy-Free:** You can absolutely try this with dairy-free shredded cheese and plant-based milk. Just ensure your chosen dairy-free cheese melts well, as some can be a bit… stubborn.
FAQ (Frequently Asked Questions)
You’ve got questions, I’ve got (casual) answers! Let’s clear up any lingering mysteries.
- **Can I use canned diced chiles?** Technically, yes, but it won’t have the same robust, layered *oomph*. It’ll be more like a cheesy chile scramble. Still delicious, but a different vibe. Stick to whole if you can for the full experience.
- **Is this casserole spicy?** Not usually! Canned green chiles are generally very mild. If you want heat, you’ll need to add some fresh jalapeños, serranos, or a spicier cheese.
- **Can I make this ahead of time?** Absolutely! Assemble everything (steps 1-6), cover it tightly with plastic wrap, and refrigerate for up to 24 hours. When you’re ready to bake, pull it out while the oven preheats, and add about 10-15 minutes to the baking time since it’s starting cold.
- **What do I serve with it?** Oh, the possibilities! Sour cream, salsa (red or green), guacamole, fresh cilantro, chopped green onions, or even just a simple side salad. Or, honestly, just a fork. No judgment here.
- **What if my casserole is still jiggly after 40 minutes?** Keep baking, buttercup! Oven temperatures can vary. It’s done when it’s golden brown, set in the middle, and a knife comes out clean. It might just need a few more minutes.
- **Can I add other vegetables?** Sure! Sautéed onions, bell peppers, or even a handful of spinach would be tasty additions. Just make sure they’re cooked and drained of any excess moisture before adding them to the layers.
Final Thoughts
So there you have it, your new go-to for when you want to feel fancy without actually *being* fancy. This Chili Rellenos Casserole is proof that comfort food doesn’t have to be complicated to be utterly divine. Go forth, conquer your kitchen, and devour this cheesy masterpiece. You’ve earned it, superstar! Now, if you’ll excuse me, I hear my own casserole calling my name…


