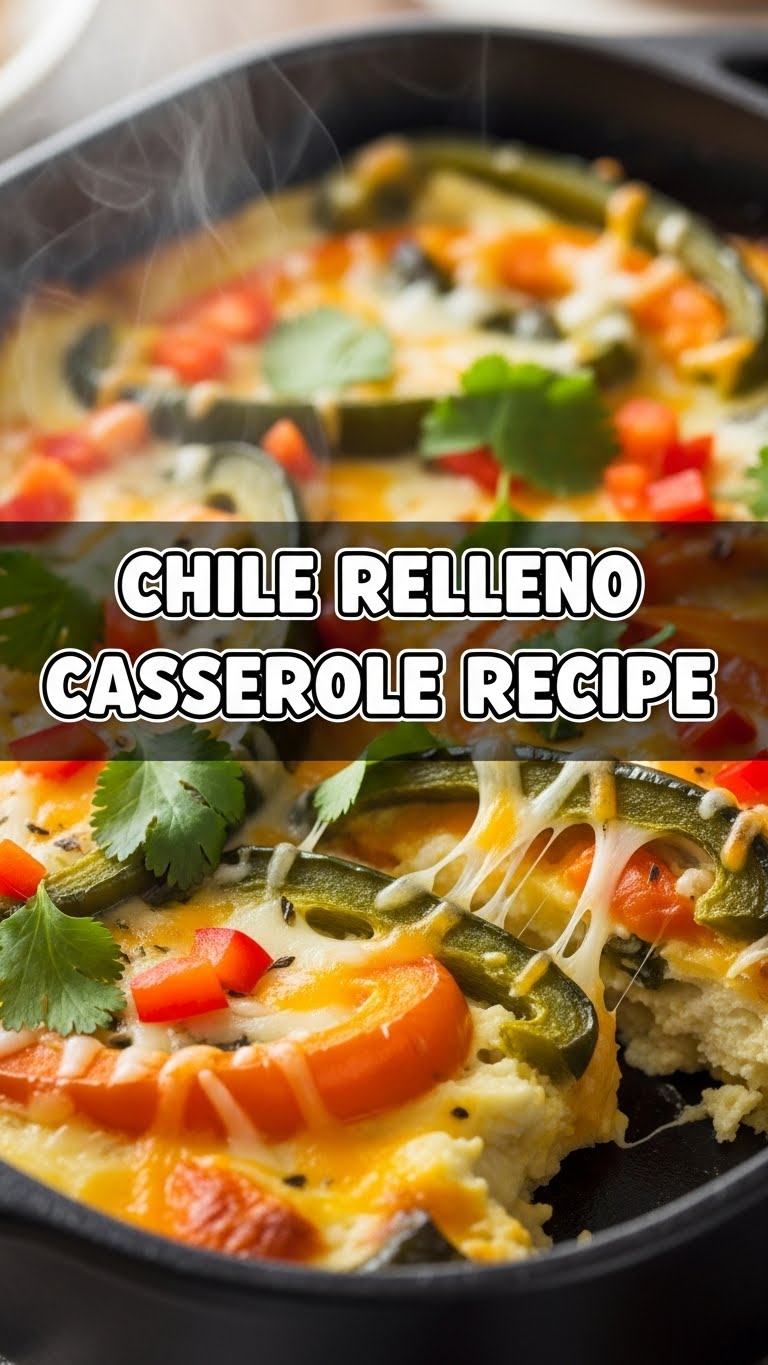
So you’re craving something warm, cheesy, and just a little bit spicy, but the thought of individually stuffing and frying peppers makes you want to curl up and cry? Been there, done that, bought the T-shirt. Good news, my friend! We’re about to dive headfirst into the glorious world of **Chile Relleno Casserole**. It’s all the epic flavor of classic chile rellenos, minus 90% of the effort and 100% of the deep-fryer-induced anxiety. You ready? Let’s do this!
Why This Recipe is Awesome
Okay, let’s be real. Traditional chile rellenos are a labor of love. A delicious, grease-splattering, often-comes-undone-in-the-pan kind of labor. This casserole, however? It’s the chill older sibling who knows all the shortcuts. It’s **idiot-proof**, I swear. Even I, Queen of Occasionally-Burning-Water, manage to pull this off beautifully every single time. It’s also:
- **Effortless AF:** No individual stuffing, no messy frying. Just layer, pour, and bake. Boom!
- **Seriously Delicious:** All that cheesy, eggy, roasted chile goodness, just in casserole form. Your taste buds will throw a party.
- **Feeds a Crowd (or just you, for days):** This bad boy makes a decent-sized dish, perfect for sharing or for epic leftovers. No judgment here if you hoard it all.
- **Customizable:** Wanna get wild? Add some cooked chicken! Feel like extra cheese? Go for it! This recipe is your canvas.
Ingredients You’ll Need
Gather ’round, my culinary comrades! Here’s your shopping list. Don’t worry, nothing too exotic here. We’re keeping it simple and delicious.
- **2 (27-ounce) cans whole green chiles:** Look for “Hatch” if you can find them, but any good quality whole green chiles work. **Definitely drain these well!** Nobody wants a watery casserole.
- **2 cups (about 8 ounces) shredded Monterey Jack cheese:** Or a Mexican blend. Or cheddar. Or a mix! Just make sure it melts nicely and you love it. This is not the time to be shy with cheese.
- **1 cup (about 4 ounces) shredded Colby Jack cheese:** Or more Monterey Jack. You know the drill. Cheese is life.
- **6 large eggs:** The glue that holds our cheesy dreams together.
- **1 cup milk:** Whole milk works best for richness, but 2% is fine. Don’t even *think* about skim. Kidding… mostly.
- **1/4 cup all-purpose flour:** Just a little bit to help thicken things up and prevent a totally watery disaster.
- **1/2 teaspoon salt:** Basic seasoning, yo.
- **1/4 teaspoon black pepper:** Because flavor.
- **Optional toppings:** Sour cream, salsa, chopped cilantro, sliced avocado. Because why not go all out?
Step-by-Step Instructions
Alright, apron on, favorite tunes blasting? Let’s make some magic happen in that kitchen!
- **Preheat Your Oven & Prep Your Dish:** Get that oven up to **350°F (175°C)**. While it’s heating, lightly grease a 9×13 inch baking dish. Nobody likes a stuck casserole.
- **Wrangle Those Chiles:** Open those cans of whole green chiles and for the love of all that is holy, **drain them really, really well**. You can even gently pat them dry with a paper towel. Then, lay half of them flat in a single layer on the bottom of your greased baking dish.
- **Cheese Layer #1:** Sprinkle about half of your total shredded cheese (the Monterey Jack and Colby Jack combined) evenly over the chiles. Because layers of cheese are superior.
- **More Chiles!:** Top that cheesy goodness with the remaining half of your chiles. Another even layer, please.
- **Egg-y Goodness Time:** In a medium bowl, whisk together the eggs, milk, flour, salt, and pepper until it’s all smooth and beautifully combined. This is your custard base, your delicious binder!
- **Pour & Cover:** Carefully pour the egg mixture evenly over the chiles and cheese in the baking dish. Make sure it gets into all the nooks and crannies.
- **Cheese Layer #2 (The Grand Finale):** Sprinkle the remaining half of your shredded cheese over the top. This will give you that glorious, golden-brown crust.
- **Bake It ‘Til Bubbly:** Pop that masterpiece into your preheated oven and bake for **35-45 minutes**. You’re looking for it to be set in the center (no jiggle!), golden brown on top, and deliciously bubbly around the edges.
- **Rest & Serve:** Once it’s out of the oven, let it rest for about 5-10 minutes. This helps it set up nicely for easier slicing. Then, dish it out, top with your favorite fixings (sour cream! salsa!), and bask in the glory.
Common Mistakes to Avoid
Look, we all make mistakes. But with a little heads-up, you can avoid these classic casserole blunders and keep your kitchen karma intact!
- **Not Draining the Chiles:** This is the #1 culprit for a watery, sad casserole. Seriously, squeeze ’em dry if you have to!
- **Under-baking:** You want that egg mixture set, not jiggly. An under-baked casserole can be a bit… unappetizing. Give it the time it needs!
- **Over-baking:** On the flip side, over-baking can make the eggs rubbery. Keep an eye on it after the 35-minute mark. You want golden and set, not dried out.
- **Skimping on Cheese:** This isn’t a “diet” recipe, my friend. Embrace the cheese. **IMO**, more cheese is never a mistake.
- **Not Greasing the Dish:** Unless you enjoy chiseling your dinner out of the pan, don’t skip this step.
Alternatives & Substitutions
Feeling creative? Or just missing an ingredient? No worries, this recipe is super forgiving! Here are some ideas:
- **Chiles:** Can’t find whole green chiles? You can use roasted poblano peppers (fresh, roasted, and peeled yourself for extra cred!), or even a mix of diced green chiles (though the whole ones give a better texture).
- **Cheese:** While Monterey Jack and Colby Jack are stars, feel free to use cheddar, a good Oaxaca cheese, or even some pepper jack if you want an extra kick!
- **Add-ins:** Want to make it a heartier meal? Layer in some cooked, shredded chicken, browned ground beef, or even some crumbled cooked chorizo between the chile layers. Just make sure any meat is already cooked!
- **Spicy Factor:** If you want more heat, add a pinch of cayenne pepper to your egg mixture, or layer in some diced jalapeños with your chiles. Careful, spice fiends!
FAQ (Frequently Asked Questions)
Got questions? I’ve got (casual) answers!
- **Can I use canned diced green chiles?**
Technically yes, but I much prefer the texture and “oomph” of the whole ones. If using diced, just make sure they’re super drained, like, seriously drained. - **Can I make this ahead of time?**
Absolutely! You can assemble the whole thing, cover it, and pop it in the fridge for up to 24 hours. Just let it come closer to room temp before baking, and add about 10-15 minutes to the baking time. - **What if I don’t have a 9×13 dish?**
You can use a slightly smaller rectangular or even a round baking dish. Just be aware the baking time might vary, and it might be a bit thicker. Adjust as needed! - **Is it really spicy?**
Not usually! Canned whole green chiles are typically pretty mild. If you want more heat, see the “Alternatives” section for how to amp it up. - **Can I freeze leftovers?**
Yep! This casserole freezes surprisingly well. Just wrap individual portions tightly or store in an airtight container for up to 3 months. Thaw and reheat gently. - **Why do you recommend whole milk?**
It just gives a richer, creamier texture to the egg custard. You *can* use lower fat milk, but your casserole might feel a tiny bit less luxurious. Your call!
Final Thoughts
There you have it, folks! Your new go-to recipe for when you want delicious, comforting, cheesy goodness without the culinary acrobatics. This Chile Relleno Casserole is a crowd-pleaser, a comfort food hero, and honestly, just plain delightful. Now go impress someone—or yourself—with your new culinary skills. You’ve earned it! Don’t forget to snap a pic and send it my way. Happy cooking!


