So, you’re looking for a chicken stew that tastes like you spent all day slaving, but actually took less effort than deciding what to binge-watch? My friend, you’ve come to the right place. This isn’t some fussy, pretentious recipe that demands obscure ingredients or a culinary degree. Nope, this is the “I want comfort food *now* but also want to feel accomplished” chicken stew. Get ready to impress yourself!
Why This Recipe is Awesome
Let’s be real, who has endless hours to stand over a stove? Not me, and probably not you either. This recipe is your weeknight warrior, your lazy Sunday hero, and your “I need a hug in a bowl” go-to. It’s so easy, honestly, it practically makes itself while you scroll TikTok. We’re talking maximum flavor with minimum fuss.
It’s also incredibly forgiving. Forget a dash of this or that? No biggie. Want to throw in an extra carrot? Go for it! Plus, the leftovers? **Chef’s kiss.** They taste even better the next day, which means you’ve got lunch sorted without lifting another finger. You’re basically a genius.
Ingredients You’ll Need
- 1.5 lbs Boneless, Skinless Chicken Thighs: (The real MVPs of stew, they stay juicy! Diced into bite-sized pieces. If you *must* use breasts, go for it, but don’t blame me if they’re a little drier.)
- 2 tbsp Olive Oil: (Or whatever cooking oil is chilling in your pantry.)
- 1 Large Yellow Onion: (Chopped. Prepare for happy tears.)
- 2 Carrots: (Peeled and chopped. Because health.)
- 2 Celery Stalks: (Chopped. The unsung hero of flavor bases.)
- 3-4 Cloves Garlic: (Minced. Because garlic makes everything better, obviously.)
- 2-3 Medium Potatoes: (Yukon Gold or Russets work great. Peeled and diced into 1-inch pieces.)
- 2 tbsp All-Purpose Flour: (Our little secret for a thick, luscious stew, not watery soup!)
- 4 cups Chicken Broth: (Low sodium if you’re watching your salt intake. Otherwise, full throttle!)
- 1 tsp Dried Thyme: (Classic stew vibes.)
- 1 Bay Leaf: (Don’t underestimate this one, it adds magic!)
- Salt and Freshly Ground Black Pepper: (To taste. Don’t be shy, but also don’t overdo it!)
- Optional: A splash of heavy cream or a handful of frozen peas (for extra richness and a pop of color at the end).
Step-by-Step Instructions
- **Prep Like a Pro:** First things first, get all your chopping done. Dice your chicken, chop your onion, carrots, and celery, peel and dice those potatoes, and mince the garlic. **Trust me, mise en place is your best friend here.** It makes the actual cooking a breeze.
- **Brown the Bird:** Heat the olive oil in a large pot or Dutch oven over medium-high heat. Add your diced chicken and cook until it’s lightly browned on all sides. It doesn’t need to be cooked through yet! This browning step adds *so much flavor*, so don’t skip it. Remove the chicken and set it aside.
- **Veggies in the House:** Toss the chopped onion, carrots, and celery into the pot. Sauté for about 5-7 minutes, stirring occasionally, until they start to soften. Now, stir in the minced garlic and cook for another minute until you can smell its glorious fragrance. Don’t let it burn!
- **Flour Power:** Sprinkle the flour over the veggies and stir for 1-2 minutes. This creates a roux (fancy term for flour cooked in fat) which is what will thicken our stew. Keep stirring so it doesn’t get clumpy!
- **Liquid Gold & Herbs:** Slowly pour in the chicken broth, making sure to scrape up any delicious browned bits from the bottom of the pot. Those bits are flavor gold! Add the dried thyme, the bay leaf, and return the browned chicken to the pot. Give it all a good stir and bring it to a gentle simmer.
- **Potato Time:** Add your diced potatoes to the pot. Reduce the heat to low, cover the pot, and let it all simmer for about 20-25 minutes. You’ll know it’s ready when the chicken is cooked through and the potatoes are nice and fork-tender.
- **Taste & Finish:** Remove the bay leaf (important!). If you’re using heavy cream or frozen peas, stir them in now and cook for another 2-3 minutes. Taste your stew and adjust the seasoning with salt and pepper as needed. **A little extra salt can really make all the flavors sing!**
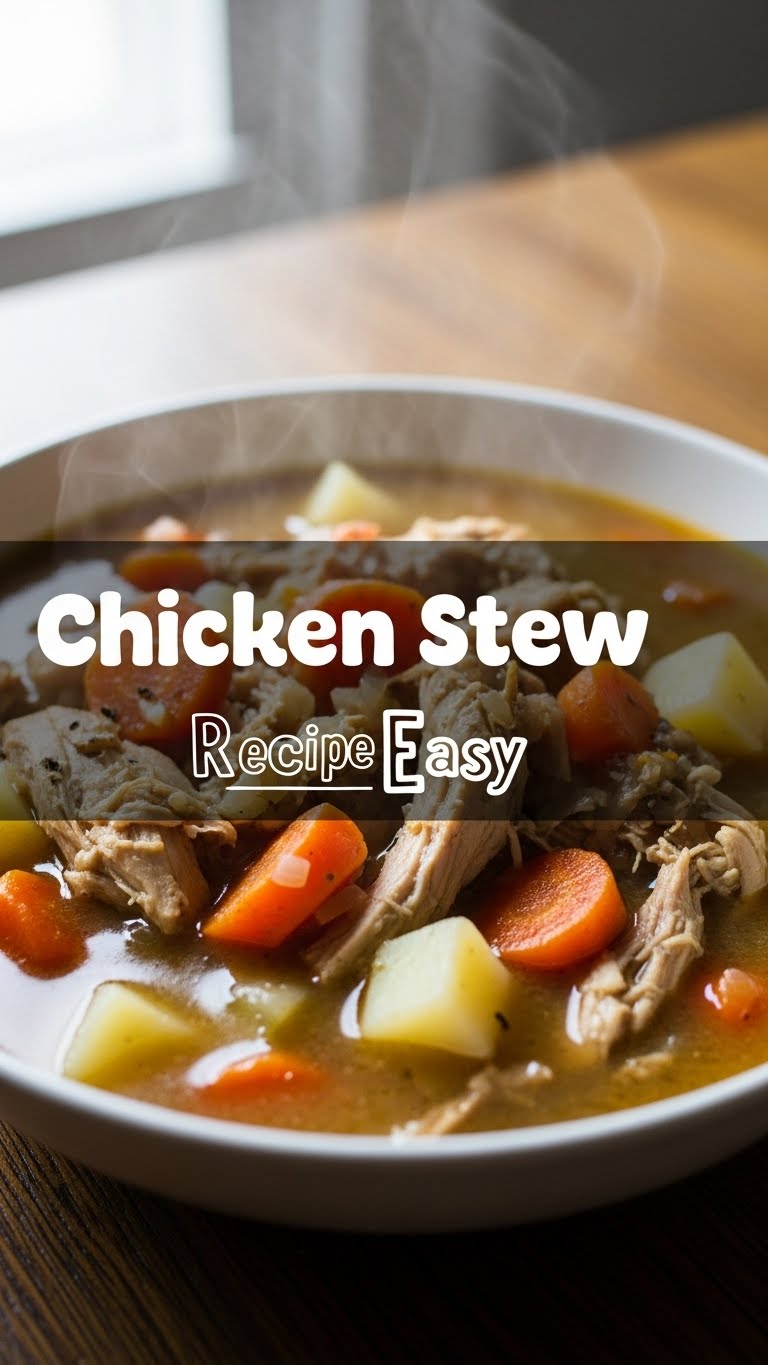
- **Serve It Up:** Ladle your magnificent creation into bowls. Serve hot with some crusty bread for dipping, or over rice. Bask in the glory of your easy, delicious chicken stew!
Common Mistakes to Avoid
- **Skipping the Chicken Browning:** Seriously, don’t do it. That golden crust adds a depth of flavor you’ll miss. It’s a quick step, promise!
- **Adding Potatoes Too Early:** If you throw them in at the very start, they’ll be mush by the time everything else is cooked. Timing is everything!
- **Under-Seasoning:** A bland stew is a sad stew. Taste as you go, and definitely give it a final taste test at the end. Your palate is your guide.
- **Forgetting the Bay Leaf:** Not just in the pot, but also to *remove* it before serving. Biting into a bay leaf is… an experience you probably don’t want.
- **Not Scraping the Bottom:** Those browned bits (fond) stuck to the bottom of the pot after browning the chicken and sautéing veggies are pure flavor. Use your broth to deglaze and scrape them up!
Alternatives & Substitutions
Feeling adventurous or just working with what you’ve got? No problem!
- **Chicken:** While thighs are best, you can use boneless, skinless chicken breasts. Just keep an eye on them, as they can dry out faster. Want to use bone-in? You can, but it’ll take longer to cook and you’ll need to remove the bones before serving.
- **Veggies:** Get creative! Mushrooms, bell peppers, corn, green beans, or even sweet potatoes can be fantastic additions. Just adjust cooking times as needed.
- **Herbs:** Don’t have thyme? A little dried rosemary or a pinch of poultry seasoning can work in a pinch. Fresh herbs work too – just double the amount.
- **Thickener:** If you’re gluten-free, mix 1-2 tablespoons of cornstarch with an equal amount of cold water to form a slurry. Stir this into the simmering stew at the end until it thickens, instead of using flour earlier.
- **Liquid:** A splash of dry white wine (like Sauvignon Blanc or Pinot Grigio) added after the veggies and before the broth can add amazing depth of flavor. Let it cook down for a minute or two.
FAQ (Frequently Asked Questions)
- **Can I make this vegetarian?** Absolutely! Skip the chicken, use vegetable broth, and load up on extra hearty veggies like chickpeas, lentils, or cannellini beans for protein. It’ll be a delicious veggie stew!
- **How long do leftovers last?** In the fridge, this stew is usually good for 3-4 days. **FYI, it often tastes even better the next day** as the flavors have more time to meld. Score!
- **Can I freeze this stew?** You bet! Once completely cooled, transfer it to freezer-safe containers or bags and freeze for up to 3 months. Thaw overnight in the fridge and reheat gently on the stovetop or in the microwave.
- **Is this good for meal prep?** IMO, it’s practically *made* for meal prep! Make a big batch on Sunday, and you’ve got comforting, ready-to-eat meals for days. Future you will send thank-you notes.
- **Can I add pasta or rice directly to the stew?** You *can*, but I’d recommend serving the stew *over* rice or noodles, or with a side of crusty bread. Adding them directly might make the stew too starchy or soak up too much of that delicious broth, messing with the texture.
- **What if my stew isn’t thick enough?** No worries! If you want it thicker, make a quick cornstarch slurry (1 tbsp cornstarch mixed with 1 tbsp cold water) and stir it into the simmering stew. Let it cook for a couple of minutes until it reaches your desired consistency.
Final Thoughts
See? You just made a ridiculously delicious, soul-warming chicken stew without breaking a sweat (or at least, not too much). You’re practically a kitchen wizard! This recipe proves that amazing food doesn’t have to be complicated or take all day. Now you have a big ol’ pot of comfort ready to warm you from the inside out.
Go on, pat yourself on the back. You deserve it. Now go impress someone—or yourself—with your new culinary skills. You’ve earned it!


