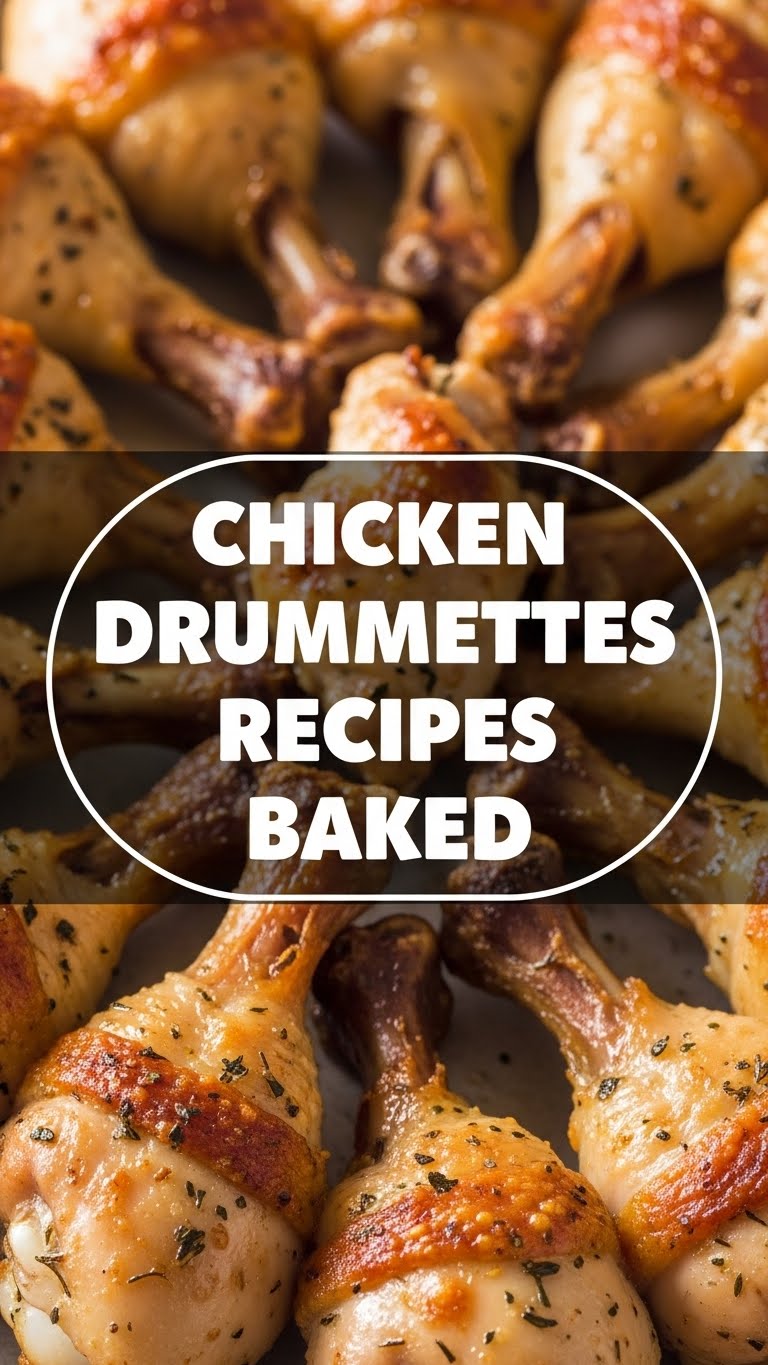
So you’re craving something tasty but too lazy to spend forever in the kitchen, huh? Same. We’ve all been there: that rumble in your tummy demanding something delicious, but your inner chef is currently on strike, demanding minimal effort and maximum flavor payoff. Well, my friend, grab a seat (or, you know, just keep scrolling), because I’m about to drop some baked chicken drummette wisdom that’ll make your taste buds sing and your lazy bones rejoice. Get ready for some seriously easy, seriously yummy chicken that practically cooks itself!
Why This Recipe is Awesome
Let’s be real, in the culinary world, “easy” often means “boring.” Not today, friends! This baked chicken drummette recipe is the MVP of weeknight dinners, game day snacks, or “I just don’t wanna cook anything complicated” meals. Why is it awesome, you ask? Oh, let me count the ways:
- It’s practically **idiot-proof**. Seriously, if I can do it without setting off the smoke alarm, you’re golden.
- **Minimal cleanup.** We’re talking one pan, maybe a bowl. Your dishwashing future self will thank you profusely.
- **Customizable AF.** Wanna go spicy? Sweet? Herb-y? The world is your oyster (or, you know, your chicken drummette).
- **Crispy skin, juicy inside.** The holy grail of baked chicken, achieved with shockingly little effort.
- It smells ridiculously good while baking. Your neighbors might just “accidentally” drop by. You’ve been warned.
Ingredients You’ll Need
No fancy schmancy stuff here! We’re keeping it simple, approachable, and delicious. You probably have most of this lurking in your pantry already. (If not, a quick trip to the store won’t break the bank, promise!)
- 1.5 – 2 lbs Chicken Drummettes: The stars of our show, obviously. Make sure they’re thawed!
- 1-2 tbsp Olive Oil (or any neutral oil): Just a drizzle to get things crispy and help the spices stick. Don’t drown them!
- 1 tsp Salt: Because bland food is a tragedy.
- 1/2 tsp Black Pepper: Your trusty sidekick.
- 1 tsp Garlic Powder: Because garlic makes everything better. It’s science.
- 1 tsp Paprika: For that lovely color and a hint of smoky sweetness.
- 1/2 tsp Onion Powder: Another layer of savory goodness.
- Optional (but highly recommended) Spices: A pinch of cayenne for heat, dried thyme, oregano, or a dash of your favorite poultry seasoning. This is your flavor playground!
Step-by-Step Instructions
Alright, apron on (or not, I’m not judging), let’s get these drummettes from fridge to fabulous!
Preheat Your Oven & Prep Your Pan: Crank that oven up to 400°F (200°C). Line a baking sheet with parchment paper or foil. This is crucial for easy cleanup, trust me. Nobody likes scrubbing burnt chicken bits.
Pat ‘Em Dry: Grab your drummettes and pat them thoroughly dry with paper towels. This is a **super important step** for crispy skin! Moisture is the enemy of crispiness.
Oil ‘Em Up: Toss the dry drummettes in a large bowl with the olive oil. Make sure they’re lightly coated everywhere.
Season Generously: Sprinkle in your salt, pepper, garlic powder, paprika, onion powder, and any other spices you’re feeling. Get in there with your hands and really massage that seasoning into every nook and cranny. Don’t be shy!
Arrange for Awesomeness: Lay the seasoned drummettes in a single layer on your prepared baking sheet. Make sure they have some space between them. **Do not overcrowd the pan!** This is key for crispy, not steamed, chicken.
Bake Away: Pop that baking sheet into your preheated oven. Bake for 20 minutes.
Flip & Finish: After 20 minutes, carefully flip each drummette over. Return to the oven and bake for another 15-20 minutes, or until they’re golden brown, crispy, and cooked through. To be super sure, the internal temperature should hit 165°F (74°C).
Serve and Devour: Let them rest for a few minutes (if you can wait!) before serving. This helps keep them juicy. Dive in and enjoy your crispy, flavorful creation!
Common Mistakes to Avoid
Even the simplest recipes have traps for the unwary! Dodge these common rookie errors for drummette perfection:
- Thinking you don’t need to preheat the oven: Rookie mistake! A cold oven equals soggy chicken. Always preheat, folks.
- Overcrowding the pan: I get it, you wanna cook everything at once. But cramming those drummettes together means they’ll steam instead of roast, leading to sad, limp skin. Give them space!
- Forgetting to pat them dry: As mentioned, moisture is the enemy of crisp. Don’t skip this easy step!
- Not seasoning enough: A little salt and pepper won’t cut it. Be bold with your spices! They’re there to make your chicken taste amazing.
- Not checking for doneness: Raw chicken is a no-go. If you’re unsure, get a meat thermometer. It’s a small investment for peace of mind (and safety!).
Alternatives & Substitutions
This recipe is a fantastic blank canvas! Feel free to get creative and make it your own. Here are a few ideas:
- Spice Blends Galore: Instead of individual spices, use a pre-made blend like taco seasoning, lemon pepper, Cajun spice, or an Italian herb mix. Easy peasy!
- Saucy Situation: After baking, toss the hot drummettes in your favorite sauce! BBQ sauce, buffalo sauce, sweet chili, or even a simple honey-garlic glaze. Just pop them back in the oven for 5-10 minutes to let the sauce caramelize. (OMG, yum!)
- Veggie Companions: Want a complete meal on one pan? Toss some chopped veggies like bell peppers, onions, zucchini, or potatoes with a little oil and seasoning and roast them alongside the drummettes. Just make sure they’re cut small enough to cook in the same timeframe.
- Different Cuts: While drummettes are awesome, this method works for whole chicken wings, bone-in chicken thighs, or even chicken breasts (though you’ll want to adjust cooking times accordingly to avoid drying them out).
FAQ (Frequently Asked Questions)
Got questions? I’ve got (casual, humorous) answers!
Can I use frozen drummettes? Well, technically yes, but **please thaw them completely first!** Trying to bake them from frozen will result in uneven cooking and potentially rubbery chicken. Nobody wants that.
How do I know when they’re truly cooked through? The best way is to use a meat thermometer inserted into the thickest part of the drummette (avoiding the bone). It should read **165°F (74°C)**. If you don’t have one, cut into the thickest part – the juices should run clear, and the meat shouldn’t be pink.
Can I make these ahead of time? You can definitely do the seasoning part ahead! Toss them with oil and spices, then refrigerate for up to 24 hours. Just bring them closer to room temp before baking for best results.
What about leftovers? Oh, leftovers are great! Store them in an airtight container in the fridge for up to 3-4 days. Reheat in the oven (around 350°F) or air fryer for best crispiness, or microwave if you’re in a hurry (but expect softer skin).
My chicken isn’t getting crispy, what gives? A few culprits: **not patting them dry enough**, **overcrowding the pan**, or your oven might be running a bit cool. Try turning up the heat slightly for the last 5-10 minutes, or even a quick blast under the broiler (watch very carefully!).
Can I add a little kick? Abso-freakin-lutely! Add more cayenne pepper, a pinch of red pepper flakes, or a dash of hot sauce to the oil/spice mix. Go wild! IMO, a little heat elevates everything.
Final Thoughts
There you have it, folks! Your new go-to, no-fuss baked chicken drummette recipe. It’s simple, it’s satisfying, and it leaves you with plenty of time to binge-watch that show or, you know, actually relax. So go ahead, whip up a batch (or two!). Your taste buds will thank you, your future dishwashing self will thank you, and frankly, you’ve earned a delicious, stress-free meal.
Now go impress someone—or yourself—with your new culinary skills. You’ve earned it!


