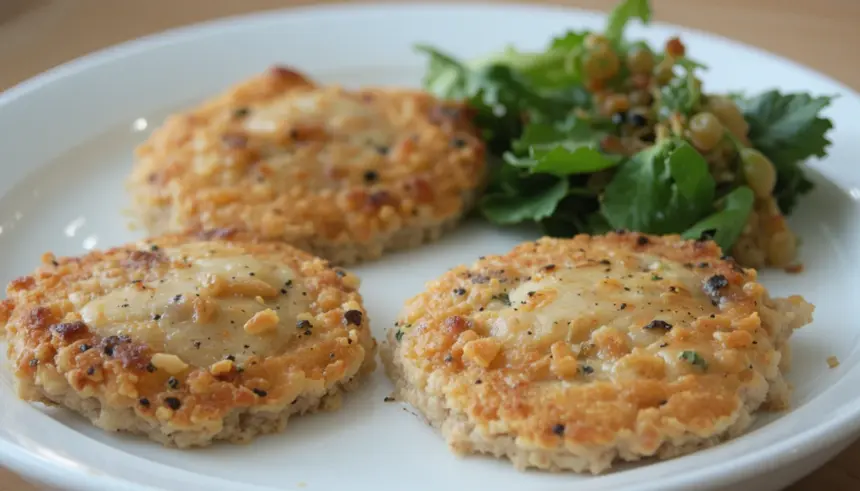
So You’re Craving Something Tasty But Too Lazy to Spend Forever in the Kitchen, Huh? Same. 🙂
Look, we’ve all been there. The fridge is looking a little sad, your motivation is lower than a snake’s belly in a ditch, and the thought of cooking anything remotely complicated makes you want to order pizza. But what if I told you there’s a magical little thing called chicken cutlets that can save your culinary soul without requiring a degree in advanced gastronomy? Yep, we’re talking about *easy*. Like, “I-can-do-this-while-watching-my-favorite-sitcom” easy. Let’s get cooking, shall we?
Why This Recipe is Awesome (Like, Seriously Awesome)
Okay, so why these specific chicken cutlets? Because they are ridiculously simple, unbelievably forgiving, and taste like you actually tried. **No fancy ingredients**, no bizarre techniques that require a YouTube tutorial and a prayer. This is your weeknight warrior, your “oops-company’s-coming-in-10-minutes” savior, your “I-just-want-something-delicious-now” best friend. It’s pretty much idiot-proof, even I didn’t mess it up the first time (and that’s saying something). Plus, the cleanup is minimal, and who doesn’t love that?
Ingredients You’ll Need (Don’t Panic, It’s Not Rocket Science)
* Chicken Breasts: About 2 medium ones. You can buy them already “cutlets” if you want to feel extra fancy and lazy.
* Flour: All-purpose is fine. We’re talking a modest amount, maybe 1/2 cup.
* Eggs: Two of them. For dipping. The goo that makes everything stick.
* Breadcrumbs: Panko is king here for that extra crunch, but regular breadcrumbs work too. About 1 cup.
* Salt & Pepper: The dynamic duo. Don’t be shy.
* Oil: For frying. Olive oil, canola, vegetable – whatever you’ve got lurking in the pantry. Enough to generously coat the bottom of your pan.
Step-by-Step Instructions (So Easy, Your Pet Could Probably Do It)
1. Prep Your Chicken: If your chicken breasts aren’t already thin, give ’em a good pound with a meat mallet (or a heavy pan if you’re feeling rustic). Aim for about 1/4-inch thickness. This ensures they cook quickly and evenly. It’s like giving them a little makeover.
2. Set Up Your Dredging Station: Get three shallow dishes. Put flour in the first, seasoned with salt and pepper. Whisk your eggs in the second. Put your breadcrumbs in the third. It’s like an assembly line for deliciousness!
3. Dredge Away! Dip each chicken piece first in the flour, making sure it’s coated all over. Shake off any excess. Then, dip it in the egg, letting any extra drip off. Finally, press it into the breadcrumbs until it’s nicely covered. Repeat for all your chicken pieces.
4. Heat the Pan: Pour enough oil into a large skillet to cover the bottom. Heat it over medium-high heat. You want it hot, but not smoking. **A good test: drop a tiny breadcrumb in; if it sizzles immediately, you’re good to go.**
5. Fry ‘Em Up: Carefully place a few cutlets in the hot oil (don’t overcrowd the pan!). Fry for about 3-4 minutes per side, until they’re golden brown and cooked through. **Watch them closely; they cook fast!**
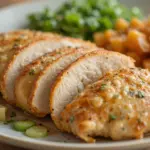
6. Drain and Devour: Remove the cooked cutlets and place them on a plate lined with paper towels to drain off any excess oil. Do this in batches until all your chicken is done.
Common Mistakes to Avoid (Don’t Be That Person)
* Overcrowding the pan: This is a biggie. It lowers the oil temperature and results in soggy, sad cutlets. Fry in batches, my friends.
* **Not preheating the oil enough:** You’ll end up with greasy, pale chicken that takes forever to cook. Patience, young grasshopper!
* **Touching the chicken too soon:** Let it cook undisturbed for those crucial few minutes per side. Resist the urge to poke and prod!
* **Using stale breadcrumbs:** IMO, this is a culinary crime. They won’t get as crispy, and your cutlets will weep.
Alternatives & Substitutions (Because Life is All About Options)
* Gluten-Free? Easy peasy! Use gluten-free flour and gluten-free breadcrumbs. Almond flour can also work for a nuttier flavor.
* **Want some spice?** Add a pinch of cayenne pepper or some smoked paprika to your flour or breadcrumbs. Boom! Flavor explosion.
* **No breadcrumbs?** Crushed crackers (like Ritz or even plain crackers) can work in a pinch. Or go super minimalist and just do flour and egg. It’s not as crunchy, but still tasty.
* **Baking instead of frying?** You *can* bake them! Place on a greased baking sheet and bake at 400°F (200°C) for about 15-20 minutes, flipping halfway through. They won’t be quite as crispy, but it’s a healthier option.
FAQ (Because I Know You Have Questions)
* Can I make these ahead of time? You can bread them ahead and refrigerate them for a few hours, but frying is best done fresh for ultimate crispiness.
* What do I serve these with? Anything! Salad, pasta, rice, roasted veggies, mashed potatoes – the world is your oyster (or, uh, chicken cutlet).
* My chicken is still pink inside, what happened? You either didn’t pound it thin enough, or your oil wasn’t hot enough. Give it a few more minutes, or you might have to accept your fate and pop it in the oven briefly.
* **Can I use chicken thighs?** Yes, but they’ll take a bit longer to cook. Just be sure they’re cooked through!
* **Why are my breadcrumbs burning?** Your heat is too high! Lower it slightly and keep an eye on them. They can go from golden to burnt in seconds.
* **Is it okay if they’re not perfectly uniform in shape?** Absolutely! Embrace the rustic charm. It means they’re homemade and made with love (and maybe a little bit of haste).
Final Thoughts (Go Forth and Conquer)
See? That wasn’t so bad, was it? You’ve just created culinary magic with minimal effort and maximum deliciousness. These chicken cutlets are your new secret weapon for those busy nights when you want something good without the fuss. Now go impress someone—or yourself—with your new culinary skills. You’ve earned it! Happy cooking!
