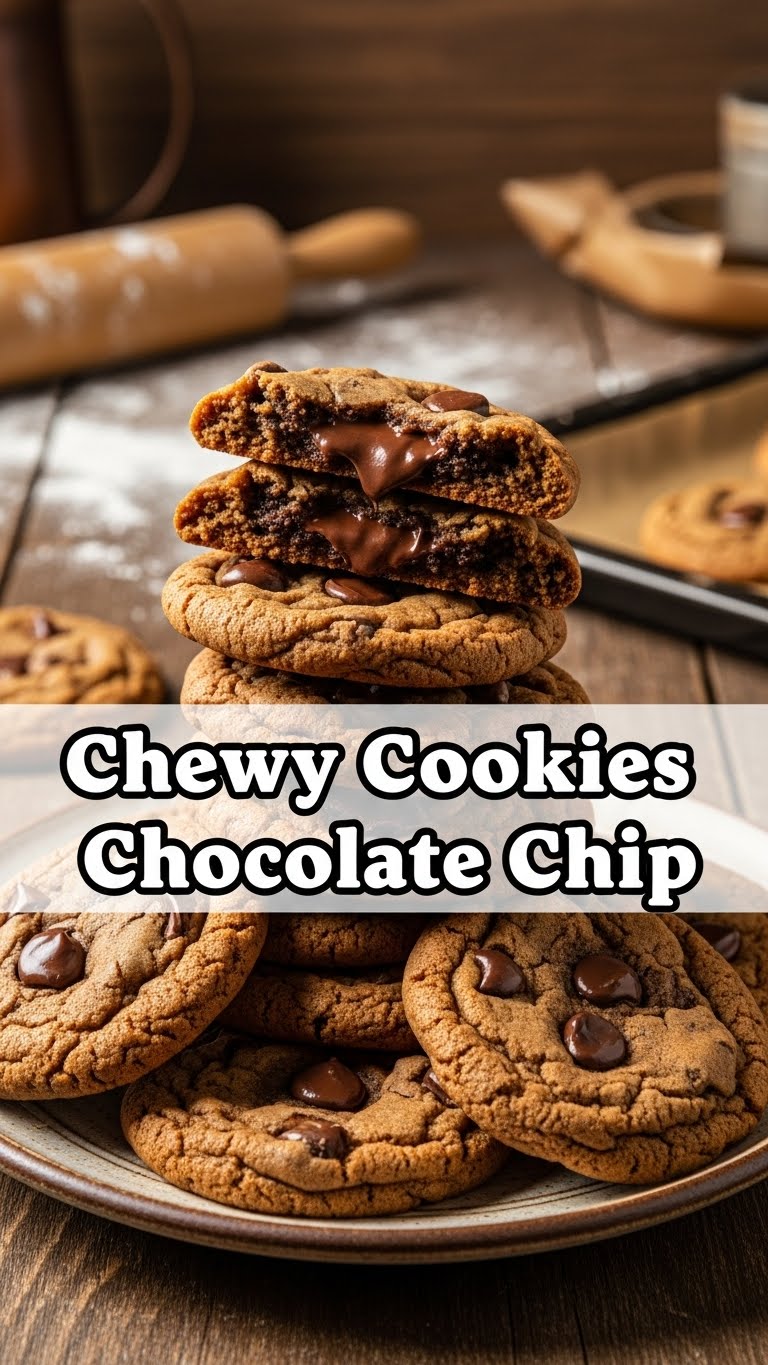
So you’re craving something warm, gooey, and utterly delicious but *without* the drama of a super complicated recipe, huh? Same, friend, same. We’ve all been there – staring into the fridge, wondering if a cheese stick counts as dessert (it doesn’t, BTW). Good news! Today, we’re diving headfirst into the glorious world of **chewy chocolate chip cookies** that are so good, you’ll wonder if you secretly became a professional baker overnight. (Spoiler: You didn’t, this recipe is just *that* good.)
Why This Recipe is Awesome
Okay, let’s be real. There are a million chocolate chip cookie recipes out there. But this one? This is *the* one. Why? Because it delivers on that elusive, perfect chewiness without making you jump through hoops. Think golden edges, soft centers, and chocolatey pockets that practically sing to you. Plus, it’s pretty much **idiot-proof**. Seriously, if I can nail it after a long week, you totally can too. It’s the kind of recipe that makes you look like a kitchen wizard with minimal effort. Win-win!
Ingredients You’ll Need
Get ready to gather your culinary squad! These aren’t fancy ingredients, just your everyday heroes ready to transform into pure cookie magic. Make sure they’re mostly at room temperature – it makes a difference, trust me.
- **1 cup (2 sticks) Unsalted Butter:** Softened, but not melted. We’re looking for spreadable, not soupy.
- **¾ cup Packed Light Brown Sugar:** This is your secret weapon for chewiness! Don’t skimp.
- **½ cup Granulated Sugar:** Just enough for a little crisp edge and sweetness balance.
- **2 Large Eggs:** Room temperature, please! They emulsify better.
- **2 teaspoons Vanilla Extract:** Use the good stuff if you got it. It makes a difference!
- **2 ¼ cups All-Purpose Flour:** Level those cups, folks.
- **1 teaspoon Baking Soda:** Helps those cookies puff just right.
- **½ teaspoon Salt:** Balances all that sweetness. Don’t skip it!
- **1 ½ cups Semi-Sweet Chocolate Chips:** Or chunks, or a mix! Your cookie, your rules.
Step-by-Step Instructions
Alright, apron on (or just wear that stained t-shirt, no judgment), let’s get baking!
- **Preheat Power:** Crank that oven to **375°F (190°C)**. Line a couple of baking sheets with parchment paper or silicone mats. This saves you from sticky situations and ensures even baking.
- **Cream It Up:** In a large bowl, or the bowl of your stand mixer, cream together the softened butter, brown sugar, and granulated sugar until it’s light and fluffy. This usually takes about 2-3 minutes. **Don’t rush this step!**
- **Egg-cellent Addition:** Beat in the eggs, one at a time, mixing well after each addition. Then stir in that glorious vanilla extract. Scrape down the sides of the bowl to make sure everything gets cozy.
- **Dry Mix Magic:** In a separate medium bowl, whisk together the flour, baking soda, and salt. Whisking ensures everything is evenly distributed – no one wants a salty bite and then a bland one!
- **Combine and Conquer:** Gradually add the dry ingredients to the wet ingredients, mixing on low speed until just combined. **Stop mixing as soon as you don’t see any dry streaks.** Overmixing is the enemy of chewiness!
- **Chocolate Time:** Fold in those chocolate chips with a spatula. Get them evenly distributed so every bite is a chocolatey dream.
- **Chill Out (Optional but Recommended!):** For the absolute best chewy texture, cover the dough and **chill it in the fridge for at least 30 minutes**, or even up to 24 hours. This lets the flavors meld and prevents over-spreading.
- **Scoop ‘Em Out:** Drop rounded tablespoons of dough onto your prepared baking sheets, leaving about 2 inches between each cookie. Use a cookie scoop for perfectly uniform cookies.
- **Bake Away!** Bake for **9-11 minutes**, or until the edges are golden brown but the centers still look a little soft and underbaked. This is key for that chewy goodness!
- **Cool Down (If You Can):** Let the cookies cool on the baking sheets for about 5 minutes before transferring them to a wire rack to cool completely. Or, you know, eat one (or three) while they’re still warm and gooey. You’ve earned it!
Common Mistakes to Avoid
Look, we all make mistakes. But with these insider tips, you won’t be making *these* mistakes. You’re welcome.
- **Overmixing the Dough:** Seriously, stop. As soon as the flour disappears, put down that mixer. Overmixing develops too much gluten, leading to tough, not chewy, cookies. Rookie mistake!
- **Skimping on the Chill Time:** Thinking you can just bake them immediately? You *can*, but they’ll spread more and be less chewy. **Chilling helps the butter solidify and flavors deepen.** Patience is a virtue, especially for perfect cookies.
- **Overbaking:** This is probably the biggest chewy cookie killer. If they look perfectly golden all over, they’re probably overdone. Pull them out when the edges are set and the centers still look a bit soft. They’ll continue to bake on the hot sheet.
- **Using Cold Butter or Eggs:** Remember how we said room temp? Yeah, that wasn’t just for fun. Cold ingredients don’t emulsify properly, leading to a less uniform dough and potentially flatter cookies.
- **Not Leveling Flour:** Scooping flour directly from the bag can pack it down, making you use too much. Use the “spoon and level” method: spoon flour into your measuring cup, then level off with a straight edge.
Alternatives & Substitutions
Feeling adventurous? Or maybe you just ran out of something? Here are some ideas to mix it up.
- **Chocolate Choices:** Not a semi-sweet fan? Go for **milk chocolate, dark chocolate chunks, or even white chocolate chips**. Mix ’em up! I’m a big fan of a half-and-half semi-sweet and dark chocolate chunk combo for extra depth.
- **Add-ins:** Nuts (walnuts, pecans!), shredded coconut, dried cranberries, or even a sprinkle of sea salt on top before baking. Just don’t go too wild, or you’ll overwhelm the cookie.
- **Gluten-Free Flour:** You can usually substitute a 1:1 gluten-free flour blend for the all-purpose flour. Just make sure it includes xanthan gum! The texture might be slightly different, but still tasty.
- **Different Fats?** While butter is king for flavor and chew, in a pinch, you *could* try half butter, half shortening for a slightly different texture. But honestly, **stick with butter for the best result, IMO.**
FAQ (Frequently Asked Questions)
Got questions? I’ve got (casual and hopefully helpful) answers!
- **Can I use margarine instead of butter?** Well, technically yes, but why hurt your soul (and your cookies’ flavor) like that? For truly amazing chewy cookies, **butter is your best friend.** Margarine will change the taste and texture significantly.
- **My cookies spread too much! What happened?** This could be a few things: your butter was too soft (or even melted), your oven wasn’t hot enough, or you didn’t chill your dough. Also, check if your baking soda is still active!
- **Can I freeze the cookie dough?** Absolutely! Roll the dough into balls, place them on a baking sheet, and freeze until solid. Then transfer to an airtight freezer bag for up to 3 months. When you’re craving a cookie, bake straight from frozen, adding a couple more minutes to the bake time. **Freshly baked cookies on demand? Yes, please!**
- **What’s the secret to that ultimate chewiness?** It’s a combo deal: **brown sugar** (which has molasses, keeping things moist), **not overmixing**, **chilling the dough**, and **slightly underbaking** them. Don’t be afraid if they look a little soft when you pull them out!
- **How long do these chewy masterpieces last?** In an airtight container at room temperature, they’ll stay deliciously chewy for about 3-5 days. But let’s be real, they rarely last that long.
- **Can I make these in a bigger batch?** Go for it! This recipe doubles beautifully. Just make sure your mixer can handle the volume, and you have enough baking sheets.
Final Thoughts
There you have it, your new go-to recipe for chewy chocolate chip cookies. This isn’t just a recipe; it’s an invitation to treat yourself (and maybe a few lucky others) to pure joy. So go forth, preheat that oven, and make some magic happen. Now go impress someone—or yourself—with your new culinary skills. You’ve earned it! Don’t forget to grab a tall glass of milk. You’re gonna need it. Happy baking!


