So you know that feeling? The one where you’re utterly craving something delicious, creamy, and just a little bit fancy, but the thought of making an entire *cake* for one (or maybe just for you and your very understanding cat) feels like too much commitment? Yeah, me too. Who has time for that kind of drama? Luckily, I’ve got your back. This isn’t your grandma’s marathon baking session; this is **Cheesecake For One**—your personal dessert hero.
Why This Recipe is Awesome
Let’s be real, this recipe is a godsend. It’s not just a cheesecake; it’s a declaration of self-love and a serious time-saver. Forget the monstrous springform pan and the endless dishes. We’re talking about a single-serving delight that comes together faster than you can pick out a Netflix show. **It’s practically idiot-proof**, even *I* managed not to mess it up, and my kitchen adventures often end with a fire extinguisher. Plus, no sharing necessary. Your secret, your cheesecake. You’re welcome.
Ingredients You’ll Need
Gather your troops, fellow dessert warrior! You probably have most of this stuff lurking in your fridge already. If not, a quick dash to the store is all you need for your cheesecake destiny.
- **2 Graham Crackers (about 1/4 cup crumbs):** The crunchy foundation of your happiness. Crush ’em good!
- **1 tablespoon Unsalted Butter, melted:** The glorious glue that holds your crust together. Don’t skimp.
- **4 oz Cream Cheese, full-fat, softened:** The star of the show. Seriously, go full-fat. This is for pleasure, not penance.
- **2 tablespoons Granulated Sugar:** Just enough sweetness to make your soul sing.
- **1/2 teaspoon Vanilla Extract:** A little hug for your taste buds. Don’t skip this!
- **1 Egg Yolk:** Just one! Don’t be greedy with the whites today. It makes it extra creamy.
- **1/2 teaspoon Lemon Juice (optional, but highly recommended):** A tiny zing that brightens everything up. Trust me on this one.
Step-by-Step Instructions
Alright, oven on! Let’s get this deliciousness happening. You’ll be eating cheesecake before you can say “instant gratification!”
- **Preheat Your Oven:** Set it to 325°F (160°C). Don’t you dare skip this step. Seriously.
- **Crust Time:** Grab your graham cracker crumbs and melted butter. In a small bowl, mix them together until they look like wet sand. Now, press this mixture firmly into the bottom of a 4-inch ramekin or a small oven-safe dish.
- **The Creamy Filling:** In another small bowl (yes, two bowls, we’re fancy), beat your softened cream cheese until it’s super smooth. No lumps allowed!
- **Sweeten It Up:** Add the sugar, vanilla extract, and lemon juice (if using) to the cream cheese. Beat again until everything is well combined and creamy.
- **Egg Yolk Magic:** Gently mix in the egg yolk. Don’t overmix; just until it’s incorporated. Overmixing can lead to cracks, and nobody wants a sad, cracked cheesecake.
- **Assemble Your Masterpiece:** Pour the creamy filling over your prepared graham cracker crust in the ramekin. Give it a gentle tap on the counter to release any air bubbles.
- **Bake It Baby:** Carefully place your ramekin on a baking sheet (just in case there’s any spillage, which there shouldn’t be, but safety first!). Bake for 20-25 minutes, or until the edges are set but the center still has a slight wobble.
- **Chill Out:** Remove your cheesecake from the oven and let it cool completely on a wire rack. Once it’s at room temperature, pop it in the fridge for at least 2 hours. **Don’t skip the chill time!** This is crucial for texture.
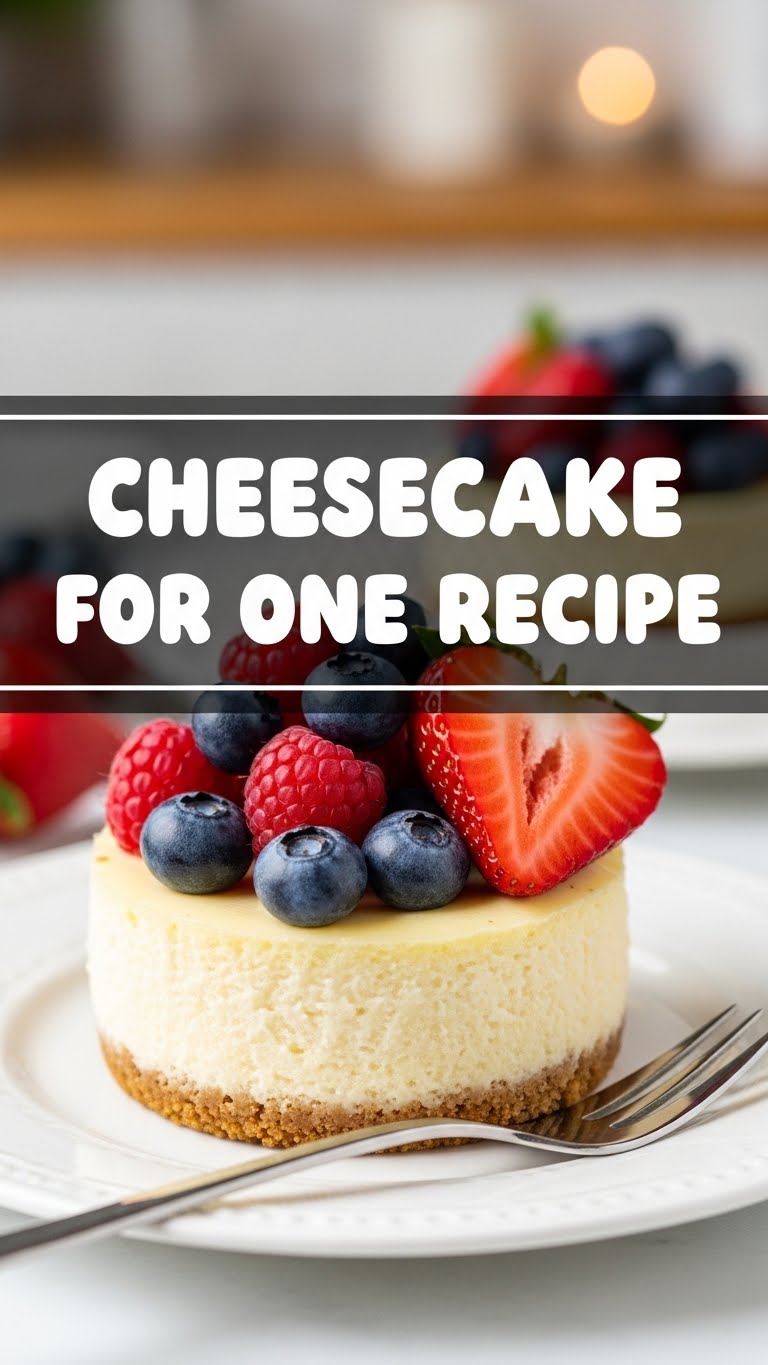
- **Devour:** Garnish with berries, chocolate sauce, or just a spoon. Enjoy your personal slice of heaven!
Common Mistakes to Avoid
We’ve all been there, staring at a kitchen disaster wondering “what went wrong?” Here are a few rookie errors to sidestep:
- **Forgetting to soften your cream cheese:** Trying to beat cold cream cheese is like trying to reason with a toddler – lumpy, frustrating, and not worth the effort. Let it sit out for an hour or use the microwave for a few seconds.
- **Overmixing the filling:** Once you add the egg yolk, mix just until combined. Whipping too much air into the batter is a one-way ticket to a cracked cheesecake. You want smooth, not fluffy.
- **Skipping the chill time:** I know, I know, you want to eat it NOW. But seriously, **patience is a virtue here**. Chilling allows the cheesecake to set properly, giving it that perfect, dense texture. IMO, it’s worth the wait.
- **Using low-fat cream cheese:** Look, I get it. But for this one-person treat, just embrace the full-fat goodness. The texture and flavor are infinitely better. Don’t do yourself dirty.
Alternatives & Substitutions
Feeling a little wild? Want to spice things up? Go for it! This recipe is super forgiving.
- **Crust Crazy:** No graham crackers? Use crushed Oreos for a chocolatey base, shortbread cookies for a buttery flavor, or even gingersnaps for a spiced twist.
- **Flavor Town:** Swirl in a teaspoon of peanut butter, Nutella, or a spoonful of fruit jam before baking. Or top with fresh berries, chocolate shavings, or a dollop of whipped cream after chilling.
- **No Lemon? No Problem:** While lemon juice adds a lovely brightness, if you don’t have it, don’t fret. Your cheesecake will still be delicious.
FAQ (Frequently Asked Questions)
- **Can I make this in a microwave?** No, please no. While some things can be microwaved, cheesecake isn’t one of them. You want that baked texture!
- **My cheesecake cracked! What happened?** Probably overmixed the filling, baked it too long, or the oven was too hot. Don’t worry, it still tastes great! Just cover it with some fruit and pretend it was intentional.
- **Can I use margarine instead of butter?** Well, technically yes, but why hurt your soul like that? Butter just tastes better, period. FYl, it makes a difference.
- **How long does it last in the fridge?** If you manage not to eat it all in one sitting (highly unlikely), it’ll be good for 3-4 days, covered.
- **What if I don’t have a 4-inch ramekin?** A slightly larger ramekin (like 6-inch) will work, but your cheesecake will be thinner and might bake a little faster. Keep an eye on it! Or use a small oven-safe mug.
- **No egg yolk? What can I do?** The egg yolk really helps with richness and texture. If you absolutely can’t use it, your cheesecake might be a little softer, but still edible.
Final Thoughts
So there you have it, your very own, personal, no-stress cheesecake! Who knew being a culinary genius could be so easy? Go forth and conquer your cravings, my friend. You’ve earned this. Now go impress someone—or yourself—with your new culinary skills. You’re basically a professional baker now, just on a much smaller scale. Enjoy every single bite!


