So, you’re looking for something that screams “I’m healthy, I’m delicious, and I barely required any effort,” right? And you’ve got a can of chickpeas staring at you from the pantry, begging for a glow-up? My friend, you’ve come to the right place. We’re about to transform those humble little legumes into a salad that’s so good, you’ll wonder why you ever bothered with anything else. No sweat, no stress, just pure, unadulterated, crunchy goodness. Let’s do this!
Why This Recipe is Awesome
Okay, let’s be real. In a world full of complicated recipes that require obscure ingredients and a culinary degree, this chickpea salad is your knight in shining armor. Why is it so awesome? First off, **it’s ridiculously easy**. Seriously, if you can open a can and wield a knife (safely, please!), you’re golden. Secondly, it’s packed with flavor, vibrant colors, and enough fiber to keep your digestive system sending you thank-you notes. Plus, it’s healthy, satisfying, and totally customizable. Think of it as your culinary playground. Oh, and did I mention it’s budget-friendly? Your wallet will love you almost as much as your taste buds will. It’s basically a triple threat: healthy, tasty, and doesn’t break the bank. What’s not to love?
Ingredients You’ll Need
Gather ’round, fellow food adventurers! Here’s the treasure map to deliciousness. You probably have most of this stuff already, because we like to keep things convenient, unlike that one ex who was always “conveniently” busy.
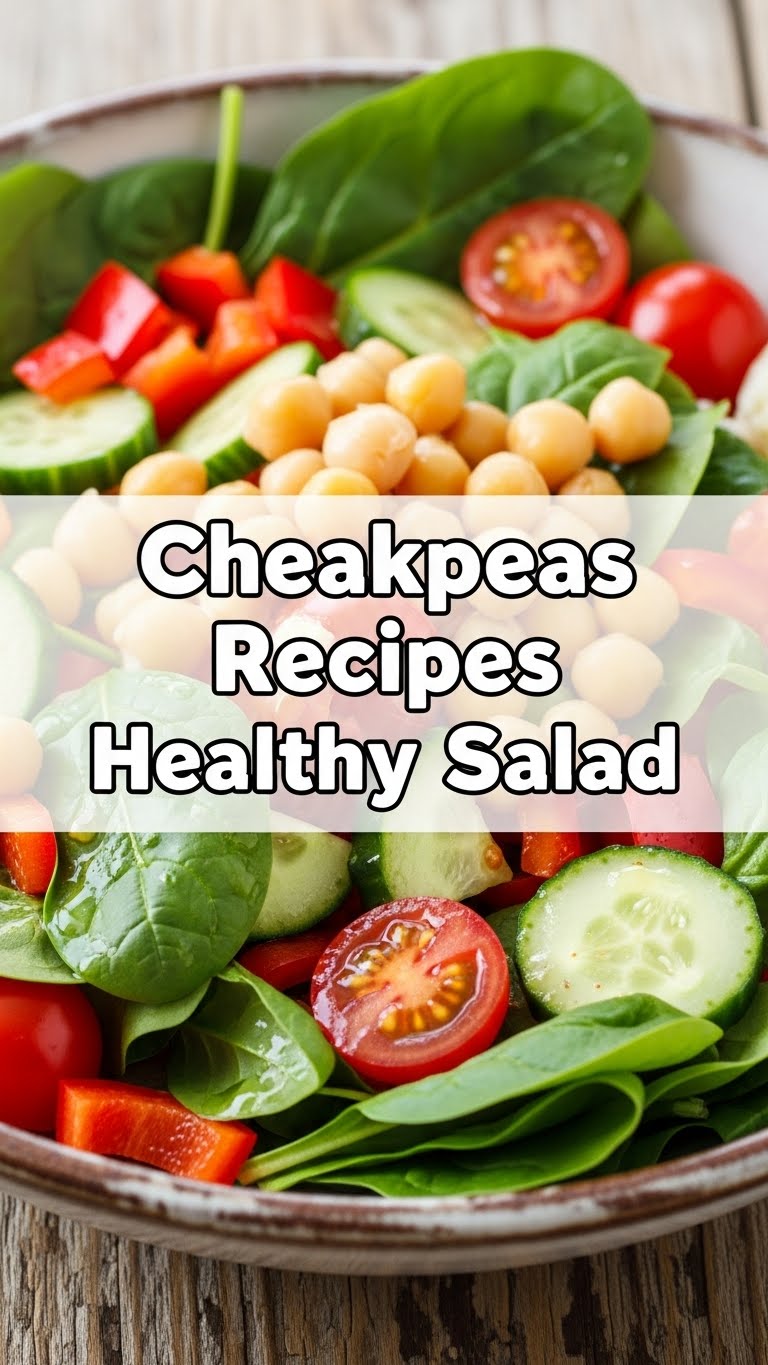
- One 15-oz can of chickpeas: Drained and rinsed. Don’t skip the rinsing, unless you *like* extra fizziness and can-flavor. We don’t.
- 1/2 a cucumber: Diced. The crunch factor is non-negotiable here.
- 1-2 Roma tomatoes: Diced. Or any small, firm tomato. We want juicy, not watery.
- 1/4 red onion: Finely diced. For that little zing! If raw onion makes you cry (literally), soak it in cold water for a few minutes after dicing to mellow it out.
- 1/2 bell pepper: Any color you fancy, diced. Yellow, orange, or red adds a pop of color and sweetness.
- A handful of fresh parsley: Chopped. Because fresh herbs are basically tiny flavor fairies.
- For the Dressing:
- 2 tablespoons extra virgin olive oil: The good stuff, please!
- 1-2 tablespoons fresh lemon juice: Squeeze it yourself, it makes a difference, I promise.
- 1/2 teaspoon dried oregano: Or fresh, if you’re feeling fancy.
- Salt and black pepper: To taste. Don’t be shy, but don’t overdo it either. It’s a delicate balance, like my patience on a Monday morning.
Step-by-Step Instructions
Alright, superstar chef, let’s get this show on the road. These steps are so easy, you could probably do them blindfolded. (Please don’t, safety first!)
- **Prep Your Chickpeas:** First things first, grab that can of chickpeas. Drain ’em, rinse ’em under cold water until they’re sparkling clean, and then let them dry a bit while you chop everything else. No one likes soggy salad.
- **Chop ’til You Drop (But Not Literally):** Get to dicing your cucumber, tomatoes, bell pepper, and red onion. Aim for roughly chickpea-sized pieces for maximum salad cohesion. Roughly chopping your parsley is next.
- **Whip Up the Dressing:** In a small bowl, whisk together your olive oil, lemon juice, dried oregano, salt, and pepper. Give it a taste. Need more zing? More lemon! More kick? More pepper! You’re the boss.
- **Combine Everything:** In a large bowl (because we don’t like ingredients spilling out, do we?), gently toss the drained chickpeas with all your beautifully chopped veggies and parsley.
- **Dress and Serve:** Pour the dressing over your colorful mix. Toss gently until everything is coated and looking fabulous. **Give it another quick taste test.** Adjust seasoning if needed.
- **Chill Out (Optional but Recommended):** While you can totally dive in right away, letting it chill in the fridge for 15-20 minutes allows the flavors to really get to know each other. Think of it as a little flavor spa day.
Common Mistakes to Avoid
Listen, we all make mistakes. It’s how we learn! But since I’m here to save you from culinary oopsies, let’s tackle a few common blunders before they happen. Don’t say I never warned you!
- **Not Rinsing the Chickpeas:** This is a biggie. That liquid they come in (aquafaba, for the fancy folks) is often starchy and can give your salad a weird aftertaste. Rinse, rinse, rinse!
- **Over-Dressing the Salad:** More dressing isn’t always better. Start with a smaller amount, toss, taste, and add more if needed. You want the ingredients to shine, not swim in a pool of vinaigrette.
- **Uneven Chopping:** While we’re not aiming for Michelin star perfection, having roughly similar-sized pieces means every bite is balanced and delightful. Big chunks and tiny specks make for an inconsistent experience.
- **Forgetting to Taste as You Go:** This isn’t just for fancy chefs. Taste your dressing, taste the salad before serving. Is it bland? Needs more salt! Too sharp? A pinch of sugar or a bit more olive oil can balance it. **Your taste buds are your best guide.**
Alternatives & Substitutions
Feeling rebellious? Want to make this salad truly *yours*? Go for it! This recipe is more of a suggestion, a friendly nudge in the right direction. Here are some fun ways to mix things up:
- **Veggies:** Not a fan of bell peppers? Swap them for finely diced celery for extra crunch, or some grated carrots for sweetness. Red onion too strong? Try green onions or chives for a milder flavor.
- **Herbs:** Parsley’s great, but mint or dill would also be absolutely delightful here, especially if you’re going for a more Mediterranean vibe. cilantro? Yes, please!
- **Add-ins for Extra Oomph:**
- **Feta Cheese:** Crumbled feta is basically the best friend any chickpea salad could ask for. Salty, tangy, dreamy.
- **Olives:** Sliced Kalamata or green olives add a briny kick.
- **Avocado:** Diced avocado makes it creamier and even more satisfying. Add just before serving to avoid browning.
- **Nuts/Seeds:** A sprinkle of toasted slivered almonds, sunflower seeds, or pumpkin seeds can add another layer of texture.
- **Different Dressings:** Craving a creamy dressing? Whisk in a tablespoon of Greek yogurt or mayo to your lemon-olive oil base. Or try a balsamic vinaigrette for a darker, richer flavor.
FAQ (Frequently Asked Questions)
Got questions? I’ve got answers! (Mostly.)
- **Can I make this ahead of time?** Absolutely! It’s actually even better after chilling for a bit. Just know that tomatoes might get a *tiny* bit soft if left for too long. For best results, I’d say make it no more than 24 hours in advance.
- **How long does this salad last in the fridge?** Generally, it’s good for 3-4 days in an airtight container. After that, the veggies might lose some of their crispness, but it’ll still be tasty.
- **Is this good for meal prep?** Heck yes! It’s one of my go-to’s. Make a big batch at the start of the week, and you’ve got healthy lunches sorted. **Pro tip:** Pack the dressing separately if you’re prepping for several days, and add it just before eating for maximum freshness.
- **Can I add some protein to this?** You totally can! Grilled chicken, canned tuna, or even some crumbled hard-boiled eggs would be fantastic additions to make it a super hearty meal.
- **What if I don’t have fresh lemon juice?** While fresh is best, a good quality bottled lemon juice will work in a pinch. Just taste and adjust, as bottled can sometimes be more concentrated.
- **Can I use canned beans other than chickpeas?** You betcha! Black beans, cannellini beans, or even kidney beans would be delicious in a similar style salad. Experiment!
Final Thoughts
And there you have it, folks! A chickpea salad so good, so easy, and so healthy, it practically makes itself. You just leveled up your healthy eating game without breaking a sweat, your budget, or your spirit. This isn’t just a salad; it’s a testament to simple, delicious cooking. So go on, whip up a batch, bask in the glory of your culinary prowess, and maybe share some with a friend (or don’t, I won’t tell!). Now go impress someone—or yourself—with your new culinary skills. You’ve earned it!


