So, you’ve got some sad-looking, spotty bananas on your counter, a sudden craving for something sweet and comforting, and maybe a tiny fear of gluten, huh? Don’t worry, friend, I’ve got your back. We’re diving into the magical, delicious world of Cassava Flour Banana Bread, and trust me, it’s about to be your new favorite thing.
Why This Recipe is Awesome
Let’s be real, you’re here because you want something amazing without the fuss. And this recipe? It delivers. First off, it’s naturally gluten-free, which means you can tell your stomach to chill out. Secondly, thanks to our star ingredient, cassava flour, this banana bread comes out incredibly moist and tender. We’re talking melt-in-your-mouth good, not dry-as-dust-and-crumbly bad. It’s also practically idiot-proof – even I didn’t mess it up, and my kitchen is often a zone of minor culinary disasters. Plus, it’s the perfect excuse to finally use up those super-ripe bananas before they evolve into some kind of science experiment. You’re welcome.
Ingredients You’ll Need
Gather your troops! Here’s what you’ll need to whip up this glorious loaf:
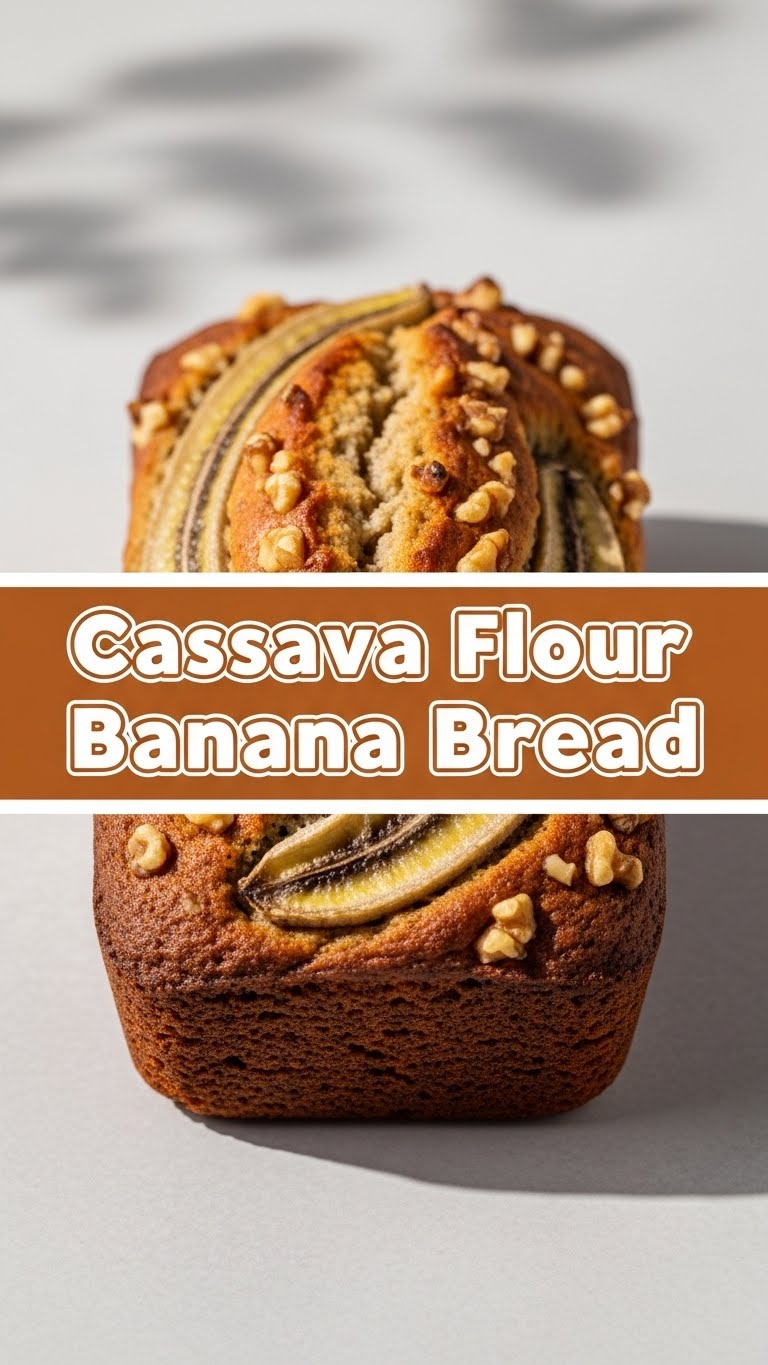
- 3-4 medium overripe bananas: The browner, the better. Seriously, don’t be shy about those spots. They’re flavor bombs!
- 1 ¾ cups cassava flour: Our MVP. Don’t confuse it with tapioca flour, FYI; they’re distant cousins with different baking personalities.
- 2 large eggs: Room temperature if you’re feeling fancy, straight from the fridge if you’re living on the edge (it’ll be fine).
- ½ cup sweetener: Brown sugar is classic, but coconut sugar works too. If you’re into liquid gold, ½ cup maple syrup or honey is a fantastic choice (you might just need to reduce other liquids slightly, but for this recipe, it usually balances out).
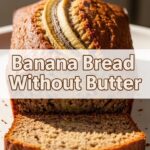
- ½ cup melted butter or oil: Unsalted butter is my jam, but coconut oil or any neutral-flavored oil (like avocado or light olive) works perfectly for a dairy-free version.
- 1 teaspoon baking soda: The mighty leavener for lift.
- ½ teaspoon baking powder: Extra lift, because we like our bread to soar.
- ½ teaspoon salt: Just a pinch to make all those sweet flavors sing.
- 1 teaspoon vanilla extract: Because everything is better with a splash of vanilla.
- Optional additions: ½ cup chocolate chips (duh!), chopped walnuts, pecans, or shredded coconut. Go wild!
Step-by-Step Instructions
Ready? Let’s do this. It’s easier than deciding what to watch on Netflix.
- Preheat and Prep: First things first, crank that oven up to 350°F (175°C). Grab a standard loaf pan (about 9×5 inches) and grease it well. You can use butter, cooking spray, or even line it with parchment paper with an overhang for easy lifting.
- Mash Those Bananas: In a large mixing bowl, get to mashing those beautiful, spotty bananas. A fork or a potato masher works wonders. You want it mostly smooth, but a few small lumps are totally welcome for texture.
- Wet Ingredients Party: To your mashed bananas, add the eggs, sweetener, melted butter (or oil), and vanilla extract. Whisk it all together until it’s well combined and looks like a delicious, slightly lumpy smoothie.
- Dry Ingredients Huddle: In a separate, medium-sized bowl, whisk together the cassava flour, baking soda, baking powder, and salt. Make sure there are no clumps of flour.
- Combine Forces: Now, gently pour the dry ingredients into the wet ingredients. With a spatula or wooden spoon, mix until just combined. Do not overmix! A few streaks of flour are perfectly fine. Overmixing equals tough bread, and we don’t want that.
- Add Your Faves: If you’re adding chocolate chips, nuts, or anything else, gently fold them in now. This is where the magic really happens, IMO.
- Bake It Till You Make It: Pour your glorious batter into the prepared loaf pan. Pop it into your preheated oven and bake for about 50-60 minutes. You’ll know it’s done when a toothpick inserted into the center comes out clean or with just a few moist crumbs attached.
- Cool Down: Once baked, let the banana bread cool in the pan for about 10-15 minutes. This helps it firm up. Then, carefully transfer it to a wire rack to cool completely before slicing. (Or, if you’re like me, cut a slice while it’s still warm and risk burning your fingers. No judgment.)
Common Mistakes to Avoid
We’ve all been there, staring at a less-than-perfect creation. Here are some pitfalls to dodge:
- Using Underripe Bananas: They won’t provide the sweetness, moisture, or classic banana flavor. Wait for the spots! It’s worth it.
- Overmixing the Batter: This is a cardinal sin in quick bread making. It develops the gluten (even in gluten-free flours, it can make things tough) and leads to a dense, chewy loaf. Mix just until combined!
- Forgetting to Grease the Pan: Unless you enjoy chiseling your precious banana bread out of the pan, don’t skip this step.
- Opening the Oven Door Too Early: Resist the urge to peek during the first 30 minutes. Sudden temperature drops can make your bread sink.
- Confusing Cassava Flour with Tapioca Starch: While related, they’re not interchangeable cup-for-cup. Cassava flour is a whole flour; tapioca is just the starch.
Alternatives & Substitutions
Feeling adventurous? Here are some ways to tweak this recipe to your heart’s content:
- Sweetener Swap: Instead of brown sugar, try coconut sugar for a less refined option, or a mix of maple syrup and honey for different flavor notes. Just keep the total amount similar.
- Fat Freedom: If butter isn’t your jam (or you’re dairy-free), coconut oil is a fantastic 1:1 substitute. Avocado oil or a neutral vegetable oil works too.
- Egg-Free Option: While I haven’t personally tested it for this specific recipe, you could try flax eggs (1 tbsp ground flaxseed + 3 tbsp water, let sit for 5 mins, per egg). The texture might be a little different, but it’s worth a shot if you need it!
- Spice It Up: Add a teaspoon of cinnamon, a pinch of nutmeg, or even a dash of allspice for some extra warmth and coziness.
- Extra Add-ins: Beyond chocolate chips, consider dried cranberries, chopped dates, or even a swirl of nut butter before baking.
FAQ (Frequently Asked Questions)
Got questions? I’ve got answers. Mostly.
“My bananas aren’t *super* ripe, can I still use them?”
Well, technically, yes, but your bread won’t be as naturally sweet or moist. If you’re desperate, you can roast them on a baking sheet at 300°F (150°C) for 15-20 minutes until the peels are black and shiny – instant ripeness! You’re welcome.
“Can I use regular all-purpose flour instead of cassava?”
Uh, no. This recipe is specifically formulated for cassava flour, which absorbs liquids very differently than wheat flour. Swapping them out would lead to a very different (and likely disappointing) result. Stick to the program, friend!
“How do I know if it’s cooked through without guessing?”
The trusty toothpick test! Stick a toothpick, skewer, or even a thin knife into the very center of the loaf. If it comes out clean or with just a few moist crumbs, it’s done. If it’s gooey, give it another 5-10 minutes.
“Can I make muffins instead of a loaf?”
Absolutely! Divide the batter into a greased 12-cup muffin tin. Bake for a shorter time, usually around 20-25 minutes, or until a toothpick comes out clean.
“How long does this banana bread last?”
On the counter, tightly wrapped, it’s good for 3-4 days. In the fridge, it’ll last up to a week. It also freezes beautifully for up to 2-3 months – just wrap individual slices in plastic wrap and then foil. Future you will thank past you.
“Is it really gluten-free?”
Yep! Cassava flour is naturally gluten-free. Just make sure any other ingredients you use (like baking powder) are also certified gluten-free if that’s a strict requirement for you.
Final Thoughts
There you have it, folks! Your new go-to, perfectly moist, utterly delicious, and practically guilt-free (mostly) cassava flour banana bread recipe. Seriously, you just made magic happen with some spotted fruit and a super cool flour. Now go impress someone—or just yourself—with your new culinary skills. You’ve earned that slice (or three). Happy baking!

