So, you’ve scrolled through enough food porn on Instagram to make your stomach grumble louder than a bear after hibernation, right? And now you’re thinking, “I need something decadent, something impressive, but also something that won’t require me to sell a kidney to buy ingredients or spend my entire weekend slaving away.” My friend, I hear you. And I raise you: Cassava Cake with Leche Flan. It’s basically the culinary equivalent of wearing sweatpants but looking like you just stepped off a runway.
Why This Recipe is Awesome
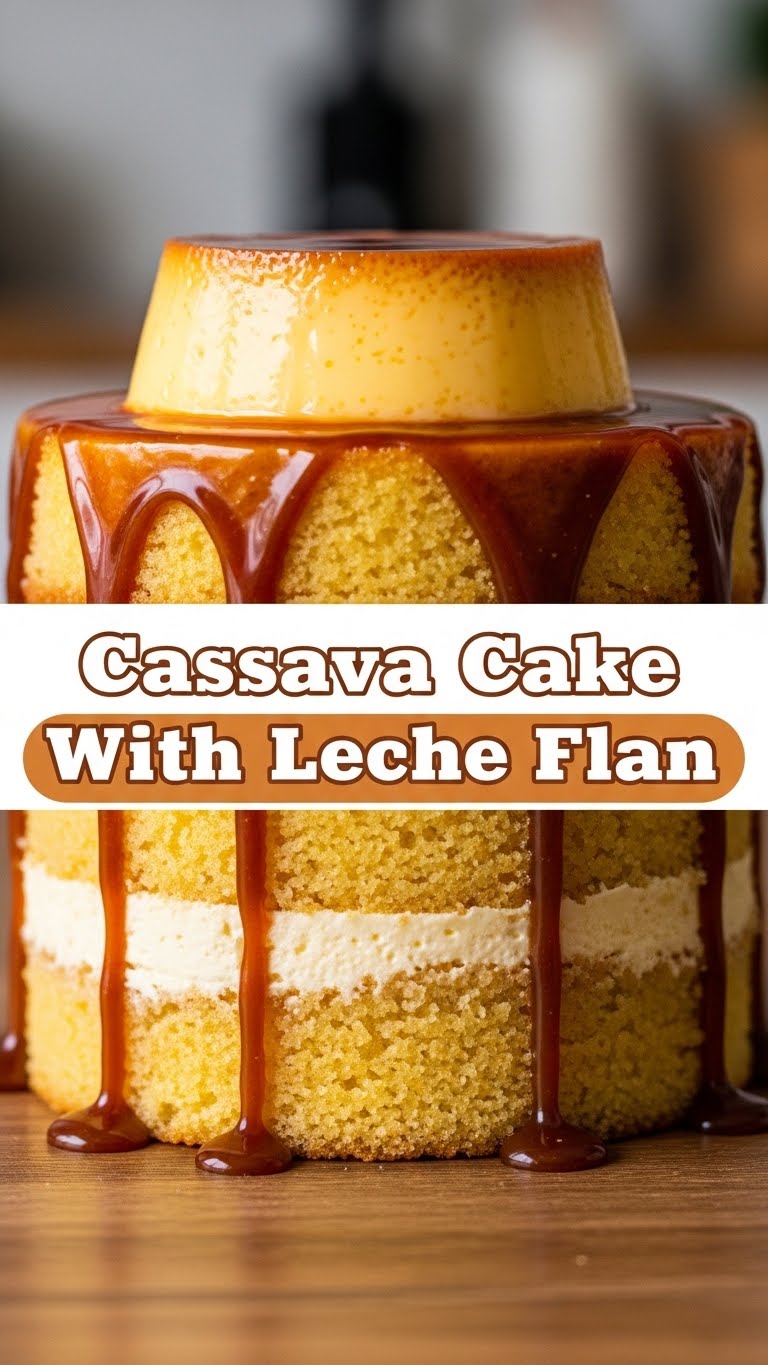
Let’s be real, most desserts make you choose: either it’s super easy but kinda ‘meh,’ or it’s a showstopper that requires a culinary degree and the patience of a saint. This beauty? It’s the best of both worlds! Imagine a moist, chewy, slightly sweet cassava cake base, topped with the silkiest, creamiest, golden leche flan. It’s like a party in your mouth where everyone’s invited and nobody’s leaving early.
Plus, it looks ridiculously fancy, which means you get maximum “oohs” and “aahs” for minimal effort. It’s practically idiot-proof – and trust me, if I didn’t mess it up, you’re golden. It’s also gluten-free (hello, cassava!) and just begging to be devoured. What’s not to love?
Ingredients You’ll Need
Time to gather your culinary squad! Don’t fret, most of these are pantry staples, or easily found at your local Asian market (which, let’s be honest, is always an adventure).
- For the Silky Leche Flan Layer:
- 1 cup granulated sugar (for that gorgeous caramel, because #priorities)
- 1/4 cup water (just a splash to get the caramel party started)
- 6 large egg yolks (the heart and soul of any good flan, ditch the whites for an omelet, or not, your call)
- 1 can (14 oz) sweetened condensed milk (aka liquid gold, sweetness overload in the best way)
- 1 can (12 oz) evaporated milk (the flan’s creamy best friend)
- 1 teaspoon vanilla extract (a little fancy, a lot of flavor)
- For the Chewy Cassava Cake Layer:
- 4 cups grated cassava (fresh is boss, but frozen defrosted and squeezed dry works too! **Squeeze it dry, people!**)
- 1 can (14 oz) sweetened condensed milk (yes, again! We love sweet around here)
- 1 can (12 oz) evaporated milk (and its partner in crime, making everything creamy)
- 1 can (13.5 oz) full-fat coconut milk (the real deal, none of that light stuff)
- 2 large eggs (binding everything together, like glue, but tasty)
- 1/2 cup granulated sugar (just a little extra hug of sweetness)
- 1/4 cup melted butter (because butter makes everything better, fight me)
- 1 teaspoon vanilla extract (for that warm, comforting vibe)
Step-by-Step Instructions
Alright, apron on, good tunes playing, maybe a little dance break between steps? Let’s get cooking!
- Caramel Kick-off: In a small, heavy-bottomed saucepan, combine the 1 cup sugar and 1/4 cup water. Cook over medium heat, swirling occasionally (don’t stir too much, rookie mistake!), until it turns a rich, amber caramel color. Pour this molten gold immediately into a 9×13 inch oven-safe baking dish, tilting it gently to coat the bottom. Set aside to cool and harden.
- Flan Fun: Grab a medium bowl. Whisk together the egg yolks, condensed milk, evaporated milk, and vanilla extract until smooth. Don’t go crazy, just combine. Pour this mixture carefully over the hardened caramel in your baking dish.
- Steam Ahead (Part 1): Place your baking dish with the flan mixture inside a larger roasting pan. Fill the larger pan with hot water, enough to come about halfway up the sides of the flan dish. This is your makeshift bain-marie, making sure the flan cooks gently.
- Pre-Bake Prep: Pop that whole setup into a preheated oven at 350°F (175°C) for about 20-25 minutes. We’re looking for the flan to be partially set but still a bit jiggly in the center. While it’s doing its thing, move on to the cassava magic!
- Cassava Carnival: In a separate large bowl, combine the grated cassava (remember, **squeezed dry**!), both cans of condensed milk, both cans of evaporated milk, coconut milk, eggs, sugar, melted butter, and vanilla extract. Mix it all up until everything is wonderfully combined.
- Layer Up!: Carefully remove the partially set flan from the oven. Gently pour the cassava mixture evenly over the flan layer. Try not to disturb the flan too much.
- Bake It ‘Til You Make It: Return the baking dish (still in its water bath) to the oven. Bake for another 60-75 minutes, or until the cassava cake is golden brown, firm to the touch, and a toothpick inserted into the cassava layer comes out clean.
- Chill Out, Seriously: Remove the pan from the oven and carefully take the cassava cake dish out of the water bath. Let it cool on a wire rack at room temperature for at least an hour. Then, and this is crucial, **refrigerate it for at least 4 hours, or even better, overnight!** The chill time helps the flan set perfectly and allows the flavors to meld.
- The Grand Reveal: Once thoroughly chilled, run a thin knife around the edges of the dish. Place a large serving platter on top of the baking dish, then, with a deep breath and a prayer, quickly and confidently flip the whole thing over. Give it a gentle shake, and watch the magnificent cassava cake with leche flan slide onto the platter. Ta-da!
Common Mistakes to Avoid
We’ve all been there – kitchen mishaps are part of the adventure! But let’s try to minimize them, shall we?
- Not Squeezing the Cassava: This is probably the biggest rookie mistake. If your grated cassava is watery, your cake will be gummy and not in a good way. **Squeeze it like your life depends on it!** Use a cheesecloth or clean kitchen towel.
- Burning the Caramel: Watch that sugar like a hawk! Caramel goes from perfectly golden to burnt disaster in seconds. If it’s too dark, it’ll taste bitter, and nobody wants bitter flan. Start over if you need to, it’s just sugar.
- Overbaking the Flan: If the flan bakes too long before the cassava layer is added, it can get rubbery or develop little holes. Keep an eye on it during that first 20-25 minute bake.
- Impatience is NOT a Virtue: Trying to flip this masterpiece before it’s thoroughly chilled is a recipe for disaster. The flan needs that time to firm up. **Seriously, chill out (pun intended!).**
- Forgetting to Grease Your Pan (or using a non-stick one for caramel): While the caramel coats the bottom, make sure your pan sides are slightly greased if you’re worried about the cake sticking. Also, don’t use a non-stick pan for the caramel, it won’t stick and spread properly.
Alternatives & Substitutions
Hey, cooking is about creativity, right? Feel free to play around a bit!
- Fresh vs. Frozen Cassava: While fresh cassava generally yields a superior texture, frozen grated cassava is a perfectly acceptable shortcut. Just make sure it’s completely thawed and, again, **squeeze out every last drop of moisture!**
- Coconut Milk Swap: If you’re not a huge fan of coconut, you could try using all evaporated milk in the cassava cake layer, but you’ll lose some of that authentic tropical flavor. **IMO, the coconut milk is non-negotiable for that classic taste.**
- Spice It Up: A pinch of cinnamon or nutmeg in the cassava layer can add a nice warm note, if you’re feeling adventurous.
- Topping Shenanigans: Feel free to sprinkle some toasted coconut flakes, a light dusting of powdered sugar, or even a few fresh berries on top right before serving for extra flair. Some people even like a sprinkle of grated cheese (yes, cheese!) on cassava cake for a sweet-savory thing, but that’s a whole other debate.
- No Steamer, No Problem: If you don’t have a huge roasting pan for the water bath, you can still use the water bath method in your oven. Just make sure the water is hot when it goes in and covers about halfway up the sides of your baking dish.
FAQ (Frequently Asked Questions)
Got questions? I’ve got (casual) answers!
- Can I use margarine instead of butter? Well, technically yes, but why hurt your soul like that? Butter just tastes better, and adds a richness that margarine can’t quite replicate. **For best results, stick with butter.**
- My caramel seized up and turned into a rock! What now? Ah, the caramel gods were not with you. Don’t panic! It happens. Just add a tiny bit more water and gently heat it again, stirring until it dissolves and smooths out. If it’s truly burnt and bitter, unfortunately, you’ll need to start fresh.
- How do I know when the cassava cake is perfectly cooked? It should be beautifully golden brown on top, firm to the touch, and a skewer or toothpick inserted into the cassava layer should come out clean.
- Can I make this ahead of time? **OMG, yes!** This dessert actually tastes even better the next day once all those amazing flavors have had a chance to really get to know each other in the fridge. Perfect for parties!
- What kind of pan should I use? A 9×13 inch glass or ceramic baking dish works perfectly. If you use a metal pan, your baking time might be slightly shorter, so keep an eye on it.
- My flan has bubbles! What did I do wrong? You probably whisked too vigorously, incorporating too much air. For a super smooth flan, whisk gently and consider straining the flan mixture before pouring it over the caramel.
- Is it really super sweet? **FYI, it’s a Filipino dessert, so yes, it’s proudly sweet!** It’s meant to be a rich treat, so embrace the sweetness. If you prefer less sweet, you could slightly reduce the sugar in the cassava layer, but don’t touch the flan sugar – that’s for caramel!
Final Thoughts
See? That wasn’t so bad, was it? You just whipped up a dessert that looks like it took you days, but really only took a few fun steps (plus some chill time, because everyone needs to chill). Now, go ahead and bask in the glory of your culinary prowess. Slice yourself a generous piece, maybe brew a strong cup of coffee or tea, and enjoy every single sweet, creamy, chewy bite.
You’ve earned it, chef! Go forth and impress someone—or just yourself. No judgment here, because this dessert is pure self-love on a plate. You’re awesome!


