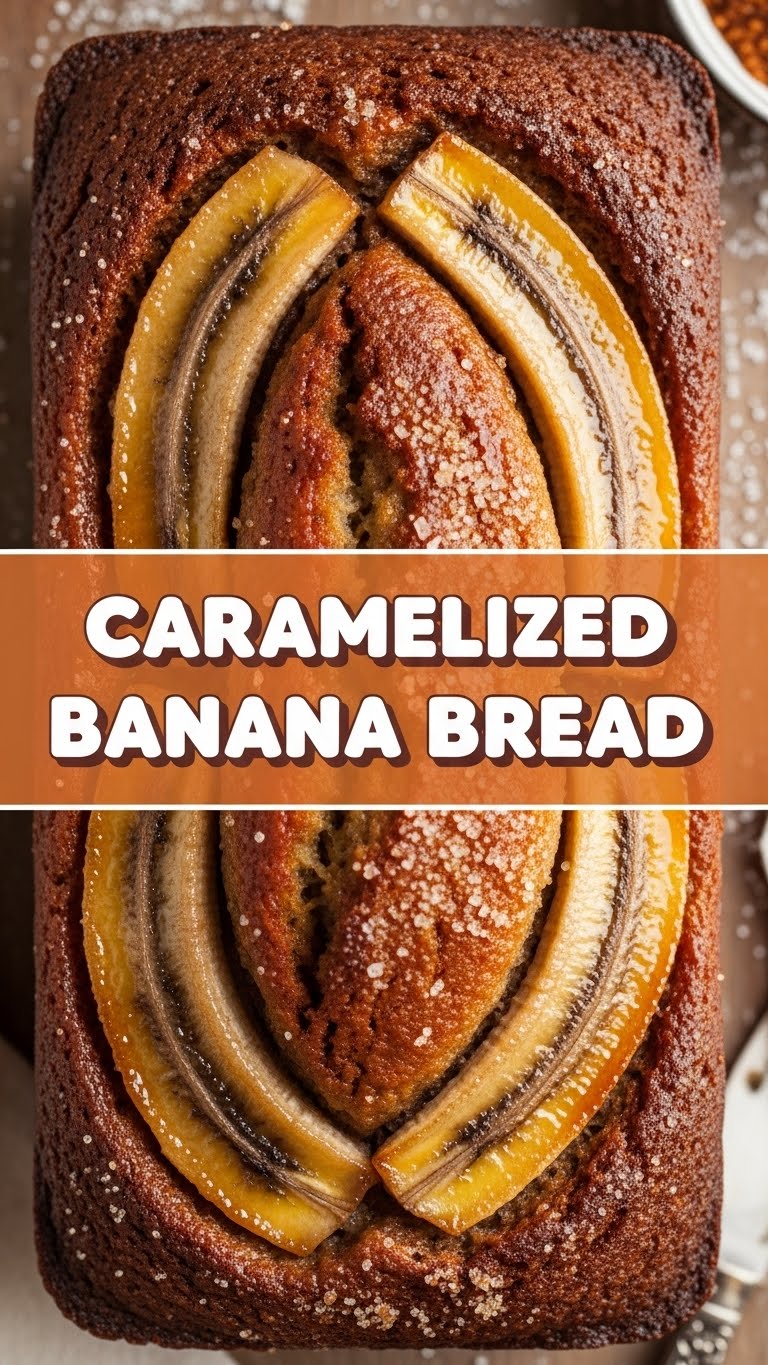
So you’re staring at those spotty bananas on your counter, feeling a mix of guilt and potential, huh? Instead of letting them turn into science experiments, let’s transform them into something ridiculously good. We’re talking Caramelized Banana Bread, people! It’s like regular banana bread went on a fancy vacation and came back with a glow-up. Trust me, your taste buds are about to send you a thank-you note.
Why This Recipe is Awesome
Okay, let’s be real. There are a million banana bread recipes out there. But this one? It’s next level. We’re not just mashing bananas; we’re giving them the VIP treatment with a glorious caramelized topping that tastes like a warm hug from a tropical island. It’s got that soft, moist crumb you crave, but with an extra oomph that screams, “I put in *effort*” (even if you totally didn’t). Plus, it’s pretty hard to mess up, so even if your kitchen skills usually involve ordering takeout, you’re golden. It’s practically idiot-proof.
Ingredients You’ll Need
Gather ’round, my baking comrades! Here’s what you’ll need to make magic happen. No need to raid a specialty store, just your regular pantry heroes:
- For the Caramel Topping (aka the “Wow Factor”):
- 1/4 cup unsalted butter (the real stuff, please; no funny business)
- 1/2 cup packed light brown sugar (dark brown works too if you’re feeling feisty)
- 2 ripe bananas, sliced into 1/4-inch thick rounds (these are the stars, give ’em a good chop!)
- For the Banana Bread Batter (the “Cozy Foundation”):
- 1 3/4 cups all-purpose flour (plain ol’ flour, nothing fancy)
- 1 teaspoon baking soda (your bread’s lift-off mechanism)
- 1/2 teaspoon salt (balances all that sweetness)
- 1/2 cup (1 stick) unsalted butter, softened (leave it out for a bit, don’t microwave it into oblivion)
- 1/2 cup granulated sugar (for sweet dreams)
- 1/4 cup packed light brown sugar (more depth, more yum!)
- 2 large eggs (room temp is best, but if you forget, don’t sweat it)
- 1 teaspoon vanilla extract (the MVP of flavor)
- 1 cup mashed ripe bananas (about 2-3 bananas; the spottier, the better!)
- 1/4 cup buttermilk (or regular milk with a splash of lemon juice/vinegar, let it sit for 5 mins – DIY buttermilk FTW!)
Step-by-Step Instructions
Alright, apron on, good tunes playing, let’s get this loaf baked!
- Prep Your Pan & Oven: Preheat your oven to 350°F (175°C). Grease a 9×5-inch loaf pan with butter or non-stick spray. Then, line the bottom with a piece of parchment paper, leaving an overhang on the sides for easy lifting later. Trust me, this trick saves lives (or at least loaves).
- Caramel Time! In a small saucepan over medium heat, melt the 1/4 cup butter. Stir in the 1/2 cup brown sugar until it’s smooth and bubbly, about 2-3 minutes. Pour this gooey goodness into the bottom of your prepared loaf pan. Arrange your sliced bananas decoratively over the caramel in a single layer. This will be the top of your bread!
- Dry Mix It Up: In a medium bowl, whisk together the flour, baking soda, and salt. Set this aside.
- Wet Mix Wonders: In a large bowl (or stand mixer), cream together the softened 1/2 cup butter, granulated sugar, and 1/4 cup brown sugar until light and fluffy. This usually takes about 2-3 minutes.
- Egg-cellent Addition: Beat in the eggs one at a time, making sure each is fully incorporated before adding the next. Stir in the vanilla extract.
- Banana Bash: Fold in your mashed ripe bananas and buttermilk. Don’t worry if it looks a little curdled; it’s all part of the process.
- Combine Forces: Gradually add the dry ingredients to the wet ingredients, mixing only until *just* combined. Do not overmix! A few lumps are totally fine; overmixing leads to tough bread, and nobody wants that.
- Assemble & Bake: Gently pour the batter over the caramelized bananas in your loaf pan. Smooth out the top with a spatula. Pop it into your preheated oven.
- Wait (Im)patiently: Bake for 55-65 minutes, or until a wooden skewer inserted into the center comes out clean (or with a few moist crumbs, but no wet batter).
- The Big Reveal: Let the bread cool in the pan for 10-15 minutes. This is crucial! Then, using those parchment paper overhangs, carefully lift the bread out onto a wire rack. Now for the fun part: invert the loaf so the caramelized banana side is facing UP! Peel off the parchment paper. Bask in its glory.
Common Mistakes to Avoid
We’ve all been there. Here are a few pitfalls to sidestep on your journey to banana bread bliss:
- Using Under-Ripe Bananas: See those yellow bananas with green tips? Put ’em back! You want bananas that look like they’ve seen some things—brown spots, super soft, almost ready for the compost. The riper, the sweeter and more flavorful.
- Overmixing the Batter: I know, it’s tempting to get every lump out. But seriously, stop when the flour is *just* incorporated. Overmixing develops gluten, which means tough, chewy bread instead of tender, moist deliciousness.
- Not Cooling Enough Before Flipping: Patience, young padawan! If you flip it too soon, your gorgeous caramelized topping might stick to the pan or crumble. Give it that 10-15 minutes to firm up.
- Ignoring the Parchment Paper: You might think, “Eh, I can skip that.” Don’t! That parchment paper is your best friend for a clean flip and easy removal of that sticky, caramelized top.
Alternatives & Substitutions
Feeling a little rebellious? Here are some ways to shake things up:
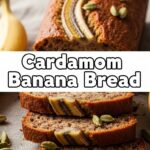
- Spice it Up: Add 1/2 teaspoon of cinnamon or a pinch of nutmeg to your dry ingredients for extra warmth.
- Nutty About Nuts? Fold in 1/2 cup of chopped walnuts or pecans with the dry ingredients. IMO, walnuts are classic, but pecans add a nice buttery crunch.
- Chocolate Lover? Who isn’t? 1/2 cup of chocolate chips (dark or semi-sweet) can never go wrong.
- Dairy-Free? You can usually swap out butter for a plant-based butter alternative and use a dairy-free milk with a splash of vinegar for the buttermilk.
- Gluten-Free? A 1:1 gluten-free baking flour blend usually works well in banana bread recipes, but results can vary slightly.
FAQ (Frequently Asked Questions)
- “My bananas aren’t ripe enough! What do I do?”
Oh, the eternal struggle! You can try baking them on a baking sheet at 300°F (150°C) for 15-30 minutes until the peels are black and shiny. Let them cool, then mash. Crisis averted!
- “Can I use margarine instead of butter?”
Well, technically yes, but why hurt your soul like that? Butter just gives a superior flavor and texture, especially in the caramel. Treat yourself!
- “How do I store this masterpiece?”
Once cooled, wrap it tightly in plastic wrap or foil. It’ll stay fresh at room temperature for 2-3 days, or in the fridge for up to a week. If it lasts that long, you’re a stronger person than I am.
- “Can I freeze it?”
Absolutely! Wrap the cooled loaf (or slices) tightly in plastic wrap, then again in foil. It freezes beautifully for up to 3 months. Just thaw at room temp when a craving strikes. FYl, it’s perfect for a quick breakfast on a busy morning!
- “My caramelized bananas stuck to the pan! Help!”
Bummer! Did you use parchment paper? And did you let it cool for long enough before flipping? Those are usually the culprits. Next time, really make sure that parchment paper is securely in place and resist the urge to flip too early!
Final Thoughts
So there you have it, folks! Your new favorite way to conquer those ripe bananas and impress anyone lucky enough to snag a slice. This Caramelized Banana Bread isn’t just a recipe; it’s a statement. It says, “I’m fancy, but also I just wanted something comforting and delicious.” Now go on, get baking, and don’t forget to savor every single bite. You’ve earned it!

