So, you’re craving something ridiculously delicious, Instagram-worthy, and yet, you want to put in minimal effort, because, let’s be real, life’s too short for complicated baking. Sound familiar? Good, because we’re about to dive headfirst into the glorious, bite-sized world of Cake Pop Chocolate!
Why This Recipe is Awesome
Listen, if I can make these without setting off the smoke detector (which, let’s just say, happens more often than I’d like to admit), then you, my friend, are absolutely golden. This isn’t just a recipe; it’s a cheat code to looking like a culinary genius. We’re talking about taking a perfectly good cake, crumbling it into submission, mixing it with frosting (yes, *more* frosting!), shaping it, and then drowning it in chocolate. It’s basically a dessert Frankenstein, but in the best way possible. It’s idiot-proof, fun, and shockingly easy, even for those of us whose kitchen skills usually stop at opening a bag of chips. Plus, everyone loves a cake pop, right? It’s like a tiny, personal party on a stick!
Ingredients You’ll Need
- 1 box cake mix + ingredients listed on box: Pick your poison! Chocolate, vanilla, red velvet – whatever makes your tastebuds sing.
- 1 can (16 oz) frosting: Again, your choice! Cream cheese, vanilla, chocolate. This is the glue, the magic, the reason your cake balls won’t just be dry crumbs.
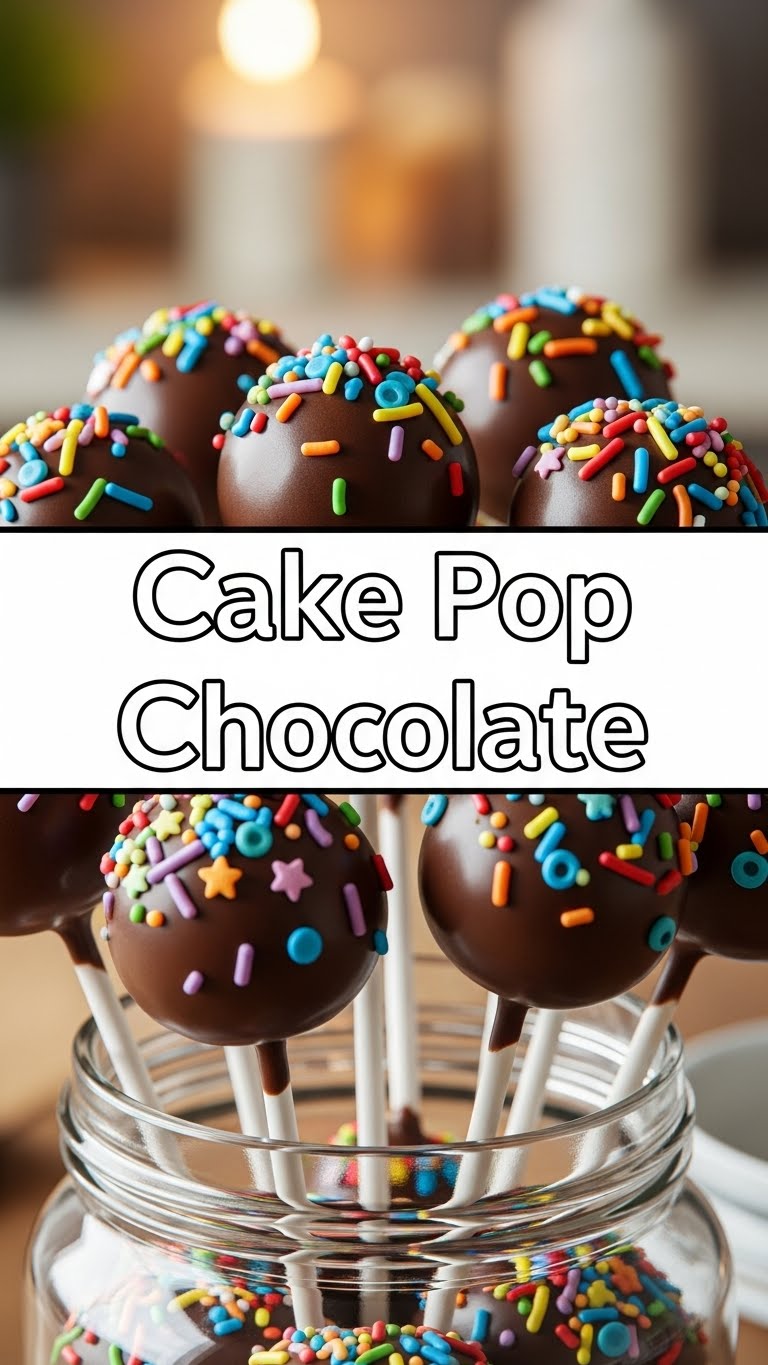
- 1-2 bags (12 oz each) chocolate candy melts or good quality chocolate chips: Because what’s a cake pop without its glorious chocolate shell? Candy melts are easier for dipping, just FYI.
- Lollipop sticks: The unsung heroes that turn a humble cake ball into a pop star.
- Sprinkles, edible glitter, or extra chocolate for drizzling: For making them look fancy AF. Optional, but highly encouraged for maximum sparkle.
Step-by-Step Instructions
- Bake Your Cake: Follow the instructions on your cake mix box. Don’t overthink it, just bake it and let it cool completely. Seriously, *completely*. No warm cake crumbling allowed, unless you want a sticky mess.
- Crumble Time: Once cool, crumble that cake into a large bowl. You want fine crumbs, no big chunks. Get in there with your hands; it’s therapeutic, trust me.
- Mix in the Magic: Add about ¾ of your can of frosting to the cake crumbs. Mix it up really well with your hands until it’s like a soft, play-doh consistency. It should hold its shape when squeezed but not be sticky or mushy. Add more frosting if needed, but go slow!
- Roll ‘Em Up: Scoop out small portions (about 1.5 tablespoons) and roll them into tight, smooth balls. Place them on a baking sheet lined with parchment paper.
- Chill Out: Pop those beauties into the fridge for at least 30 minutes. This step is crucial! Cold balls are happy balls that won’t fall off the stick.
- Melt the Chocolate: While your balls are chilling, melt your candy melts or chocolate chips. Do it in a microwave-safe bowl in 30-second intervals, stirring in between, until smooth. Don’t overheat it, or it’ll seize up on you!
- Stick ‘Em Up: Dip the tip of a lollipop stick into the melted chocolate (just about ½ inch), then gently insert it about halfway into a chilled cake ball. This acts like edible glue. Repeat for all balls.
- Chill Again (Optional, but Smart): For extra security, put the stuck balls back in the fridge for another 10-15 minutes to let that chocolate “glue” set.
- Dip and Decorate: Take a cake pop, hold it over your melted chocolate, and dip it in, twisting gently to get a full, even coat. Tap off any excess chocolate by gently tapping the stick against the side of the bowl. Immediately add sprinkles or drizzles before the chocolate sets.
- Set and Enjoy: Stick the finished cake pops into a block of styrofoam or a tall glass to dry completely. Once the chocolate is set (usually 10-20 minutes), they’re ready to devour!
Common Mistakes to Avoid
- Warm Cake Crumbs: Trying to mix warm cake with frosting is like trying to comb a cat—you’re just going to make a mess. Let that cake cool down!
- Too Much Frosting: Adding too much frosting makes your cake balls mushy and hard to roll. They also won’t hold their shape and might slide off the stick. Go easy, soldier!
- Not Chilling Enough: Rookie mistake! If your cake balls aren’t cold, they’ll be too soft and will likely fall apart or slide off the stick when dipped. Patience, young grasshopper!
- Overheated/Thick Chocolate: If your chocolate is too hot, it can melt the cake ball. If it’s too thick, you’ll get a clumpy, uneven coating. If it’s too thick, add a tiny bit of coconut oil or shortening to thin it out.
- Impatience with Decorating: Trying to add sprinkles to chocolate that’s already set is a fruitless endeavor. Move fast!
Alternatives & Substitutions
Feeling creative? This recipe is your canvas!
- Cake & Frosting Flavors: Mix and match! How about lemon cake with cream cheese frosting? Or carrot cake with vanilla? The world is your oyster. Or, you know, your cake.
- Chocolate Coating: Don’t just stick to milk chocolate! Dark chocolate for the sophisticated palate, white chocolate for a classic look, or even colored candy melts to match a party theme. IMHO, the quality of your chocolate really makes a difference here.
- Decorations: Beyond sprinkles, think mini chocolate chips, chopped nuts, shredded coconut, or a drizzle of contrasting chocolate. Get wild!
- No Sticks? No Problem!: Turn them into “cake bites” by simply rolling them, dipping them, and serving them in mini cupcake liners. Still delicious, just sans stick.
FAQ (Frequently Asked Questions)
Q: Do I *have* to use a box cake mix? Can I use homemade?
A: Well, technically yes, but why make life harder for yourself? This recipe is designed for maximum ease. If you have a favorite homemade cake recipe you want to use, go for it! Just make sure it’s fully cooled and crumbly.
Q: My cake balls are too crumbly and won’t stick together. What did I do wrong?
A: Sounds like you need more frosting! Add a little more, a tablespoon at a time, until the mixture can be squeezed and holds its shape without falling apart. It should feel like play-doh.
Q: Why is my chocolate coating getting lumpy or seizing up?
A: Two main culprits: overheating or getting water in it. Heat chocolate slowly, stirring often. And make sure your bowl and utensils are completely dry! Water is chocolate’s arch-nemesis.
Q: How do I get a super smooth chocolate coating?
A: Make sure your chocolate isn’t too thick (thin with a tiny bit of coconut oil if needed) and your cake balls are very cold. Dip quickly, tap off excess, and don’t double dip unless absolutely necessary (and quickly!).
Q: How long do cake pops last, and how should I store them?
A: If they last more than a day in your house, you have more willpower than I do! Store them in an airtight container in the fridge for up to a week. You can even freeze them for a month or two, just thaw in the fridge before serving.
Q: Can I use regular chocolate bars instead of candy melts?
A: You can, but it’s trickier. Regular chocolate needs tempering to get that shiny, snap-able coating that doesn’t melt in your hands. Candy melts are designed to be user-friendly for dipping and setting without all that fuss. So, for ease, I’d stick with the melts.
Final Thoughts
There you have it, folks! Your new favorite dessert, ready to impress at your next gathering or just for a Tuesday night treat. Don’t be afraid to experiment, have fun, and maybe even get a little messy. That’s what baking (or, in this case, assembling) is all about! Now go forth and create some chocolate-covered magic. You’ve earned it, you rockstar baker, you!


