So, someone’s hitting the big one-eight, huh? And you’ve drawn the short straw for cake duty? Deep breaths, pal, because we’re about to make you look like a Martha Stewart protégé without actually *being* Martha. This isn’t about baking a cake from scratch (unless you’re feeling ambitious, then go you!), it’s about transforming a humble cake into an absolute showstopper for that milestone 18th birthday. Get ready for compliments, high fives, and maybe even a job offer as a professional cake whisperer.
Why This Cake Design is Awesome
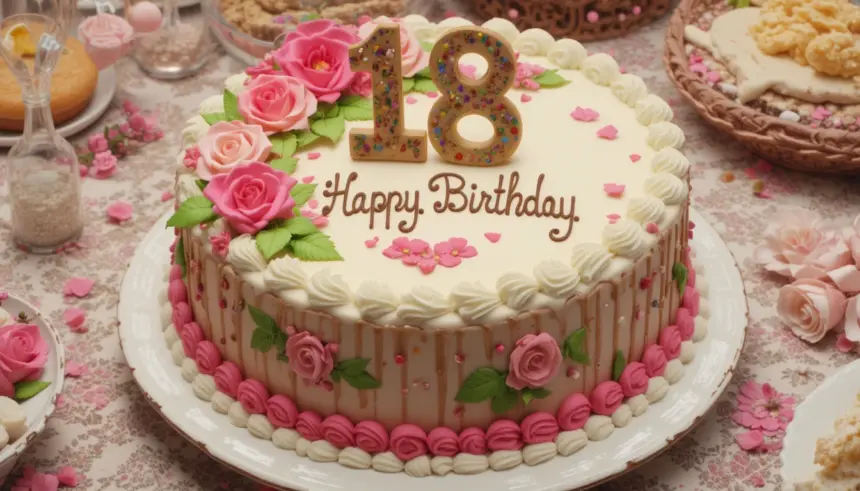
Because let’s be real, turning 18 is a huge deal. It’s like, “Welcome to adulthood, here’s a mountain of responsibilities, enjoy!” So the cake needs to reflect that epic transition. This design is awesome because it’s **visually stunning but shockingly simple**. Seriously, it’s idiot-proof, even I didn’t mess it up (and my track record with frosting usually involves more on my face than the cake). It uses readily available bits and bobs, looks way more expensive than it is, and can be completely personalized. Plus, it screams “party!” without screaming “I spent a week making this!” Win-win, IMO.
Ingredients You’ll Need
Alright, gather ’round, folks! Here’s your shopping list for design domination:
- Your Cake Canvas: A pre-baked cake! Round or square, two layers is ideal for that dramatic height. Store-bought vanilla, chocolate, red velvet – whatever floats your boat. (Or if you’re a baking wizard, whip one up!)
- Frosting, Baby!: At least two tubs of your favorite buttercream. White is a classic base, but a pastel color can be fun too. We’re talking store-bought, folks. No shame in that game.
- Sprinkles Galore: Grab a mix of fancy, metallic, or themed sprinkles. Think golds, silvers, iridescent pastels, or even a mix of the birthday person’s favorite colors. The more random, the better!
- Drip Magic (Optional but Recommended): A squeeze bottle of chocolate ganache or a candy melt drip in a complementary color. This is where we get fancy!
- Number Toppers: Obvs, the big “1” and “8.” Gold or silver looks super chic.
- Cake Topper (Optional but Extra Sparkle): A “Happy Birthday” or “Cheers to 18 Years!” sign, maybe some mini balloons or a glittery starburst.
- Fresh Berries/Chocolates (Optional): Strawberries, raspberries, or some fancy truffles to perch on top. Adds a touch of freshness and gourmet flair.
Step-by-Step Instructions
- Prep Your Canvas: First, ensure your cake is completely cooled if you baked it yourself. If it’s fresh out of the store, unbox it and marvel at its potential. Place your cake on your serving platter or cake stand now; it’s easier to decorate in place.
- Crumb Coat Crusade: Apply a thin layer of frosting all over your cake. This is called a “crumb coat” and it traps any loose crumbs, preventing them from messing up your final, smooth layer. Stick it in the fridge for 15-20 minutes to firm up.
- Smooth Operator: Retrieve your cake from the fridge. Now, apply a generous, thicker layer of frosting, smoothing it out with an offset spatula or a bench scraper. Aim for as smooth as possible, but don’t stress *too* much—the sprinkles will hide minor imperfections!
- Drip, Drip, Hooray! (If using): If you’re doing a drip, warm your ganache or candy melts until it’s a pourable consistency. Gently squeeze it around the top edge of your cake, letting it drip down the sides. Go slow! You can add a little more to the center of the top and spread it out.
- Sprinkle Sensation: This is the fun part! Gently press your sprinkles into the sides of the cake. You can do the whole cake, or just the bottom half for an ombré effect. For the top, scatter them liberally, especially if you skipped the drip. **Don’t be shy with the sprinkles!**
- Topper Time: Carefully insert your “1” and “8” number toppers into the top of the cake. Add any other cake toppers you have. Position them slightly off-center for an artistic touch.
- Berry & Chocolate Bling (Optional): Artfully arrange your fresh berries or chocolates around the base of your toppers and on the top of the cake. This adds texture and a touch of elegance.
- Admire Your Masterpiece: Stand back, take a deep breath, and bask in the glory of your creation. You just designed an epic 18th birthday cake!
Common Mistakes to Avoid
We’ve all been there, staring at a cake catastrophe. Here are a few rookie errors to steer clear of:
- Skimping on the Crumb Coat: Seriously, don’t skip this step. Those crumbs will haunt you in your final frosting layer, making it look gritty. It’s like putting on foundation without primer—just don’t.
- Warm Cake, Frosting Fail: Trying to frost a cake that isn’t completely chilled is like trying to ice skate uphill. The frosting will melt, slide, and make you question all your life choices. **Always chill your cake first!**
- Underestimating Sprinkle Power: Thinking a tiny bottle of sprinkles will do the trick? Bless your heart. Go big or go home. You want a generous, celebratory cascade, not a sparse dusting.
- Overthinking the Drip: The drip is meant to be a little organic and imperfect. Don’t try to make every drip identical. Let it flow, embrace the artistic chaos!
- Using the Wrong Tools: Trying to smooth frosting with a butter knife is a special kind of torture. Invest in a cheap offset spatula or a bench scraper. Your sanity (and your cake) will thank you.
Alternatives & Substitutions
Feeling creative? Mix it up!
- Color Scheme Swap: Instead of white frosting, use a pastel pink, blue, mint green, or even a bold black for a dramatic effect. Match your sprinkles to complement!
- Theme Toppers: Is the birthday person obsessed with a certain hobby? Find toppers that reflect that! Mini guitars for a musician, tiny books for a reader, etc.
- Edible Flowers: For a more sophisticated look, swap out the berries and chocolates for some gorgeous edible flowers. Think pansies, violas, or rose petals. Very chic!
- Cookie Crumble Base: Instead of sprinkles on the side, press crushed Oreos, Biscoff cookies, or even toasted coconut flakes into the frosting. Delicious texture!
- Candy Mountain Top: Forget berries; pile on their favorite candies! Gummy bears, mini chocolate bars, M&Ms – go wild. It’s an 18th birthday, after all!
FAQ (Frequently Asked Questions)
- Can I use whipped cream instead of buttercream? Well, you *could*, but whipped cream is notoriously less stable and will weep more easily, especially if left out. For a sturdy, Instagram-worthy cake, buttercream is your BFF. Why hurt your beautiful design like that?
- How far in advance can I decorate this cake? You can usually decorate the cake up to 1-2 days in advance, especially if it’s buttercream. Keep it refrigerated, and bring it to room temperature for about an hour before serving for best flavor and texture.
- My frosting isn’t smoothing out nicely, help! Is your frosting too cold? Let it sit at room temp for 15-20 minutes, then stir it to make it more pliable. Or, try dipping your spatula in hot water, wiping it dry, and then smoothing. It’s a game-changer!
- Where do I find all these fancy sprinkles and toppers? Check your local craft store (like Michaels or Hobby Lobby), party supply stores, or the baking aisle of larger supermarkets. Online retailers like Amazon are also treasure troves for unique cake decorating bits.
- Do I really need a crumb coat? My cake is pretty firm. YES. Seriously, don’t skip it. It’s the secret weapon for a professional-looking finish. Even firm cakes shed crumbs, and those crumbs *will* get into your final frosting layer.
- My drip is too thick/thin! What do I do? If it’s too thick, gently warm it a bit more (microwave in 10-second bursts, stirring). Too thin? Add a tiny bit more chocolate (for ganache) or un-melted candy melts (for candy drip) and stir until it thickens slightly. Patience is key, my friend.
Final Thoughts
See? That wasn’t so scary, was it? You just whipped up a stunning, celebratory cake that looks like it took hours of effort but actually gave you plenty of time to, you know, live your life. This 18th birthday cake isn’t just dessert; it’s a testament to your newfound cake-designing prowess. Now go impress someone—or yourself—with your new culinary skills. You’ve earned it! And don’t forget to snap a pic before it all disappears!


