“`html
So you’re craving something deliciously chocolatey, but the thought of a whole baking production makes you want to take a nap instead, right? Totally get it. Life’s too short for complicated brownie recipes when there’s perfectly good Netflix to watch and comfy couches to occupy. But what if I told you that you could whip up some fudgy, chewy, utterly divine brownies with minimal fuss, and the secret ingredient is probably already lurking in your pantry? Yup, we’re talking about brownies made with self-rising flour!
Why This Recipe is Awesome (Seriously, It’s a Lifesaver)
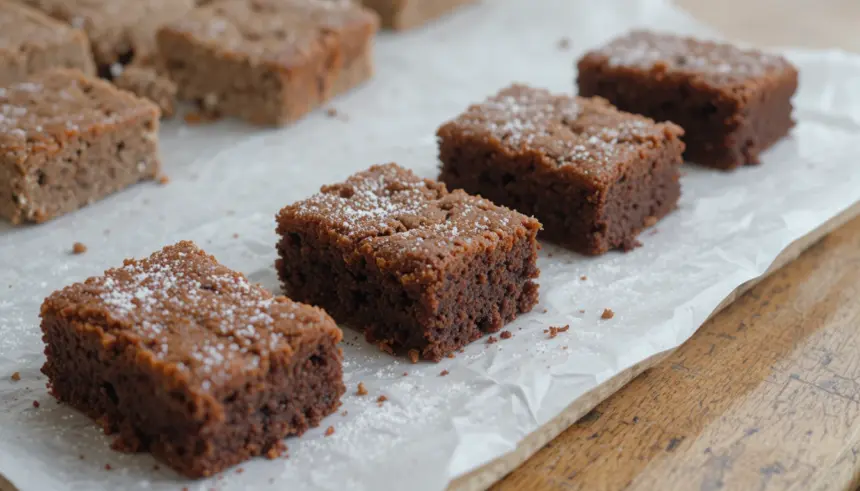
Let’s be real, the magic of this recipe lies in its simplicity. Using self-rising flour means you can wave goodbye to that whole separate baking soda/baking powder debacle. It’s like a shortcut for your baking superpowers! This recipe is pretty much **idiot-proof**, which is a huge win in my book. Even if you’re a self-proclaimed kitchen klutz, you can nail these. They’re rich, they’re decadent, and they bake up beautifully without you having to consult a crystal ball or perform a baking ritual. Plus, the texture? Oh, it’s pure brownie bliss. Chewy edges, gooey centers – the whole nine yards.
Ingredients You’ll Need (Don’t Panic, It’s Not That Scary)
- 1 cup (2 sticks) unsalted butter, melted. Because life’s better with butter, duh.
- 2 cups granulated sugar. Sweetness overload? Nah, just right.
- 4 large eggs. The binder of dreams and deliciousness.
- 1 teaspoon vanilla extract. The fancy perfume for your brownies.
- 1 cup all-purpose flour (this is where the magic happens, FYI).
- ½ cup unsweetened cocoa powder. For that deep, dark chocolatey goodness.
- ½ teaspoon salt. To balance out all that sweet.
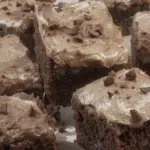
- 1 cup chocolate chips (semi-sweet, milk, dark – your call!). These are non-negotiable.
Step-by-Step Instructions (Follow These and You’re Golden)
- Preheat your oven to 350°F (175°C) and grease and flour a 9×13 inch baking pan. Don’t be shy with the greasing; we don’t want any brownie cling-ons.
- In a large bowl, whisk together the melted butter and sugar until well combined. It should look a bit like glossy, brown goo. Mmm, goo.
- Beat in the eggs one at a time, then stir in the vanilla extract. Make sure everything is nicely incorporated. No one likes unmixed egg streaks.
- In a separate medium bowl, whisk together the flour, cocoa powder, and salt. This is your dry magic potion.
- Gradually add the dry ingredients to the wet ingredients, mixing until just combined. **Don’t overmix!** We’re not making a tire.
- Fold in the chocolate chips. Distribute them evenly like you’re scattering gold coins.
- Pour the batter into your prepared pan and spread it out. Make it look pretty; the brownies deserve it.
- Bake for 25-30 minutes, or until a toothpick inserted into the center comes out with moist crumbs attached. If it comes out clean, you’ve gone too far, my friend.
- Let them cool completely in the pan before cutting. This is the hardest part, I know. Patience, grasshopper.
Common Mistakes to Avoid (Don’t Be That Guy/Gal)
- Thinking you don’t need to preheat the oven. Rookie mistake. Your brownies will be sad and pale.
- Overmixing the batter. Seriously, just mix until the flour disappears. Overmixing leads to tough brownies, and nobody wants tough brownies.
- Cutting them too soon. Warm brownies are delicious, yes, but they’ll crumble into a sad mess. Let them set.
- Forgetting the chocolate chips. I mean, you can, but why would you? It’s like going to a concert and not listening to the music.
Alternatives & Substitutions (Because Life Isn’t Always by the Book)
Feeling adventurous? Or just ran out of something? No problem!
- Butter: Margarine works in a pinch, but IMO, it just doesn’t have the same luxurious mouthfeel as butter. Your call, though!
- Chocolate Chips: You can swap some of these out for chopped nuts (pecans or walnuts are my jam) or even M&Ms for a fun twist.
- Cocoa Powder: If you’re *really* stuck and don’t have cocoa, you could try a few tablespoons less flour and some melted semi-sweet chocolate instead, but that’s a whole different ballgame, so stick to cocoa if you can.
FAQ (The Burning Questions You Probably Have)
Can I use self-rising flour if the recipe calls for all-purpose flour and baking powder/soda?
Well, technically, yes! But remember, self-rising flour already has leavening agents and salt in it. You’ll need to adjust the recipe accordingly, usually by omitting the separate baking powder and salt called for. For *this* recipe, it’s perfect because it’s designed for it!
Are these brownies cakey or fudgy?
With this recipe, they lean towards the fudgy side, especially when you don’t overbake them. The butter-to-sugar ratio really helps with that gooey goodness.
Can I add coffee to this recipe?
YES! A tablespoon or two of instant espresso powder or strong brewed coffee can really amp up the chocolate flavor. Just whisk it in with the dry ingredients. So good.
How long do these brownies last?
In an airtight container at room temperature, they’ll be good for about 3-4 days. But let’s be honest, they probably won’t last that long. 😉
Can I freeze these?
Absolutely! Wrap them well. Thaw them at room temperature, or pop them in the microwave for a few seconds for a warm, gooey treat.
My brownies look a little dry. What did I do wrong?
Most likely, you either overbaked them or overmixed the batter. Next time, keep a closer eye on them and stop baking as soon as you see those moist crumbs!
Final Thoughts
See? Easy peasy, lemon squeezy – or should I say, brownie, brownie! You’ve got this. Whether you’re baking these for a crowd, for your Netflix binge, or just because you deserve a treat (you totally do), these self-rising flour brownies are guaranteed to be a hit. Now go forth and bake something awesome! You’ve earned it!
“`

