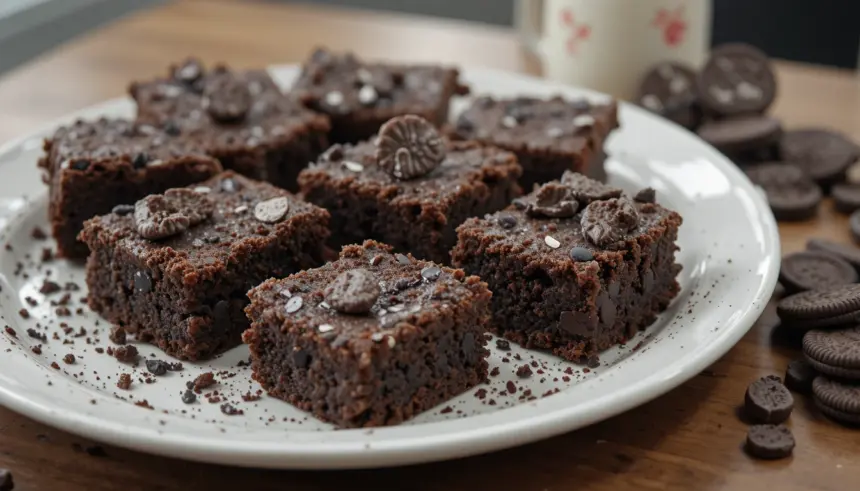
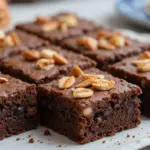
So you’re craving something tasty but too lazy to spend forever in the kitchen, huh? Same. 😉 And when “tasty” and “lazy” collide, what magical creature is born? Brownies. But not just *any* brownies, my friend. We’re talking about the legendary, the magnificent, the downright decadent **Brownies with Oreos**. Prepare your taste buds for a party, because this recipe is about to become your new bestie.
Why This Recipe is Awesome
Honestly, why is this recipe awesome? Because it takes two of the greatest inventions known to humankind – brownies and Oreos – and smashes them together like a toddler with LEGOs. It’s ridiculously easy, which is a win in my book. Plus, it’s practically *impossible* to mess up. Seriously, if I can do it (and trust me, I’ve had my moments), so can you. It’s the perfect blend of chewy, fudgy goodness with those delightful little cookie surprises hidden inside. It’s basically a hug in a brownie pan.
Ingredients You’ll Need
- 1 cup (2 sticks) unsalted butter, melted. Because we’re not skimpy with the good stuff.
- 2 cups granulated sugar. Sweetness is key, people!
- 4 large eggs. The fluffy binders of joy.
- 1 teaspoon vanilla extract. For that little je ne sais quoi.
- 1 cup all-purpose flour. The backbone of our brownie empire.
- 3/4 cup unsweetened cocoa powder. The darker, the better, IMO.
- 1/2 teaspoon baking powder. Just a whisper to keep things from getting too dense.
- 1/4 teaspoon salt. The unsung hero that balances all the sweetness.
- 1 cup chopped semi-sweet chocolate chips. Because more chocolate is always the answer.
- 12-15 whole Oreos, roughly chopped. The stars of the show!
Step-by-Step Instructions
- Preheat your oven to 350°F (175°C). Grab a 9×13 inch baking pan and grease it up like you’re prepping for a marathon. Lining it with parchment paper is optional but HIGHLY recommended for easy cleanup.
- In a large bowl, whisk together the melted butter and sugar. Get it all smooth and happy. Then, crack in those eggs one at a time, mixing well after each addition. Don’t forget the vanilla extract; give it a good stir.
- In a separate, *medium* bowl (don’t get lazy and skip this), whisk together the flour, cocoa powder, baking powder, and salt. This ensures all those dry ingredients are evenly distributed, preventing random pockets of blandness.
- Now, gradually add the dry ingredients to the wet ingredients. Fold it in until just combined. **Do not overmix!** Seriously, we want brownies, not hockey pucks.
- Fold in the chopped semi-sweet chocolate chips. These are for those extra gooey moments.
- Gently fold in the chopped Oreos. Try not to pulverize them into dust; we want some chunky bits of cookie magic!
- Pour the batter into your prepared baking pan and spread it out evenly.
- Bake for 25-30 minutes, or until a toothpick inserted into the center comes out with moist crumbs attached (not wet batter!). **Overbaking is the enemy of fudgy brownies.**
- Let them cool completely in the pan before cutting. This is the hardest part, I know. Patience, grasshopper.
Common Mistakes to Avoid
- Overmixing the batter: Seriously, just stop when you see no dry flour. Overmixing develops gluten, which makes for tough brownies. Nobody wants tough brownies.
- Underbaking: While tempting to eat them warm and gooey, underbaked brownies can be a bit of a sticky mess. A toothpick test is your friend here!
- Overbaking: This is the flip side of underbaking and equally disastrous. Dry, crumbly brownies are a tragedy. Keep a close eye on them!
- Skipping the salt: You might think salt is weird in brownies, but it’s crucial for balancing the sweetness and enhancing the chocolate flavor. Don’t be a salt-avoider.
- Not letting them cool: As mentioned, it’s torture, but it’s necessary for them to set properly. Trying to cut hot brownies is like trying to wrestle an octopus.
Alternatives & Substitutions
Feeling adventurous? Or maybe just ran out of something? Here are some ideas:
- Different Chocolate Chips: Milk chocolate, dark chocolate, white chocolate – go wild! Dark chocolate chips will give you a more intense chocolate flavor.
- Different Cookies: Mint Oreos? Golden Oreos? Peanut Butter Oreos? The possibilities are endless, my friend! Just chop ’em up and throw ’em in.
- Nuts: Love a little crunch? Add about 1/2 cup of chopped walnuts or pecans to the batter along with the chocolate chips and Oreos.
- Butter: Can you use margarine? Well, technically yes, but why hurt your soul like that? Butter provides the best flavor and texture. IMO, stick with butter if you can.
FAQ (Frequently Asked Questions)
Q: Can I make these in a different pan size?
A: Sure! If you use a smaller pan, you’ll need to bake them longer. A larger pan means shorter baking time. Just keep an eye on that toothpick test!
Q: My brownies look a little… shiny on top. Is that bad?
A: Nope! That’s the “fudge dome” effect, a sign of a perfectly baked brownie. It means you’ve got that rich, dense texture going on.
Q: Can I eat them warm?
A: Technically, yes. But you’ll regret it when they’re falling apart. Patience is a virtue, especially when it comes to delicious brownies.
Q: How long do these last?
A: If they even *make it* past the first day, they should be stored in an airtight container at room temperature for about 3-4 days. But let’s be real, they’ll be gone way before then.
Q: Do I *have* to use Oreos?
A: Well, it wouldn’t be “Brownies with Oreos” then, would it? But if you’re feeling rebellious, any sturdy cookie will do in a pinch. Just don’t tell the Oreo purists.
Q: Can I freeze them?
A: Absolutely! Wrap them up well and they should freeze beautifully for up to 2-3 months. Thaw them on the counter for a bit before diving in.
Final Thoughts
And there you have it! Your ticket to brownie bliss. These fudgy, Oreo-studded delights are the perfect antidote to a bad day, a celebration, or just a Tuesday. They’re easy, they’re delicious, and they’re practically guaranteed to make you feel like a baking wizard. Now go impress someone—or yourself—with your new culinary skills. You’ve earned it! Happy baking! ✨

