“`html
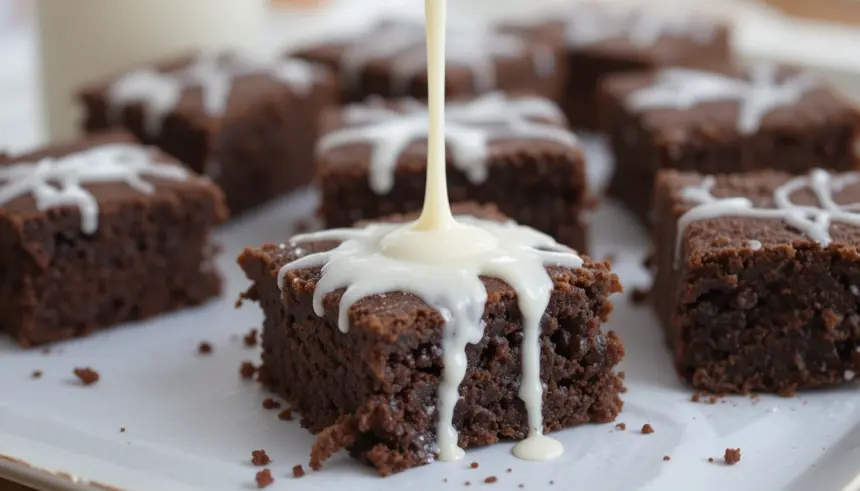
So you’re craving something tasty but too lazy to spend forever in the kitchen, huh? Same. But what if I told you there’s a way to get fudgy, chocolatey brownie bliss without all the fuss? And the secret weapon? A humble can of evaporated milk. Yep, that stuff you usually only see in your grandma’s pantry. Trust me on this one. These brownies are about to become your new best friend when the chocolate emergency strikes.
Why This Recipe is Awesome
Okay, let’s be real. Most brownie recipes feel like a full-time job. Measuring, melting, mixing… it’s a lot. But THIS? This is practically a one-bowl wonder. Evaporated milk is the magic ingredient that makes these brownies incredibly moist and rich without requiring fancy techniques. It’s so easy, even your cat could *almost* make them (if they had opposable thumbs and a penchant for baking, which, let’s face it, they don’t). Plus, who doesn’t love a recipe that’s basically **idiot-proof**? It’s the kind of dessert that impresses without you having to break a sweat. Winning!
Ingredients You’ll Need
- Butter: Unsalted, obviously. We’re not savages. About 1/2 cup, softened so it doesn’t fight you.
- Sugar: 1 cup. Sweetness is key, people!
- Eggs: 2 large ones. The glue that holds our chocolate dreams together.
- Evaporated Milk: A 12oz can. The star of the show! Don’t use sweetened condensed milk, that’s a whole different (delicious, but different) ballgame.
- Vanilla Extract: 1 teaspoon. Because vanilla makes everything better. Duh.
- All-Purpose Flour: 3/4 cup. Don’t go overboard, or they’ll get cakey. We want fudgy!
- Cocoa Powder: 1/3 cup. Use unsweetened. The darker, the better, IMO.
- Salt: 1/4 teaspoon. Just a pinch to balance the sweet.
- Chocolate Chips: 1 cup (optional, but *highly* recommended). Dark, milk, semi-sweet – your call!
Step-by-Step Instructions
- Preheat your oven to 350°F (175°C) and **grease and flour** an 8×8 inch baking pan. Nobody likes brownies stuck to the pan.
- In a medium bowl, cream together the softened butter and sugar until it looks fluffy and happy. Think sunshine yellow.
- Beat in the eggs one at a time, then stir in the evaporated milk and vanilla extract. It might look a little weird at this point, but don’t panic. It’s just shy.
- In a separate, *even more separate* bowl (just kidding, you can use the same one if you’re feeling brave), whisk together the flour, cocoa powder, and salt. This is called “dry ingredients.”
- Gradually add the dry ingredients to the wet ingredients, mixing until just combined. **Don’t overmix!** Seriously, I’ll come to your house if you do.
- Fold in the chocolate chips if you’re feeling extra.
- Pour the batter into your prepared pan and spread it evenly. It’ll be thick and gooey, like brownie lava.
- Bake for 25-30 minutes, or until a toothpick inserted into the center comes out with moist crumbs attached (not wet batter!). Overbaking is a crime against brownie-kind.
- Let them cool completely before cutting. This is the hardest part, I know. Patience, grasshopper.
Common Mistakes to Avoid
Alright, listen up, buttercup. Don’t be *that* person. Here are a few landmines to sidestep:
- Measuring flour like it’s going out of style: Spoon it into your measuring cup and level it off with a straight edge. Don’t just scoop it directly from the bag like you’re digging for gold.
- Thinking you don’t need to preheat the oven: Rookie mistake. Your brownies will be sad and undercooked. Preheat it!
- Peeking too early: Let them bake for the recommended time. Every oven is different, but give them a chance.
- Cutting them while they’re still molten lava: I know it’s tempting, but trust me. Cool them down. It’s worth the agony.
Alternatives & Substitutions
So, you ran out of something? No worries, we’ve got options:
- Butter: If you *absolutely* must, you can use margarine. But **butter is king** for flavor, so try to stick with it if you can. Your taste buds will thank you.
- Cocoa Powder: If you only have unsweetened baking chocolate, you can use that, but you’ll need to adjust the sugar and butter. It’s more complicated, so stick to cocoa if you can!
- Chocolate Chips: If you hate joy and don’t like chocolate chips, fine. But I can’t be friends with you anymore. (Just kidding! Mostly.) You can also add nuts or M&Ms if you’re feeling wild.
FAQ (Frequently Asked Questions)
Got burning questions? I’ve got casual answers:
- Can I use regular milk instead of evaporated milk? Well, technically yes, but you’ll lose that super-rich, fudgy texture. Evaporated milk has had most of its water removed, making it concentrated and perfect for desserts. Don’t do it, unless you enjoy mediocrity.
- How do I know if they’re done? The toothpick test! If it comes out with moist crumbs, they’re ready. If it’s clean, they’re probably overbaked. If it’s covered in batter, give ’em more time.
- Can I make these gluten-free? You bet! Just swap out the all-purpose flour for a good quality gluten-free baking blend. Easy peasy.
- Do I *have* to use a square pan? Nope! A round 9-inch pan will work too. Just keep an eye on the baking time, as it might be slightly different.
- Why are my brownies kind of dry? Likely culprits: overbaking or too much flour. Remember the flour measuring tip!
- Can I freeze these? Yes! Wrap them up tight and they should last for a couple of months. Perfect for future chocolate emergencies.
Final Thoughts
See? Brownies don’t have to be intimidating. This evaporated milk magic is your secret weapon for deliciousness without the drama. They’re perfect for a movie night, a potluck, or just because you deserve a treat (which is, like, always). Now go impress someone—or yourself—with your new culinary skills. You’ve earned it!
“`
