“`html
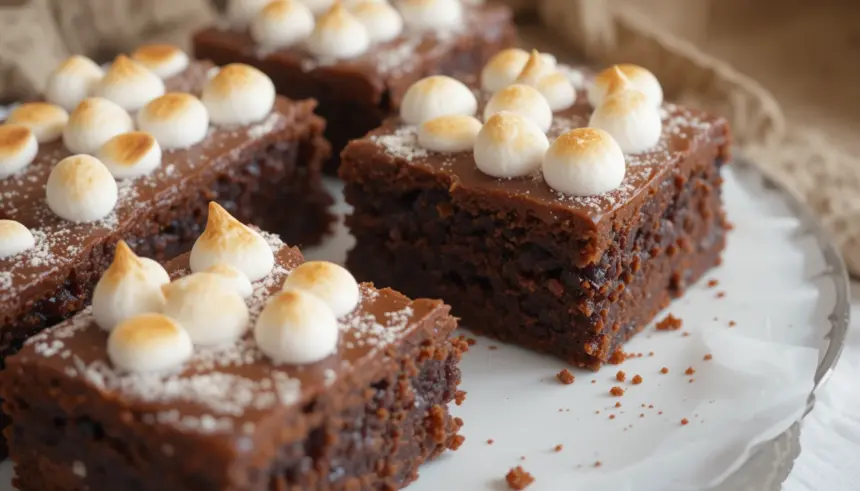
Brownies Topped With Marshmallows: The Ultimate Hug in a Pan!
So you’re craving something tasty but too lazy to spend forever in the kitchen, huh? Same. We’ve all been there. You want that deep, chocolatey goodness, but also that gooey, melty marshmallow magic. Well, my friend, let me tell you, you’re in for a treat. These brownies are so good, they’ll make your taste buds do a happy dance. And the best part? They’re ridiculously easy. Like, “I-just-woke-up-from-a-nap-and-still-managed-to-make-these” easy.
Why This Recipe is Awesome
Let’s be real. What’s not to love about fudgy brownies? They’re basically chocolate perfection. Now, add a blanket of fluffy marshmallows that get all toasty and golden on top? GENIUS. It’s like giving your brownies a cozy, sweet little hug. Plus, it’s practically a two-in-one dessert. You get your brownie fix and your s’mores fix, all in one pan. It’s also idiot-proof, even I didn’t mess it up (and that’s saying something!). Seriously, this recipe is a guaranteed crowd-pleaser, or a solo-pleaser if you’re like me and believe leftovers are just for yourself.
Ingredients You’ll Need
Alright, let’s gather our chocolatey treasures. Don’t sweat it, these are pretty standard kitchen staples.
- 1 cup (2 sticks) unsalted butter, melted (because we’re fancy like that)
- 1 ½ cups granulated sugar (the sweet stuff, obviously)
- 2 teaspoons vanilla extract (don’t be shy, vanilla is our friend)
- 4 large eggs (fresh ones, please! No zombie eggs here.)
- ¾ cup unsweetened cocoa powder (the darker, the better, IMO)
- 1 cup all-purpose flour (the binder of dreams)
- ½ teaspoon baking powder (just a little lift, we’re not making cakes!)
- ¼ teaspoon salt (to balance all that sweetness, duh)
- 1 cup chocolate chips (semi-sweet or dark, whatever floats your boat)
- 1 ½ cups mini marshmallows (or regular ones if you’re feeling brave and want to chop ’em up)
Step-by-Step Instructions
Ready to get your bake on? Let’s do this!
- First things first, **preheat your oven to 350°F (175°C)**. And **grease and flour a 9×13 inch baking pan**. Nobody likes sticky brownies.
- In a large bowl, **whisk together the melted butter and sugar** until it looks smooth and happy. Stir in the **vanilla extract**.
- Now, **beat in the eggs, one at a time**. Make sure each egg is fully incorporated before adding the next. We’re building a chocolate empire here, people!
- In a separate bowl, **whisk together the cocoa powder, flour, baking powder, and salt**. This is your dry magic mix.
- Gradually **add the dry ingredients to the wet ingredients**, mixing until just combined. **Don’t overmix!** We want fudgy, not tough.
- Fold in those glorious **chocolate chips**. They’re like little nuggets of joy.
- Pour the batter into your prepared pan and **spread it out evenly**. Make it look pretty.
- Now for the fun part: **Sprinkle the marshmallows evenly over the top** of the brownie batter. Try to cover as much surface as possible for maximum gooeyness.
- **Bake for 30-35 minutes**, or until a toothpick inserted into the center comes out with moist crumbs attached (not wet batter!). Keep an eye on those marshmallows though; we want them toasty, not burnt offerings.
- Let them **cool completely in the pan** before cutting. This is the hardest part, I know. Patience, my friend!
Common Mistakes to Avoid
Even though this recipe is pretty foolproof, a few little oopsies can happen. Let’s sidestep those potential brownie disasters:
- Thinking you don’t need to preheat the oven – rookie mistake. Your brownies will be sad and undercooked.
- Overmixing the batter – this leads to tough, cakey brownies, and nobody wants that. Be gentle!
- Baking them for too long – dry brownies are a tragedy. Pull them out when they’re still a little moist in the center.
- Cutting them while they’re still hot – resist the urge! They need to set, or you’ll end up with a gooey mess (which, okay, isn’t *that* bad, but still).
- Forgetting the salt – it’s a small amount, but it’s crucial for balancing the sweetness. Don’t skip it!
Alternatives & Substitutions
Feeling a little adventurous? Or maybe you’re missing an ingredient? No worries!
- Butter vs. Margarine: Can I use margarine instead of butter? Well, technically yes, but why hurt your soul like that? Butter gives the best flavor and texture. If you absolutely have to, use a good quality stick margarine, not the tub stuff.
- Chocolate Chips: Feel free to swap out the chocolate chips for your favorite candy bar pieces! Reese’s Peanut Butter Cups? Snickers? Go wild!
- Marshmallows: If you can only find large marshmallows, just snip them into smaller pieces with kitchen scissors. It’s a bit more work, but totally worth it for that uniform gooey layer.
- Cocoa Powder: If you’re a dark chocolate fiend, use Dutch-processed cocoa powder for an even richer flavor.
FAQ (Frequently Asked Questions)
Got questions? We’ve got answers! (Probably.)
- Can I make these gluten-free? Yep! Just swap out the all-purpose flour for a good quality gluten-free baking blend. Results may vary slightly, but it’ll still be delicious!
- My marshmallows burned! What did I do wrong? Ah, the dreaded burnt marshmallow. You might have had your oven too hot, or baked them for too long. Keep an eye on them and consider tenting with foil for the last 5-10 minutes if they’re browning too quickly.
- Can I add nuts or other goodies? Absolutely! Toss in some chopped walnuts, pecans, or even some sprinkles with the chocolate chips. Just keep in mind that adding too many wet ingredients might affect the baking time.
- How long will these last? If you can resist eating them all in one sitting, they’ll stay fresh in an airtight container at room temperature for about 3-4 days. Honestly, though, they’re best eaten fresh!
- Do I *really* have to let them cool? Okay, *if* you absolutely cannot wait, you can dig in while they’re warm. Just be prepared for a more melty, less structured dessert. It’s more like brownie soup. Delicious, but messy.
- Can I freeze these? Yes, you can! Let them cool completely, then wrap them tightly in plastic wrap and foil. They’ll keep in the freezer for up to 3 months. Thaw them at room temperature.
Final Thoughts
There you have it, folks! The easiest, most ridiculously delicious brownies topped with marshmallows you’ll ever make. They’re perfect for movie nights, potlucks, or just a Tuesday. You’ve got the chocolate, you’ve got the marshmallow goo, and you’ve got bragging rights. Now go impress someone—or yourself—with your new culinary skills. You’ve earned it! Happy baking!
“`
