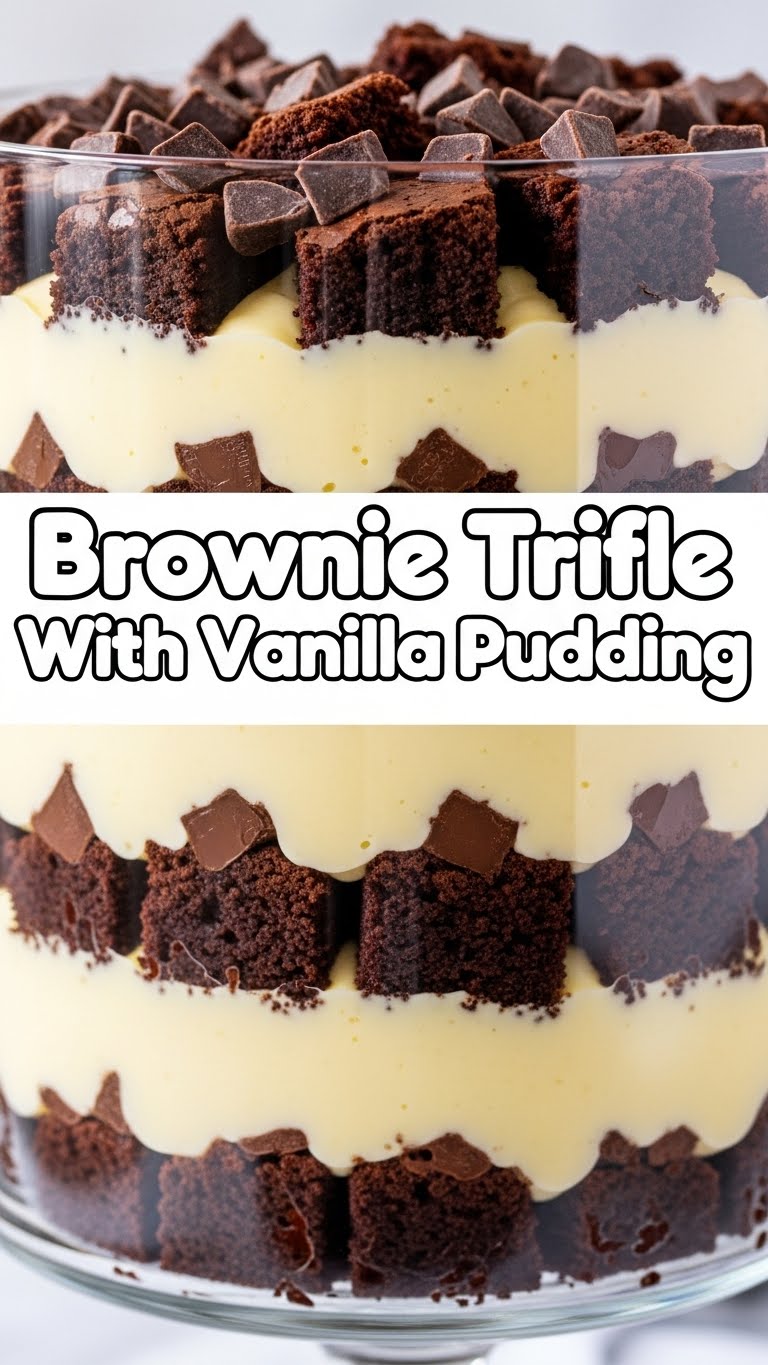
Okay, buckle up, buttercup! Ever have one of those days where you want to impress everyone (or just yourself) with your mad dessert skills, but also… nap? Same, friend, same. That’s where the Brownie Trifle with Vanilla Pudding swoops in like a delicious, layered superhero, ready to save your sweet tooth and your precious energy. No fancy techniques, no hours slaving over a hot stove – just pure, unadulterated dessert bliss. Let’s get this party started!
Why This Recipe is Awesome
Because it’s practically idiot-proof, even I didn’t mess it up! Seriously, this trifle is the ultimate “I tried really hard (but actually didn’t)” dessert. It looks stunning, tastes phenomenal, and requires minimal actual cooking. We’re talking layering pre-made (or semi-homemade, we don’t judge) components into a fancy glass bowl, and boom – you’re a culinary genius. It’s rich, creamy, chocolatey, and has that perfect textural contrast that makes people go, “Ooh, what’s *that*?” Plus, it’s super customizable, so you can pretend you’re an artisan baker without breaking a sweat. Win-win-win!
Ingredients You’ll Need
Gather your troops, folks! Here’s what you’ll need for this masterpiece. Remember, shortcuts are our friends!
- 1 box (18.3 oz) Brownie Mix + ingredients to make it (usually eggs, oil, water). Or, hey, grab a pack of pre-made brownies from the bakery section—we’re all about convenience here.
- 2 boxes (3.4 oz each) Instant Vanilla Pudding Mix. Don’t try to be a hero and make custard from scratch unless you’re feeling particularly ambitious. We’re keeping it simple!
- 4 cups Cold Milk. For the pudding. Whole milk makes it extra creamy, but whatever you have will work.
- 2 cups Heavy Whipping Cream. This is where the magic happens.
- 1/2 cup Powdered Sugar. To sweeten your dreams (aka, the whipped cream).
- 1 teaspoon Vanilla Extract. Because everything is better with a splash of vanilla.
- Optional Fun Stuff: Chocolate shavings, mini chocolate chips, sprinkles, fresh berries (strawberries or raspberries are divine!).
Step-by-Step Instructions
Get ready to assemble your dessert Everest! These steps are so easy, you can probably do them with your eyes closed (but maybe don’t).
- Bake (or Unbox) Your Brownies: First things first, get those brownies happening. If you’re using a mix, follow the package directions for an 8×8 or 9×13 inch pan. Bake them until they’re fudgy and delicious, then let them cool completely. This is crucial! Warm brownies will melt your pudding, and we can’t have that. If you bought pre-made, congratulations, you’re already ahead of the game!
- Whip Up the Pudding: In a large bowl, whisk together your instant vanilla pudding mixes and cold milk for about 2 minutes. It’ll start thickening almost immediately. Let it sit for 5 minutes to get nice and firm.
- Make That Whipped Cream: Pour your heavy whipping cream into a chilled bowl. Add the powdered sugar and vanilla extract. Beat with an electric mixer on high speed until stiff peaks form. Watch it carefully; you don’t want to turn it into butter!
- Cube ‘Em Up: Once your brownies are cool, cut them into bite-sized cubes. Aim for about 1-inch squares.
- Let’s Get Layering! Grab your prettiest trifle bowl (or any clear bowl, we’re not picky). Start with a layer of brownie cubes at the bottom. Aim for about a third of your brownies.
- Pudding Time: Spoon about half of your vanilla pudding over the brownie layer, spreading it gently to the edges.
- Creamy Dreamy: Next, add about a third of your freshly whipped cream on top of the pudding. Spread it out evenly.
- Repeat the Magic: Do it all again! Another layer of brownies, then the remaining pudding, and another layer of whipped cream.
- The Grand Finale: Top your trifle with the last of the brownie cubes. Then, finish with the remaining whipped cream. This is your chance to get fancy! Garnish with chocolate shavings, sprinkles, or fresh berries. Make it look like you worked harder than you did.
- Chill Out: Cover your trifle and pop it in the fridge for at least 4 hours. Overnight is even better! This allows all those glorious layers to meld together and get perfectly chilled.
Common Mistakes to Avoid
We’ve all been there, friend. Learn from my dessert-making mishaps!
- Warm Brownies: Putting warm brownies into your trifle is like inviting a melted mess to the party. Always let them cool completely!
- Overmixing Pudding: Instant pudding is quick. Whisk for the recommended time and stop. Overmixing can make it gritty or too thick.
- Under-Chilling: Pulling it out of the fridge too soon means mushy, unstable layers. Patience, young padawan, patience!
- Forgetting a Trifle Bowl: While any clear bowl works, a proper trifle bowl just screams “I’m fancy!” Don’t realize you don’t have one right when you’re about to layer. Rookie mistake!
- Eating All the Ingredients First: I know, I know, the temptation is real. But try to leave enough for the actual trifle. Just a suggestion.
Alternatives & Substitutions
Feeling adventurous? Or just working with what you’ve got? No problem!
- Pudding Power: Not a vanilla fan? Swap it for instant chocolate, butterscotch, or even banana pudding! Chocolate pudding with chocolate brownies? Yes, please.
- Cake It Up: Don’t have brownies? This trifle works beautifully with cubed pound cake, angel food cake, or even leftover chocolate cake.
- Fruity Freshness: Add a layer of sliced strawberries, raspberries, or blueberries between your pudding and whipped cream layers for a burst of freshness. It brightens up the whole dessert!
- Cool Whip vs. Homemade: If whipping cream feels like too much effort (no judgment, we’ve all been there), a tub of thawed Cool Whip works perfectly as a substitute.
- Boozy Kick: Want an adult-only trifle? Drizzle a little Kahlua, Irish cream, or rum over the brownie layers before adding pudding. You’re welcome!
FAQ (Frequently Asked Questions)
Got questions? I’ve got answers (and probably some sarcasm).
- Can I use margarine instead of butter in the brownies? Well, technically yes, but why hurt your soul like that? Butter just tastes better, IMO. But if that’s all you have, go for it!
- How far in advance can I make this trifle? You can definitely assemble it the day before. In fact, it often tastes even better on day two once all the flavors have had a chance to mingle and make friends.
- What if I don’t have a trifle bowl? Any large, clear bowl will do the trick! A glass punch bowl or even a large mixing bowl will show off those beautiful layers. It’s about the taste, not just the container.
- Can I use homemade pudding? Absolutely, if you’re feeling fancy and have the time! Just make sure it’s completely chilled and set before layering. We want firm pudding, not a soup.
- How long does the trifle last in the fridge? It’s usually best consumed within 3-4 days. After that, the brownies can start to get a bit soggy. (But honestly, will it even last that long?)
- Can I make individual trifles? Oh, you fancy, huh? Yes! Layer everything in small Mason jars or clear drinking glasses for adorable single servings. Perfect for parties!
- Is this actually easy, or are you just saying that? I swear on my last brownie, it’s easy! If I can do it without setting off the smoke detector, you definitely can.
Final Thoughts
See? I told you it was easy! You just created a dessert that looks like it came from a fancy bakery but was actually assembled with minimal effort and maximum love (or just really good ingredients). This Brownie Trifle is the perfect crowd-pleaser for parties, potlucks, or just a Tuesday night when you need something sweet. So go ahead, pat yourself on the back! Now go impress someone—or yourself—with your new culinary skills. You’ve earned it!


