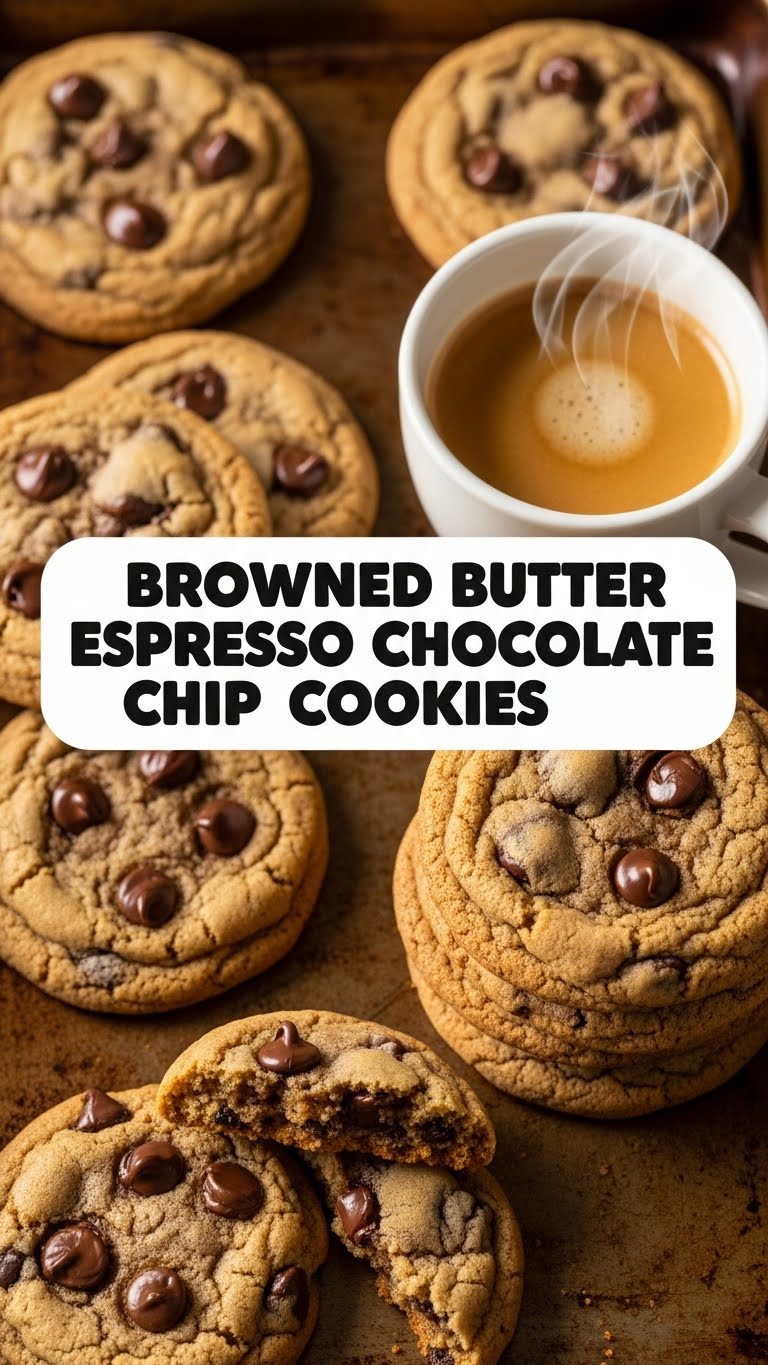
So you’re craving something tasty but too lazy to spend forever in the kitchen, huh? Same. We’ve all been there: a sudden, overwhelming urge for something warm, gooey, and utterly delicious, but the thought of a complicated recipe makes you want to just curl up with a bag of chips instead. Well, my friend, put down those chips (just for a moment!) because I’ve got a recipe that’s about to blow your mind and keep your effort level comfortably low. We’re talking about Browned Butter Espresso Chocolate Chip Cookies – it’s like your favorite classic cookie went to a fancy coffee shop and came back with a whole new level of sophistication. And trust me, it’s easier than parallel parking.
Why This Recipe is Awesome
Okay, let’s break it down. Why these cookies? Because they’re basically the cool older sibling of your grandma’s chocolate chip cookies. First off, browned butter. If you’ve never tried it, prepare to have your world rocked. It’s nutty, it’s rich, it adds this incredible depth of flavor that makes regular butter feel, well, a bit basic. Then, we throw in espresso powder. No, your cookies won’t taste like coffee (unless you add a ton, which, hey, no judgment!). What it *does* do is supercharge the chocolate flavor, making it deeper, darker, and oh-so-intense. It’s the secret weapon of pro bakers, and now it’s yours. And the best part? This recipe is practically idiot-proof. Seriously, even I didn’t mess it up, and my kitchen has seen some things. It’s a classic, but elevated, and will make you feel like a culinary genius without actually requiring genius-level skills. Win-win, IMO.
Ingredients You’ll Need
Gather your troops! Here’s what you’ll need to make these bad boys come to life. Don’t skimp on quality, especially the butter – it’s the star of the show!
- 1 cup (2 sticks) unsalted butter: The good stuff, none of that spread nonsense. This is where the magic happens.
- 1 cup packed light brown sugar: For that chewy, caramelized goodness.
- 1/2 cup granulated sugar: To balance things out and give a little crisp edge.
- 2 large eggs: Room temperature, please! They mix better and make for a smoother dough.
- 2 teaspoons pure vanilla extract: Don’t even think about the imitation stuff. Your cookies deserve better.
- 2 ¼ cups all-purpose flour: Your trusty baking BFF.
- 1 teaspoon baking soda: Our leavening agent for that perfect puff.
- 1 teaspoon salt: Crucial for balancing all that sweetness and bringing out flavors. Don’t skip it!
- 1 ½ – 2 teaspoons instant espresso powder: Your secret weapon. Start with 1 ½ tsp; add more if you’re a serious coffee fanatic.
- 1 ½ cups chocolate chips: Your preferred kind! Semi-sweet is classic, but dark chocolate chunks are *chef’s kiss*.
Step-by-Step Instructions
Alright, apron on (or don’t, I won’t tell), let’s get baking! These steps are short and sweet, just like your future cookies.
- Brown the Butter: In a light-colored saucepan, melt the butter over medium heat. Keep stirring it. It’ll get foamy, then it’ll start to smell nutty and little brown bits will appear at the bottom. Keep a close eye on it so it doesn’t burn! As soon as it’s golden brown and smells like heaven, pour it into a large, heatproof bowl and let it cool for about 10 minutes. We need it warm, not piping hot.
- Mix the Sugars: To the cooled (but still warm) browned butter, add the brown sugar and granulated sugar. Whisk them together until combined and smooth.
- Add Wet Ingredients: Beat in the eggs one at a time, mixing well after each addition. Then stir in the vanilla extract. The mixture should look shiny and delicious.
- Combine Dry Ingredients: In a separate bowl, whisk together the flour, baking soda, salt, and espresso powder until they’re nicely combined.
- Combine Wet and Dry: Gradually add the dry ingredients to the wet ingredients, mixing on low speed (or by hand) until just combined. Be careful not to overmix! Overmixing develops gluten, which makes tough cookies.
- Stir in Chocolate: Fold in your chocolate chips. Get them evenly distributed throughout the dough.
- Chill the Dough: Cover the dough and chill it in the fridge for at least 30 minutes, or up to 24 hours. Don’t skip this step! It really makes a difference in flavor and texture.
- Preheat and Prep: When you’re ready to bake, preheat your oven to 375°F (190°C). Line a baking sheet with parchment paper or a silicone mat.
- Scoop and Bake: Scoop dough balls (about 1.5-2 tablespoons each) onto the prepared baking sheet, leaving some space between them. Bake for 9-12 minutes, or until the edges are golden brown and the centers are still slightly soft.
- Cool Down: Let the cookies cool on the baking sheet for a few minutes before transferring them to a wire rack to cool completely. Or, you know, eat them warm – who’s judging?
Common Mistakes to Avoid
Baking is a science, but even scientists make mistakes. Here are a few common pitfalls to steer clear of:
- Burning the Butter: This is a big one. Browned butter is delicious; burnt butter is sad and bitter. Keep it on medium heat and watch it like a hawk. If it goes dark brown and smells acrid, toss it and start over.
- Skipping the Chill: I know, I know, instant gratification. But chilling the dough allows the flavors to meld and the butter to firm up, preventing flat, greasy cookies. Patience, grasshopper!
- Overmixing the Flour: Once you add the flour, mix just until no dry streaks remain. Seriously, stop there. Your arm might want to keep going, but resist the urge for tender cookies.
- Not Preheating the Oven: Rookie mistake! A properly preheated oven ensures even baking from the start. Give it at least 15-20 minutes to get to temperature.
- Baking Too Long: Pull them out when the edges are set and golden, but the centers still look a little soft and underdone. They’ll continue to cook a bit on the hot baking sheet. Overbaked cookies are dry and crumbly.
Alternatives & Substitutions
Feeling adventurous? Or maybe you just ran out of something. Here are some ideas to tweak these cookies to your liking:
- Chocolate Varieties: Mix it up! Try milk chocolate, white chocolate, or even a mix of dark and semi-sweet. Chocolate chunks or chopped chocolate bars melt beautifully and give a luxurious feel.
- Add Nuts: Want some crunch? Fold in ½ cup of toasted chopped pecans or walnuts with your chocolate chips. Nuts and browned butter are a match made in heaven.
- Gluten-Free Flour: You can typically substitute a 1:1 gluten-free baking blend for the all-purpose flour. Just make sure it contains xanthan gum, or add ¼ teaspoon yourself.
- No Espresso Powder? You can use instant coffee powder, but the flavor won’t be as intense or chocolate-enhancing. If you omit it entirely, you’ll still have delicious browned butter chocolate chip cookies, just without that secret “oomph.”
- Can I use margarine instead of butter? Well, technically yes, but why hurt your soul like that? Margarine won’t brown properly and won’t give you that rich, nutty flavor we’re going for. Stick to butter for this recipe, trust me.
FAQ (Frequently Asked Questions)
Got questions? I’ve got (casual) answers!
- Do I *really* have to chill the dough? Yes, you really, *really* do. It gives the flavors time to develop, prevents spreading, and leads to a chewier, more flavorful cookie. Consider it a spa day for your dough.
- My browned butter burned! What now? Deep breaths. Don’t panic. Unfortunately, burnt butter is irreparable. You’ll need to toss it and start fresh. Learn from it, move on.
- Can I make the dough ahead of time? Absolutely! The dough can chill in the fridge for up to 3 days, or even be frozen for a month. Just let it come to room temperature for about 30 minutes if frozen before scooping and baking.
- What kind of espresso powder should I use? Look for “instant espresso powder” in the baking aisle. King Arthur Baking Company makes a good one, or you can find other brands online or at specialty stores. It’s different from regular instant coffee!
- How do I store these amazing cookies? Once completely cool, store them in an airtight container at room temperature for up to 3-4 days. They also freeze beautifully for up to 2 months.
- My cookies are spreading too much, what went wrong? This could be a few things: your butter was too warm when you mixed it, you didn’t chill the dough enough, your oven temperature is off (get an oven thermometer!), or your flour-to-fat ratio is off. Next time, try chilling longer or adding a tablespoon or two more flour.
Final Thoughts
So there you have it, your new go-to cookie recipe. These Browned Butter Espresso Chocolate Chip Cookies aren’t just a treat; they’re an experience. They’re proof that a few simple tweaks can elevate a classic into something truly spectacular. Now go impress someone—or yourself—with your new culinary skills. You’ve earned it! And, FYI, sharing is optional. I won’t judge if you hoard them all. Enjoy!


