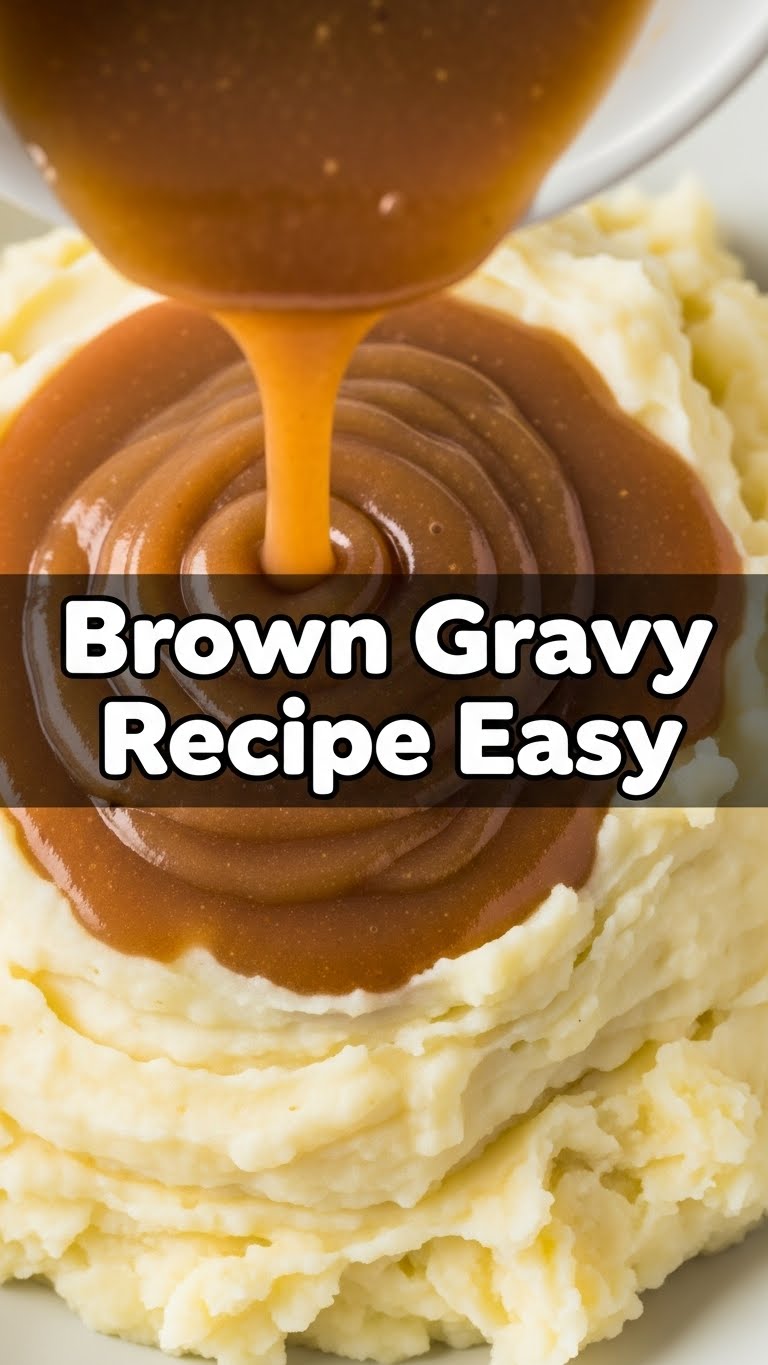
So you’re craving something tasty but too lazy to spend forever in the kitchen, huh? Same. Especially when it comes to that magical, velvety goodness known as gravy. You know, the stuff that makes mashed potatoes sing, roasted chicken beam, and frankly, makes everything better. But hold up, don’t reach for that sad, powdery packet just yet! We’re about to make **easy brown gravy** that’s so ridiculously simple, you’ll wonder why you ever hesitated. Think of it as a secret weapon for your next dinner party (or just a Tuesday night when you deserve a treat).
Why This Recipe is Awesome
Let’s be real, life’s too short for complicated recipes unless you’re, like, *really* into culinary acrobatics. This gravy, my friend, is the antithesis of complicated. It’s:
- **Idiot-proof:** Seriously, even I, someone who once accidentally seasoned chicken with sugar (don’t ask), can nail this.
- **Lightning-fast:** We’re talking minutes, not hours. Perfect for when hunger strikes harder than a medieval knight.
- **Uses minimal ingredients:** You probably have most of these lurking in your pantry right now. No obscure, “where do I even buy that?” items here.
- **Flavour-packed:** Despite its simplicity, this gravy brings the *oomph*. It’ll elevate everything from humble fries to a majestic roast.
Ingredients You’ll Need
Gather your culinary comrades! This isn’t a long list, so no excuses.
- **2 tablespoons unsalted butter:** Yes, *butter*. None of that sad margarine stuff if you can help it. Your taste buds deserve this tiny indulgence.
- **2 tablespoons all-purpose flour:** The unsung hero, creating that lovely thick consistency.
- **1.5 cups beef or chicken broth (low sodium, if you prefer):** This is where the magic happens! Chicken broth gives a lighter flavor, beef broth goes full-on savory. Grab whatever you have handy.
- **Salt and freshly ground black pepper, to taste:** Because *you’re* the boss of your gravy’s flavour profile. Don’t be shy!
Step-by-Step Instructions
Alright, apron on (or not, whatever), let’s make some liquid gold! Follow these simple steps and bask in your newfound gravy glory.
- **Melt the Butter:** Grab a medium saucepan and melt that butter over medium heat. Watch it sizzle!
- **Whisk in the Flour (Make a Roux):** Once the butter is melted and foamy, sprinkle in the flour. Whisk it continuously for about **1-2 minutes**. You’re aiming for a pale, golden paste. This step is crucial for getting rid of that raw flour taste. Don’t rush it!
- **Gradually Add Broth:** Now, slowly pour in the broth, a little at a time, **whisking constantly**. This is important! Adding it slowly and whisking prevents lumps. Keep going until all the broth is incorporated and you have a smooth, thin liquid.
- **Simmer and Thicken:** Bring the gravy to a gentle simmer, still whisking occasionally. Let it simmer for about **3-5 minutes**, or until it thickens to your desired consistency. It should coat the back of a spoon nicely.
- **Season to Perfection:** Remove from heat. Now’s the time to taste and adjust! Add salt and pepper as needed. Maybe a little more pepper if you’re feeling spicy.
- **Serve It Up!** Pour your glorious, homemade brown gravy over everything and anything. Seriously, *everything*.
Common Mistakes to Avoid
We’ve all been there, staring at a kitchen catastrophe. But with gravy, the pitfalls are easily dodged!
- **The “No Whisking” Fiasco:** Thinking you can just dump everything in and walk away? Rookie mistake. **Whisking is your best friend** here, especially when adding the flour and broth. Lumps are the enemy!
- **Skipping the Roux Cook Time:** Not cooking the flour-butter mixture for a minute or two will leave you with a distinctly “flour-y” tasting gravy. Gross. Just give it that minute; it makes a huge difference.
- **Cold Broth, Fast Pour:** Pouring cold broth rapidly into hot roux is an express train to Lumpsville. Warm your broth slightly in the microwave beforehand if you’re feeling fancy, but definitely add it gradually and whisk like your life depends on it.
- **Under-Seasoning:** Gravy without proper seasoning is like a joke without a punchline. Always **taste and adjust**! Your palate is unique, so trust it.
Alternatives & Substitutions
Feeling adventurous, or just working with what you’ve got? No problem! Gravy is forgiving.
- **Gluten-Free Gravy:** Ditch the flour! Instead, make a slurry with 1 tablespoon of cornstarch mixed with 2 tablespoons of cold water. Add this to your simmering broth (after it’s hot) and whisk until thickened. Voila!
- **Vegan Gravy:** Swap out the butter for olive oil or your favourite vegan butter alternative, and use vegetable broth. Boom, plant-based deliciousness!
- **Amp Up the Flavour:** Got pan drippings from a roast chicken or beef? Use those instead of (or in addition to) the butter and some of the broth. **IMO**, this is where next-level gravy magic happens. Just strain them first!
- **Different Broths:** While beef and chicken are classics, don’t be afraid to experiment with mushroom broth for an earthy flavour, or even a mix!
FAQ (Frequently Asked Questions)
Got questions? I’ve got (casual) answers!
- **Can I use water instead of broth?** Well, technically yes, but why hurt your soul like that? Broth adds depth and flavour that water just can’t compete with. For the best taste, stick to broth.
- **How do I fix lumpy gravy?** Panic not! If it’s just a few lumps, whisk like a maniac. If it’s a lumpy mess, you can pour it through a fine-mesh sieve, or even hit it with an immersion blender for a silky smooth finish. No one needs to know.
- **Can I make gravy ahead of time?** Absolutely! It reheats beautifully. Just store it in an airtight container in the fridge for up to 3-4 days. When reheating, you might need to add a splash more broth or water to thin it out to your desired consistency.
- **My gravy isn’t thick enough, help!** No worries! Mix a teaspoon of cornstarch with a tablespoon of cold water to create a slurry. Whisk this into your simmering gravy a little at a time until it reaches your desired thickness.
- **Conversely, my gravy is too thick!** Easy fix! Just whisk in a little more warm broth or water until it loosens up to your perfect consistency.
- **Can I freeze leftover gravy?** You betcha! Let it cool completely, then freeze in an airtight container for up to 2-3 months. Thaw in the fridge and reheat gently on the stove.
Final Thoughts
See? I told you it was easy! You’ve just whipped up a batch of delicious, homemade brown gravy. No fuss, no drama, just pure, unadulterated flavour. Now go impress someone—or yourself—with your new culinary skills. You’ve earned it! Drizzle it, pour it, bathe in it (okay, maybe not that last one). Just enjoy every savory, comforting bite. You’re officially a gravy guru. Go forth and gravy!


