So, you’ve reached that point, huh? That specific point where your soul whispers (or, let’s be real, shouts) for a cookie that’s not just *any* cookie, but one that feels like a warm hug from a fancy, slightly tipsy French chef. You want “fine taste” without the “fine dining” effort. My friend, you’ve come to the right place. We’re talking Brown Butter Chocolate Chip Cookies, and trust me, they’re so good they might just make you weep happy tears. Or at least dramatically declare your love for butter.
Why This Recipe is Awesome
Okay, let’s cut to the chase. This isn’t just another chocolate chip cookie recipe. This is *the* recipe. Why? Because we’re not just throwing butter in there; we’re giving it a little spa day on the stovetop until it turns into a magical, nutty, golden elixir. That brown butter? It’s the secret sauce, the MVP, the reason you’ll be making these on repeat. Plus, these cookies are **seriously simple**. We’re talking minimal fuss, maximum flavor. Even if your culinary adventures usually end with a smoke detector serenading you, you got this. It’s practically idiot-proof. (And yes, I’ve tested that theory myself.)
Ingredients You’ll Need
Get ready to assemble your delicious arsenal. Nothing too wild, just the good stuff.
- **1 cup (2 sticks) unsalted butter:** The star of our show. We’re giving this a glow-up!
- **1 ½ cups all-purpose flour:** The backbone of our cookies.
- **½ teaspoon baking soda:** For that perfect lift.
- **½ teaspoon salt:** Don’t skip this! It balances everything out.
- **½ cup granulated sugar:** Just enough sweetness.
- **1 cup packed light brown sugar:** Hello, chewiness and depth!
- **1 large egg + 1 egg yolk:** The dynamic duo for richness and chew.
- **2 teaspoons vanilla extract:** The more real, the better, IMO.
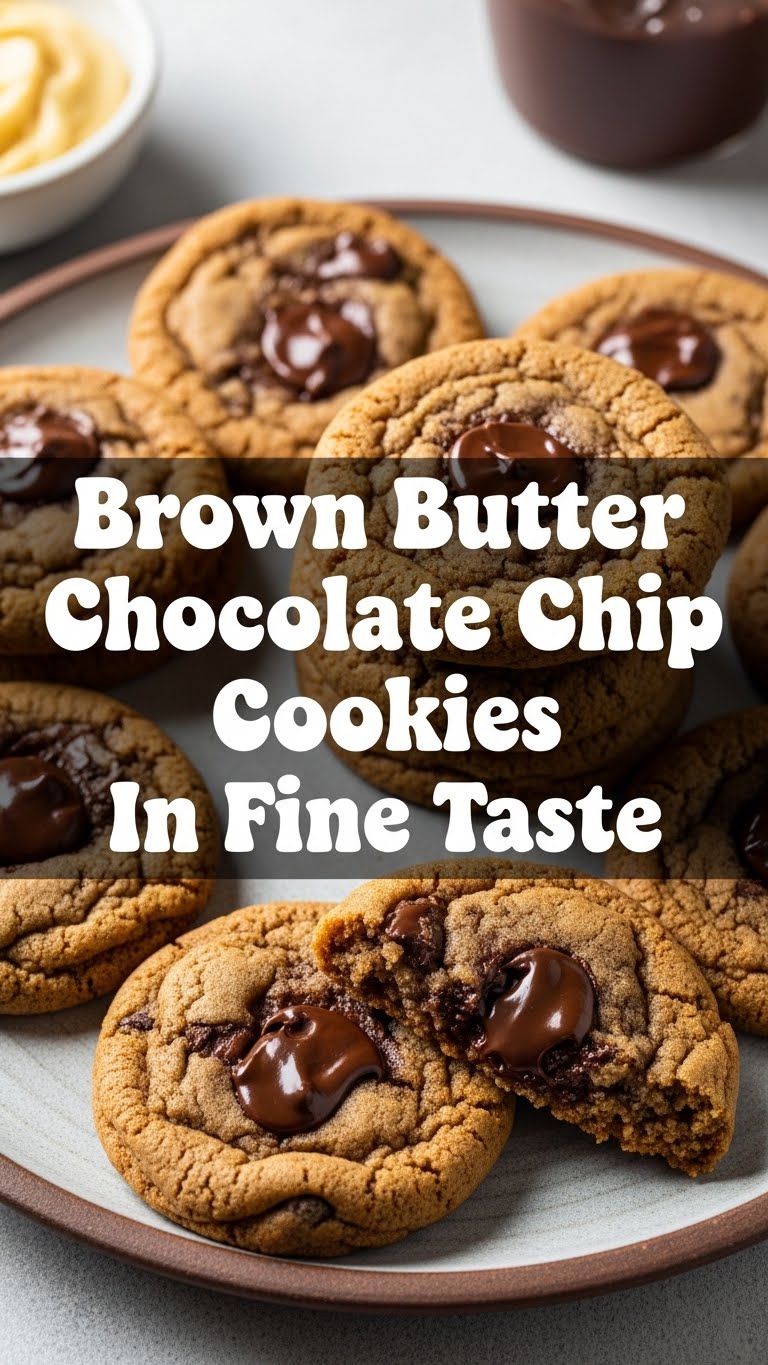
- **1 ½ cups chocolate chips (or chunks!):** A mix of milk and dark is *chef’s kiss*. Go wild!
- **Flaky sea salt (optional, but highly recommended):** For sprinkling before baking. Trust me.
Step-by-Step Instructions
Alright, apron on (or don’t, I’m not your boss), let’s get baking!
- **Brown the Butter:** Grab a light-colored saucepan so you can actually *see* the magic happen. Melt your butter over medium heat, stirring occasionally. It’ll foam, then quiet down, then start to smell nutty and tiny brown bits will form at the bottom. Keep going until it’s a beautiful amber color. **Don’t burn it!** Immediately pour it into a heatproof bowl to stop cooking. Let it cool for about 10-15 minutes – you want it warm, not sizzling hot.
- **Whisk Dry Ingredients:** In a medium bowl, whisk together your flour, baking soda, and salt. Set it aside for a sec.
- **Cream Wet Ingredients:** In a large bowl (or stand mixer if you’re fancy), combine the slightly cooled brown butter, granulated sugar, and brown sugar. Beat ’em together until they’re light and fluffy, about 2-3 minutes.
- **Add Eggs & Vanilla:** Beat in the whole egg, then the egg yolk, one at a time, mixing well after each addition. Stir in that glorious vanilla extract.
- **Combine Wet & Dry:** Gradually add your dry ingredients to the wet ingredients, mixing on low speed (or by hand) until *just* combined. **Don’t overmix!** Nobody wants tough cookies.
- **Fold in Chocolate:** Gently fold in your chocolate chips. Seriously, be gentle.
- **Chill Out (Crucial Step!):** Cover your dough and **chill it for at least 30 minutes**. An hour is even better, or even overnight! This helps the flavors meld and prevents your cookies from spreading too much. Patience, young grasshopper.
- **Preheat & Prep:** When you’re ready to bake, preheat your oven to 375°F (190°C). Line a baking sheet with parchment paper.
- **Scoop & Bake:** Scoop 1.5-2 tablespoon sized balls of dough onto your prepared baking sheet, leaving some space between them. If you’re feeling it, sprinkle with a pinch of flaky sea salt. Bake for 9-12 minutes, or until the edges are golden brown and the centers are still slightly soft.
- **Cool & Devour:** Let them cool on the baking sheet for a few minutes before transferring to a wire rack to cool completely. Or, you know, eat one (or three) warm. No judgment here.
Common Mistakes to Avoid
Listen, we all make mistakes, but let’s try to avoid these rookie errors, okay?
- **Burning the Butter:** This is a delicate dance! Keep an eye on it. If it smells burnt or turns dark brown/black, toss it and start over. Seriously, it’ll make your cookies bitter.
- **Not Cooling the Brown Butter Enough:** If you add sizzling hot butter to your sugars and eggs, you’ll essentially cook the eggs. Nobody wants scrambled egg cookies. Let it chill!
- **Overmixing the Dough:** Once the flour goes in, mix only until it’s combined. Overmixing develops gluten, which leads to tough, chewy cookies in the bad way.
- **Skipping the Chill Time:** I know, I know, you want cookies NOW. But chilling allows the flavors to deepen and prevents your cookies from turning into flat, sad puddles. **Don’t skip it!**
- **Overbaking:** Brown butter cookies are best when they’re still a little soft in the middle. They’ll continue to cook slightly on the hot baking sheet. Pull them out when the edges are set and golden.
Alternatives & Substitutions
Feeling creative? Here are some ways to jazz up (or adapt) your cookies:
- **Chocolate Choice:** Not a fan of just chips? Try chopped chocolate bars (dark chocolate is amazing with brown butter!), white chocolate, or even peanut butter chips. A mix of milk and dark is my personal faves.
- **Flour Power:** You can try swapping a small portion of the all-purpose flour for oat flour for a slightly different texture, but keep the majority all-purpose for structure.
- **Sugar Swap:** For an even chewier cookie, you could slightly increase the brown sugar and decrease the granulated sugar, but stick to the recipe ratios for the first go.
- **Add-ins:** Walnuts, pecans, shredded coconut, or a pinch of cinnamon would all be delicious additions to the dough.
- **Dairy-Free?:** Look, you can try, but the brown butter is kinda the *entire point* here. Using a dairy-free butter substitute might work, but you won’t get that nutty brown butter flavor that makes these legendary. Just sayin’.
FAQ (Frequently Asked Questions)
- **Can I make the dough ahead of time?** Absolutely! In fact, the longer it chills (up to 3 days in the fridge), the more developed the flavor will be. Cookies for days!
- **My butter didn’t brown, it just burned. What did I do wrong?** You likely had the heat too high or didn’t stir enough. Keep the heat medium, use a light-colored pan, and watch it like a hawk. Practice makes perfect!
- **Can I use margarine instead of butter?** Well, technically yes, but why hurt your soul like that? Margarine won’t brown the same way, and you’ll miss out on all that incredible flavor. Stick with real butter for these beauties.
- **How do I store these cookies?** Keep ’em in an airtight container at room temperature for up to 3-4 days. If they last that long, you have more self-control than me.
- **Can I freeze the cookie dough?** Heck yes! Scoop the dough into balls, freeze them on a baking sheet until solid, then transfer to a freezer-safe bag. Bake from frozen, adding a couple of minutes to the baking time. Fresh cookies anytime!
Final Thoughts
So there you have it, my friend. The keys to unlocking brown butter chocolate chip cookie nirvana. This recipe isn’t just about baking; it’s about embracing the joy of a truly phenomenal treat without taking yourself too seriously. These cookies are rich, complex, and will make everyone think you’re some kind of culinary wizard. Now go impress someone—or yourself—with your new culinary skills. You’ve earned it!


