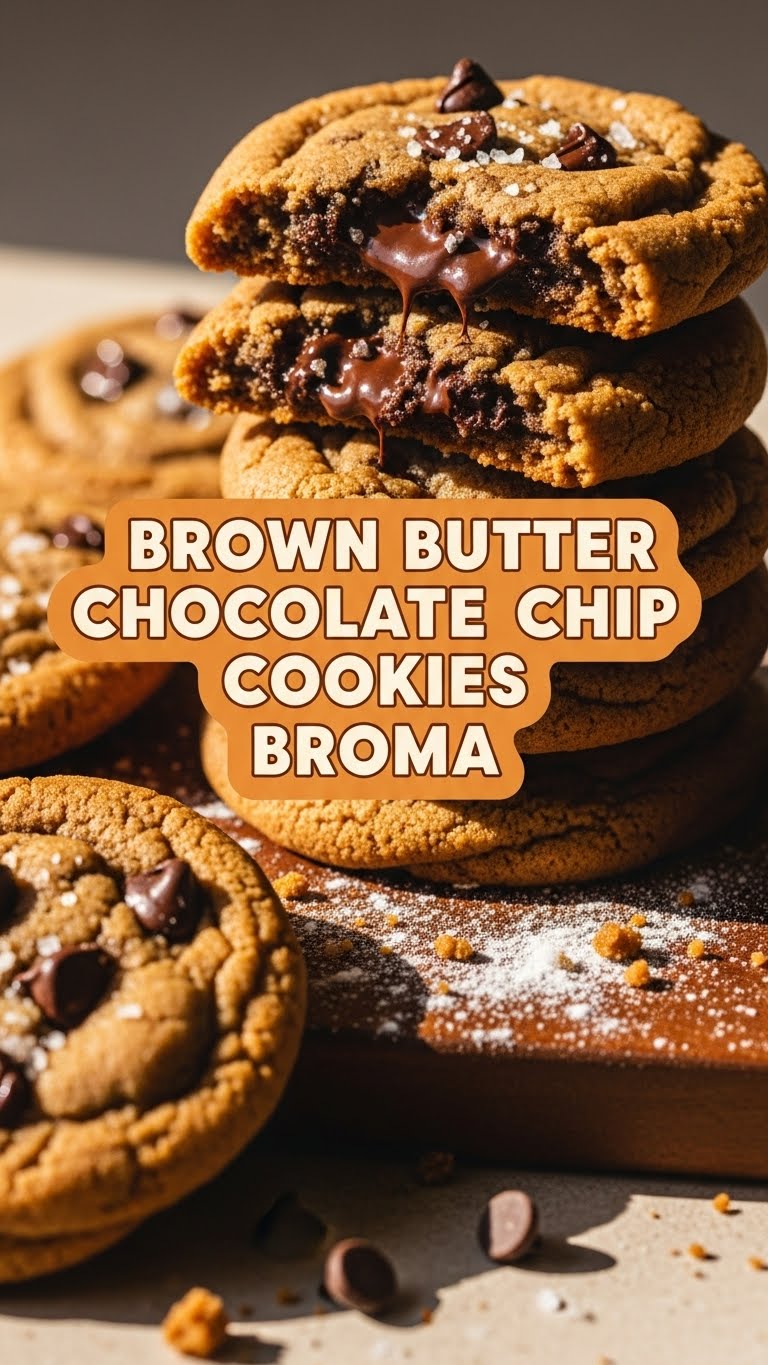
So you’re scrolling, you’re hungry, and you’re thinking, “Is there *actually* a cookie recipe out there that will change my life without making me want to throw my mixer out the window?” **Spoiler alert: Yes, there is.** Get ready for the Brown Butter Chocolate Chip Cookies Broma style. These aren’t just cookies; they’re a warm, chewy, nutty hug for your soul that basically bakes itself (almost!).
Why This Recipe is Awesome
Listen, I get it. You’ve seen a million chocolate chip cookie recipes. But this one? This is like the cookie whisperer of recipes. It’s **foolproof**, even if your past baking attempts usually involve calling the fire department (just kidding… mostly). The secret sauce here is the brown butter. It’s not just butter; it’s butter that’s been on a flavor journey, emerging with a deep, nutty, caramel-y essence that just screams “fancy pants!”
Beyond the brown butter magic, these cookies boast that perfect chewy-on-the-inside, slightly-crispy-on-the-edges texture that makes you question all your previous life choices. Plus, the dough is practically begging for a chill in the fridge, meaning you can whip it up now and bake fresh cookies later. **Future you will high-five past you.** Trust me, this recipe is a keeper. It’s so good, even I didn’t mess it up!
Ingredients You’ll Need
Gather your troops! Here’s what you’ll need to make cookie magic happen:
- **1 cup (2 sticks) Unsalted Butter:** The star of the show! Unsalted, because we’re in control of our salt here. We’re gonna give it a glow-up by browning it.
- **¾ cup Granulated Sugar:** For sweetness and a little crispness.
- **¾ cup Packed Light Brown Sugar:** For that signature chew and molassesy depth. Don’t skimp, it’s important!
- **2 large Eggs:** Room temperature, please! It makes a difference, I swear. Don’t ask for the science, just do it.
- **2 tsp Vanilla Extract:** The good stuff. A little extra won’t hurt, IMO.
- **2 ¼ cups All-Purpose Flour:** No fancy stuff needed. Just good old all-purpose.
- **1 tsp Baking Soda:** Our leavening friend! Don’t confuse it with baking powder, unless you want flat, sad cookies.
- **1 tsp Salt:** Because every sweet treat needs a little salt to really sing! Don’t forget it.
- **1 ½ cups Chocolate Chips:** Go wild! A mix of dark and milk is my personal fave, but you do you, boo. Chopped chocolate bars work wonders too.
Step-by-Step Instructions
Alright, apron on, game face on. Let’s bake some happiness!
- **Brown the Butter like a Boss:** Grab a light-colored saucepan (so you can see the magic happen!). Melt your unsalted butter over medium heat. Swirl it constantly. It’ll foam, then quiet down, then start to smell nutty, and tiny brown bits will appear at the bottom. Once it’s golden brown and smells like heaven, immediately remove it from the heat. **Don’t burn it!** That’s a sad, bitter road we don’t want to go down.
- **Cool & Combine:** Pour the brown butter into a large mixing bowl (or your stand mixer bowl). Let it cool for about 5-10 minutes. Then, add both granulated sugar and brown sugar. Whisk it all together until it’s smooth and gorgeous.
- **Eggs & Vanilla Party:** Beat in one egg at a time, making sure each is fully incorporated before adding the next. Then, stir in that glorious vanilla extract. Scrape down the sides of the bowl to make sure everything’s getting cozy.
- **Dry Ingredients Unite:** In a separate medium bowl, whisk together your flour, baking soda, and salt. Gradually add this dry mixture to your wet ingredients, mixing on low speed (or by hand) **just until combined**. A few streaks of flour are better than overmixing!
- **Chocolate Chip Heaven:** Gently fold in your chocolate chips. Like you’re giving them a tender hug, not a wrestling match.
- **The All-Important Chill Out:** Cover your dough with plastic wrap and chill it in the fridge for at least 30 minutes. An hour is better. Overnight is cookie nirvana. This step is **crucial for flavor development and preventing flat cookies!** Seriously, don’t skip it.
- **Bake It Up!** Preheat your oven to 375°F (190°C). Line a baking sheet with parchment paper. Scoop about 1.5-2 tablespoons of dough per cookie, placing them a few inches apart.
- **Golden Goodness:** Bake for 10-12 minutes, or until the edges are golden brown and the centers still look a tiny bit soft. They’ll continue to set as they cool.
- **Cool (a little):** Let those beauties cool on the baking sheet for 5 minutes before transferring them to a wire rack to cool completely. Or, you know, eat them warm. No judgment here.
Common Mistakes to Avoid
Even though this recipe is pretty bulletproof, there are a few rookie mistakes that can sabotage your cookie dreams:
- **Skipping the brown butter step:** Seriously? That’s like buying a ticket to a concert and standing outside. It’s the whole point of this Broma-style magic!
- **Overmixing the dough:** You want tender cookies, not hockey pucks. Mix until just combined, then back away from the mixer slowly.
- **Not chilling the dough:** I know, patience is a virtue, and frankly, I don’t have much of it. But chilling the dough *truly* makes a difference in flavor and prevents sad, flat cookies. **Resist the urge to bake immediately!**
- **Overbaking:** Cookies often look slightly underdone in the middle when they’re perfectly baked. Pull them out when the edges are set and golden, even if the center looks a touch soft. They’ll firm up beautifully.
- **Using cold eggs:** Remember the room temp rule? Cold eggs can make your batter lumpy and prevent proper emulsification. Take them out a bit earlier, FYI.
Alternatives & Substitutions
Feeling adventurous? Or just missing an ingredient? Here are some ideas:
- **Chocolate Variations:** Don’t limit yourself to just chips! Try chopped dark chocolate bars for gooey puddles, white chocolate, butterscotch chips, or even a handful of pretzels for a salty-sweet crunch.
- **Flour Power:** While all-purpose is best, some folks have success with a 1:1 gluten-free baking blend. I haven’t personally tested it, so proceed with caution and maybe a small test batch.
- **No Chill Time?:** If you’re in a desperate cookie emergency (we’ve all been there!), you *can* skip the chill. Just be prepared for cookies that might spread a bit more and have a slightly less developed flavor. Don’t say I didn’t warn you!
- **Nutty Additions:** Fold in some toasted chopped pecans or walnuts with the chocolate chips for extra texture and flavor.
FAQ (Frequently Asked Questions)
Got questions? I’ve got (casual) answers!
- **Can I make these ahead of time?** Absolutely! The dough keeps beautifully in the fridge for up to 3 days. You can also scoop balls of dough and freeze them in an airtight container for months. Bake from frozen, adding a few extra minutes to the bake time. Future you will thank past you for this foresight!
- **Why room temp eggs? What’s the big deal?** Ah, the age-old question! Room temperature eggs emulsify better with the butter and sugar, creating a smoother, more uniform dough texture. It’s a small step that makes a big difference!
- **My brown butter burned! Do I need to start over?** Oh no! My condolences. Yes, you gotta start over, friend. Burnt butter tastes bitter and will ruin your cookies. Next time, keep a closer eye and a lighter-colored pan.
- **Can I use a stand mixer instead of a hand mixer?** Totally! A stand mixer is perfect for this. Just use the paddle attachment and be mindful not to overmix, especially when adding the flour.
- **How do I know when the cookies are done? They still look soft!** That’s the secret! The edges should be set and golden, but the centers will still look a bit soft and perhaps slightly underbaked. They’ll continue to cook and set as they cool. Trust the process for that perfect chewy center!
- **Can I freeze the baked cookies?** You betcha! Once fully cooled, store them in an airtight container or freezer bag for up to 2-3 months. Thaw at room temperature, or zap ’em in the microwave for a few seconds for that fresh-baked feel.
Final Thoughts
And there you have it! Your ticket to cookie nirvana. You’ve officially leveled up your baking game and joined the brown butter fan club. These Broma-style cookies are more than just a treat; they’re an experience. Now go forth, conquer those cravings, and maybe share one (or two, or three) with a friend. Or don’t. I won’t tell. You’ve earned this, you magnificent baker, you! Happy baking!


