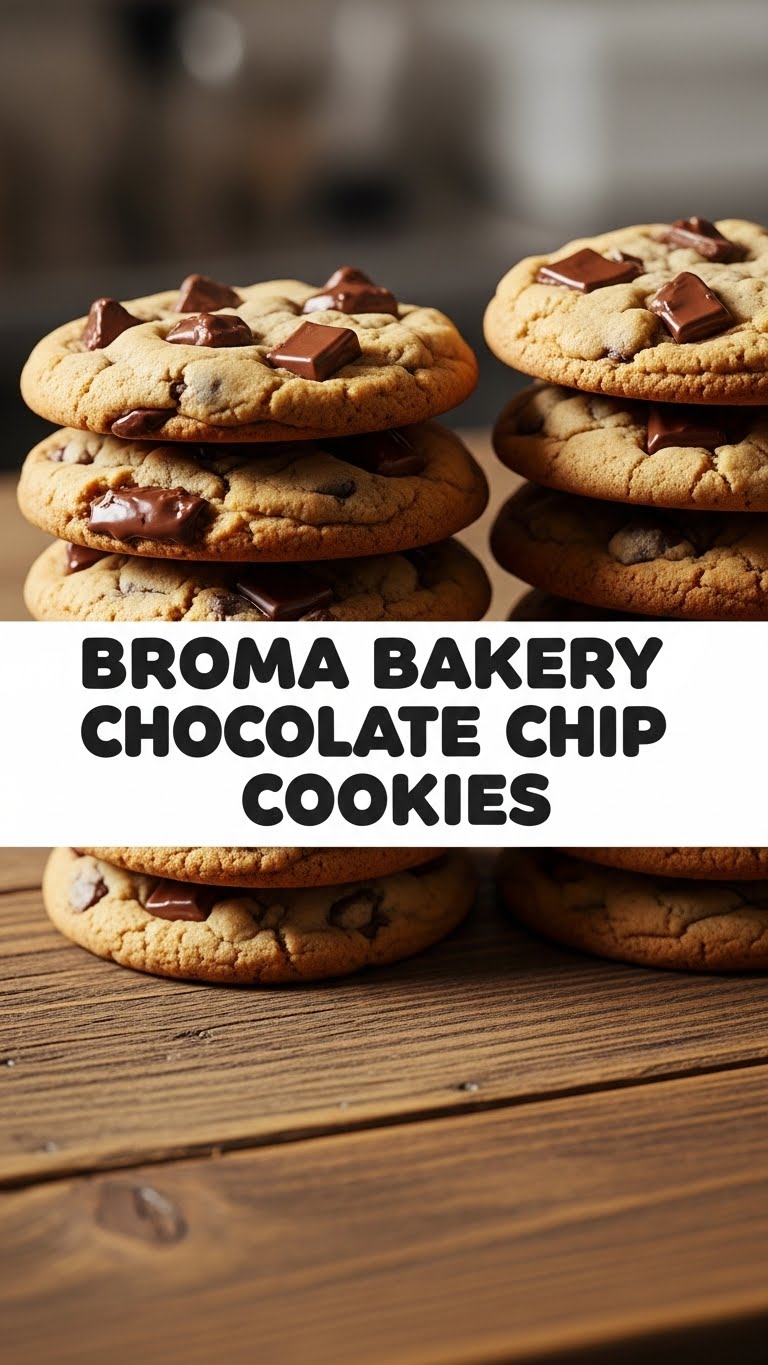
So, you’re staring into the abyss of your fridge, realizing dinner was… well, let’s just say “functional,” and now your sweet tooth is screaming for something glorious, but your motivation is currently on vacation? Yeah, same. Good news, my friend! We’re about to dive headfirst into the world of Broma Bakery Chocolate Chip Cookies, and trust me, it’s a world where laziness meets legendary deliciousness. Prepare yourself for cookies so good, they’ll make you question all your life choices (in the best way possible, obviously).
Why This Recipe is Awesome
Okay, let’s be real. There are a bazillion chocolate chip cookie recipes out there. So why this one? Because it’s not just a recipe; it’s a personality test for your willpower. And it passes with flying colors! First off, these cookies are the perfect blend of chewy and slightly crisp – none of that flat, sad pancake nonsense. Secondly, it’s practically **idiot-proof**. And I say that with love, knowing full well I’ve managed to mess up instant ramen before. Plus, the dough is so good, you’ll be “taste-testing” it more than baking it. Don’t worry, your secret’s safe with me. 😉
Ingredients You’ll Need
Gather ’round, my little bakers! Here’s what you need for pure chocolate chip cookie nirvana. Most of this stuff is probably already lurking in your pantry, waiting for its moment to shine.
- 1 cup (2 sticks) unsalted butter, softened. Not melted! We’re making cookies, not a butter soup.
- ¾ cup granulated sugar. The white stuff. Don’t overthink it.
- 1 cup packed light brown sugar. This is where the chewiness magic happens.
- 2 large eggs. Room temp if you’re feeling fancy, but straight from the fridge works too, you rebel.
- 1 teaspoon vanilla extract. Good quality stuff, please. It makes a difference!
- 2 ¼ cups all-purpose flour. Measured correctly, please! Spoon it into your measuring cup, then level off.
- 1 teaspoon baking soda. Helps them get puffy.
- ½ teaspoon salt. Crucial for balancing all that sweetness. Don’t skip it!
- 1 ½ – 2 cups chocolate chips or chunks. Your call on quantity and type (milk, semi-sweet, dark – a mix is always a good idea, IMO). Go wild!
Step-by-Step Instructions
- Preheat & Prep: First things first, get that oven fired up to 375°F (190°C). Line a couple of baking sheets with parchment paper or silicone mats. Trust me, cleanup is a breeze this way.
- Cream the Butter & Sugars: In a large bowl, or your stand mixer, cream together the softened butter, granulated sugar, and brown sugar. Beat it on medium speed until it’s light, fluffy, and looks like a golden cloud (about 2-3 minutes). This step is key for texture!
- Eggs & Vanilla Time: Add one egg at a time, mixing well after each addition. Then, stir in that glorious vanilla extract. Scrape down the sides of the bowl to make sure everything is incorporated.
- Dry Ingredients Unite: In a separate bowl (yes, another bowl, don’t be lazy now), whisk together the flour, baking soda, and salt. Make sure it’s well combined so you don’t end up with salty patches in your cookies.
- Combine & Conquer: Gradually add the dry ingredients to the wet ingredients, mixing on low speed until just combined. **Do not overmix!** Overmixing develops gluten, which makes tough cookies, and nobody wants a tough cookie.
- Chocolate Shower: Fold in those beautiful chocolate chips or chunks. Make sure they’re evenly distributed throughout the dough.
- Scoop & Space: Drop rounded tablespoons of dough onto your prepared baking sheets, leaving about 2 inches between each cookie. These babies need their personal space to spread out and get perfectly golden.
- Bake ‘Em Up: Bake for 9-11 minutes, or until the edges are golden brown and the centers are still slightly soft. They’ll firm up as they cool.
- Cool Down: Let the cookies cool on the baking sheets for a few minutes before transferring them to a wire rack to cool completely. Or, you know, eat one while it’s still warm and gooey. You earned it.
Common Mistakes to Avoid
- Using Cold Butter: Trying to cream cold butter is like trying to reason with a toddler – it’s not going to go well. Softened butter is a must for that perfect texture.
- Overmixing the Dough: We talked about this! Once you add the flour, mix until *just* combined. Too much mixing means tough cookies.
- Not Chilling the Dough (Optional but Recommended): While not strictly mandatory for this recipe, a 30-minute chill can actually intensify flavors and prevent excessive spreading. Rookies skip it, pros consider it. 😉
- Overbaking: If you wait until the cookies look fully “done” in the oven, you’ve probably gone too far. They continue to cook a little on the hot baking sheet, so pull them out when the edges are set and the centers still look a tiny bit undercooked.
- Ignoring the Salt: Salt isn’t just for savory stuff! It cuts through the sweetness and enhances the chocolate flavor. Don’t skimp!
Alternatives & Substitutions
Feeling adventurous? Or maybe you just ran out of something vital. No worries, I’ve got your back!
- Chocolate Choices: Not a fan of semi-sweet? Use milk chocolate, dark chocolate, white chocolate, or even a mix! Chocolate chunks give a more rustic, bakery-style look and gooey pockets of chocolate. Mini chocolate chips are cute too!
- Flour Power: If you’re out of all-purpose, you *can* sometimes get away with using bread flour for a chewier cookie, but the proportions might need tweaking. Whole wheat pastry flour could work for a slightly healthier (shhh!) vibe, but the texture will be different. Stick to AP if you can, it’s just easier.
- Add-ins: Want to level up? Toss in some chopped nuts (walnuts, pecans), dried cranberries, or even a sprinkle of sea salt on top before baking for that gourmet touch. Caramel bits? Peanut butter chips? The world is your oyster!
- Butter Swaps: Margarine can technically work, but… why? Butter gives the best flavor and texture. If you absolutely MUST use a dairy-free option, use a good quality plant-based butter alternative, but be aware the result might differ slightly.
FAQ (Frequently Asked Questions)
Got questions? I’ve got answers (mostly, don’t ask me about quantum physics).
- “Can I make the dough ahead of time?” Heck yes! The dough keeps wonderfully in the fridge for up to 3 days, or you can freeze scooped balls for up to a month. Bake from frozen, adding a few extra minutes to the bake time. Pro tip: a chilled dough often means better flavor and less spreading!
- “My cookies are flat! What went wrong?” Oh, the dreaded flat cookie! Usually, it’s either your butter was too soft (or melted!), your oven wasn’t hot enough, or you didn’t measure your flour correctly. Also, not chilling the dough can contribute.
- “What’s the best way to store these masterpieces?” Once they’re completely cool (if you can wait that long!), store them in an airtight container at room temperature for up to 3-4 days. They never last that long in my house, FYI.
- “Can I use less sugar?” You can, but it might affect the texture, making them less chewy and possibly a bit tougher. Sugar isn’t just for sweetness; it plays a role in browning and moisture too!
- “Do I really need parchment paper?” While not strictly mandatory if your baking sheets are non-stick, parchment paper prevents sticking, promotes even baking, and makes cleanup a dream. **Seriously, use it.**
- “Is it okay if the centers are a bit gooey?” Absolutely! That’s the sign of a perfectly baked cookie. They’ll set up as they cool, leaving you with that lovely chewiness.
Final Thoughts
There you have it, folks! Your new go-to recipe for chocolate chip cookies that will make you feel like a master baker, even if your greatest culinary achievement until now was not burning toast. These Broma Bakery-inspired cookies are all about that perfect balance of crispy edges, chewy centers, and glorious chocolate. So, what are you waiting for? Get in that kitchen, whip up a batch, and go impress someone—or yourself—with your new culinary skills. You’ve earned it!

