So you’ve stared into the abyss of your pantry, craving something warm, sweet, and ridiculously easy, but the thought of a complex recipe sends shivers down your spine? Same, friend, same. What if I told you there’s a magical loaf that tastes like a cozy hug and requires almost zero brain cells to make? Enter the glorious, ridiculously simple Apple Pie Filling Bread. It’s basically a dessert in bread form, and who are we to argue with that kind of genius?
Why This Recipe is Awesome
Let’s be real, you’re not always looking to win a Michelin star; sometimes you just want something yummy without the fuss. This recipe is your culinary superhero for precisely those moments. It’s practically idiot-proof – and coming from someone who once set off the smoke detector making toast, that’s saying something. You get all the comforting, spiced apple goodness of pie, but in a sliceable, breakfast-appropriate (or any-time-of-day-appropriate, let’s be honest) bread. Plus, it makes your kitchen smell like a cozy autumn dream, even if it’s 90 degrees outside. It’s a win-win-win, IMO.
Ingredients You’ll Need
Gather your troops, fellow lazy-but-ambitious baker! Here’s what you’ll need to whip up this glorious loaf:
- 1 ½ cups All-Purpose Flour: The basic building block. Don’t overthink it.
- ½ cup Granulated Sugar: For that sweet, sweet goodness. Adjust to your sweet tooth, but this is a good starting point.
- 1 ½ teaspoons Baking Powder: Our little lift-off agent. Make sure it’s fresh, unless you like dense bricks.
- ½ teaspoon Salt: Just a pinch to make everything else sing.
- ½ cup Milk: Any kind works – dairy, almond, oat. Use what you got!
- ¼ cup Unsalted Butter, melted: Because butter makes everything better. Melt it and let it cool a smidge.
- 1 large Egg: The binder of delicious things.
- 1 teaspoon Vanilla Extract: A splash of magic. Don’t skip it!
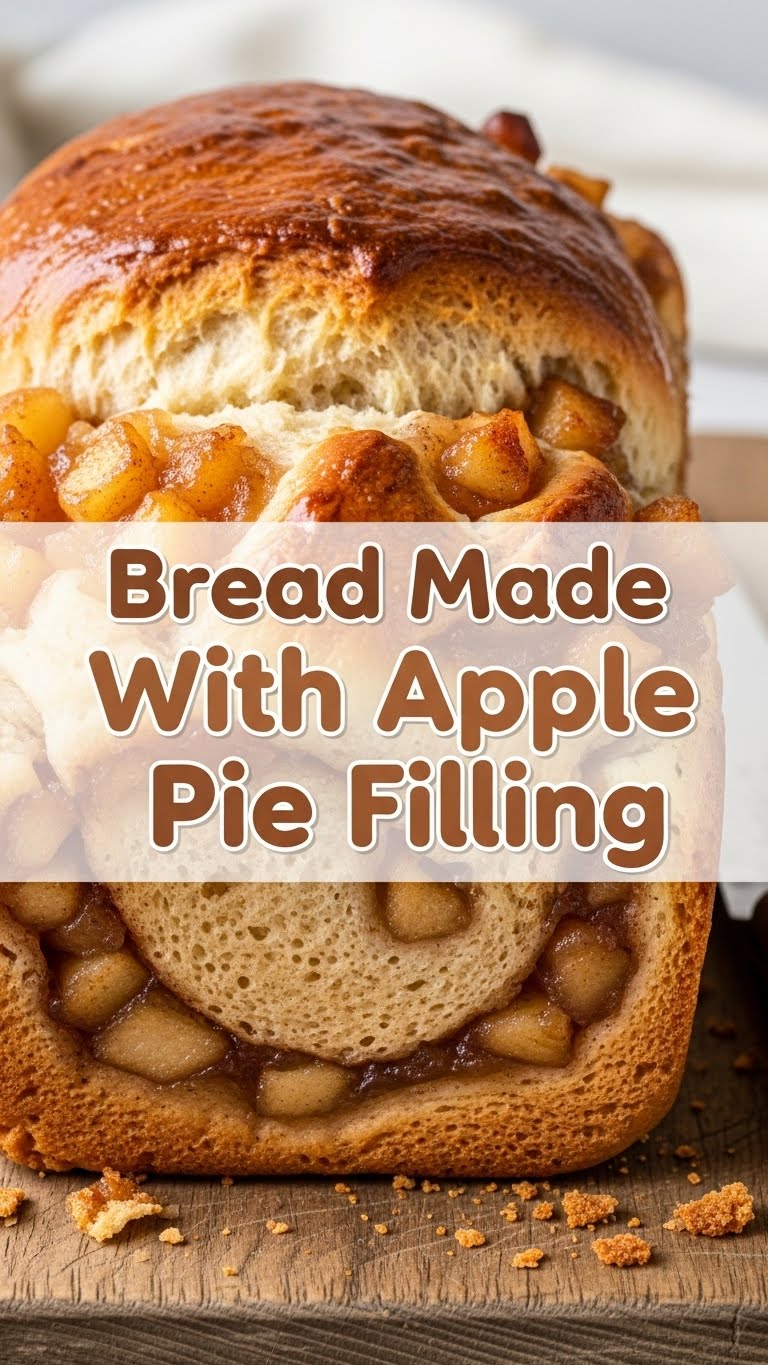
- 1 (21-ounce) can Apple Pie Filling: The MVP of this recipe. Canned is our friend here, no judgment.
- Optional: A sprinkle of cinnamon or nutmeg for extra warmth.
Step-by-Step Instructions
Alright, apron on (or not, we don’t judge!), let’s get this bread party started!
- Preheat & Prep: First things first, crank up your oven to 350°F (175°C). Then, grab a standard loaf pan (9×5 inches usually does the trick) and grease it well. Line it with parchment paper if you want extra easy removal. Trust me, future you will thank present you.
- Dry Mix Magic: In a large bowl, whisk together your flour, sugar, baking powder, and salt. Give it a good swirl so everything is evenly distributed. This is where the magic (aka leavening) starts.
- Wet Mix Whisk: In a separate medium bowl, whisk together your milk, melted butter, egg, and vanilla extract until they’re nicely combined. Don’t go crazy, just get it mixed.
- Combine Forces: Pour the wet ingredients into the dry ingredients. Stir them together with a spoon or spatula until *just* combined. Important: Don’t overmix! A few lumps are totally fine and actually preferred for a tender crumb. Overmixing develops gluten, leading to tough bread. Nobody wants tough bread.
- Fold in the Star: Now for the good part! Gently fold in your canned apple pie filling. Try to break up any super large apple chunks a bit, but don’t mash it. You want those glorious apple bits distributed throughout.
- Into the Pan: Pour the batter into your prepared loaf pan and spread it out evenly. Give the pan a gentle tap on the counter to release any large air bubbles.
- Bake It Off: Pop that beautiful pan into your preheated oven. Bake for about 50-60 minutes, or until a wooden skewer or toothpick inserted into the center comes out clean (or with just a few moist crumbs clinging to it).
- Cool Down: Once baked, let the bread cool in the pan for about 10-15 minutes. This allows it to firm up before you attempt to remove it. Then, carefully transfer it to a wire rack to cool completely. Patience is a virtue, especially when it comes to baked goods.
- Slice & Devour: Once cooled (or mostly cooled, if you’re like me), slice it up and enjoy! It’s amazing plain, with a dollop of whipped cream, or even a scoop of ice cream.
Common Mistakes to Avoid
Look, we all make mistakes. Here are a few common pitfalls to steer clear of if you want this bread to be its best self:
- Overmixing the Batter: Seriously, I cannot stress this enough. Stir until *just* combined. Lumps are your friends. Overmixing is the enemy of tender bread.
- Not Greasing Your Pan Properly: Thinking you can get away with a quick spray? Rookies! You want that bread to slide out gracefully, not put up a fight. Grease and flour, or grease and parchment.
- Cutting While Super Hot: I know, the smell is intoxicating. But slicing a hot loaf can make it gummy and difficult to cut neatly. Give it time to cool and set.
- Using Old Baking Powder: If your baking powder has been in the pantry since the dinosaurs roamed, it might be dead. Dead baking powder means a flat, sad loaf. Check the expiry date, folks!
- Patience, My Young Padawan: Don’t keep opening the oven door every five minutes to check. The sudden temperature drop can make your bread sink. Trust the process!
Alternatives & Substitutions
Feeling a little rebellious? Here are some ways to shake things up:
- Different Pie Fillings: Why stop at apple? Cherry pie filling, peach, or even blueberry would be equally delicious! Feel free to experiment!
- Add Some Crunch: Stir in ½ cup of chopped walnuts or pecans with the pie filling for an extra layer of texture.
- Spice it Up: If your pie filling isn’t super spiced, add an extra ½ teaspoon of cinnamon or a pinch of nutmeg to the dry ingredients.
- Glaze Craze: Drizzle a simple glaze over the cooled bread for extra sweetness. Whisk together ½ cup powdered sugar with 1-2 tablespoons of milk or lemon juice until smooth.
- Streusel Topping: Before baking, sprinkle a quick streusel (flour, sugar, butter, cinnamon crumbled together) on top for a crumbly crust.
FAQ (Frequently Asked Questions)
Got questions? I’ve got (mostly sarcastic) answers!
- Can I use fresh apples instead of canned filling? Well, technically yes, but then it wouldn’t be the “lazy-genius” bread, would it? You’d need to peel, chop, and cook them down with sugar and spices first. This recipe is for speed!
- How long does this bread keep? It’s best devoured within 3-4 days at room temperature, wrapped tightly. Or, you know, just eat it all immediately.
- Can I freeze this apple pie bread? Absolutely! Wrap it tightly in plastic wrap, then foil, and freeze for up to 2-3 months. Thaw at room temp. It’s like a delicious time capsule!
- My bread is dense and not fluffy. What did I do wrong? My guess? You either overmixed the batter (see “Common Mistakes”) or your baking powder is past its prime. Or both. Don’t worry, even a dense loaf is still edible!
- Can I add other spices like cardamom or allspice? Oh, you fancy, huh? Go for it! A pinch of cardamom would be divine, especially with apples. YOLO.
- Can I use margarine instead of butter? Well, technically yes, but why hurt your soul (and your bread’s flavor) like that? Butter just tastes better. Period.
- Is this considered a breakfast food or a dessert? My friend, it’s a “do what makes you happy” food. It has fruit in it, so it’s practically health food for breakfast. And it’s sweet, so it’s clearly dessert. See? Versatile!
Final Thoughts
So there you have it! A ridiculously easy, unbelievably delicious apple pie filling bread that will make you feel like a baking wizard without actually having to do any wizard-level work. Go ahead, make this loaf. Impress your friends, delight your family, or just hoard it all for yourself (no judgment here). You’ve earned this moment of cozy, apple-spiced bliss. Now go forth and bake something amazing!


