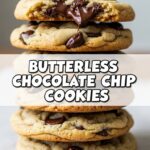
So you’re craving something tasty but too lazy to spend forever in the kitchen, huh? Same. We’ve all been there: that deep, soul-shaking desire for a chocolate chip cookie that isn’t just *good*, but *transcendent*. Not some flat, sad disc, but a chewy, gooey, bakery-style masterpiece that makes you question all your life choices before this very moment. Well, friend, buckle up, because we’re about to make those dreams a delicious reality. And no, you don’t need a pastry degree. Just a pulse and a love for butter. Let’s do this!
Why This Recipe is Awesome
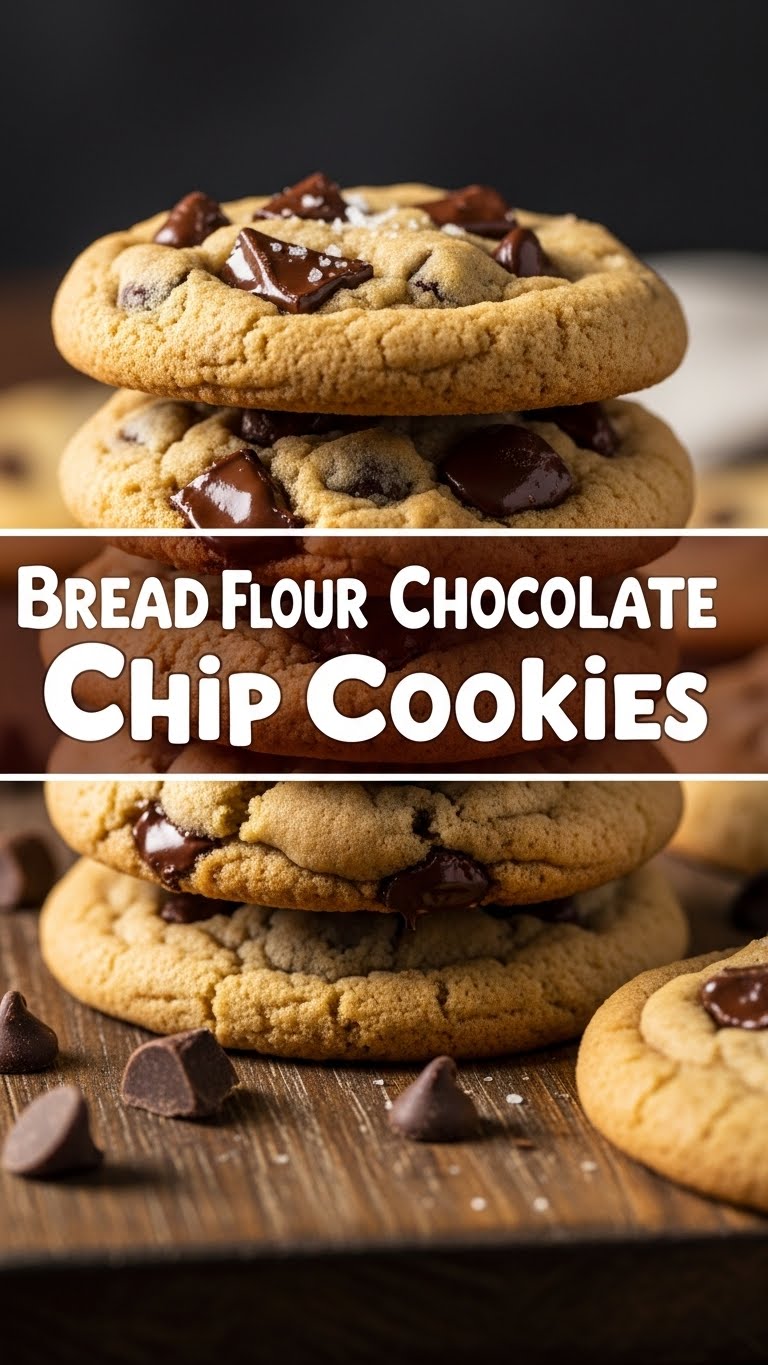
Okay, let’s be real. There are approximately a bazillion chocolate chip cookie recipes out there. So why *this* one? Because we’re using **bread flour**, my friend! That’s right, the stuff you usually save for a glorious sourdough boule is about to make your cookies next-level chewy, with that perfect pull you get from a fancy bakery. No more dry, crumbly sad sacks! This recipe delivers on:
- **Ultimate Chewiness:** Thanks to our secret weapon, bread flour, these cookies have a texture that will make you weak in the knees.
- **Crispy Edges, Gooey Centers:** The holy grail of cookie perfection. We’ve mastered it.
- **It’s Idiot-Proof:** Seriously, even *I* didn’t mess it up, and my kitchen adventures often involve smoke alarms. If you can melt butter and stir, you can make these.
- **Minimal Chill Time:** Because when a cookie craving hits, who has hours to wait? We’re talking 30 minutes, tops (or none if you’re feeling wild, but **patience pays off!**).
- **Pure Happiness:** Because isn’t that what chocolate chip cookies are really for?
Ingredients You’ll Need
Gather ’round, my fellow snack enthusiasts! Here’s what you’ll need to transform into a cookie wizard. Don’t worry, nothing too exotic here, just good stuff:
- **1/2 cup (113g) unsalted butter:** Melted, please! Because we’re making this easy and giving these cookies that rich, buttery base.
- **1/2 cup (100g) granulated sugar:** For sweetness and those perfectly crisp edges.
- **1/2 cup (110g) packed light or dark brown sugar:** Our other sugar hero! This brings moisture, chewiness, and that classic caramel-y depth.
- **1 large egg:** Room temperature, if you remember (don’t sweat it if you don’t, but it helps emulsify!). It’s the binder, the glue, the cookie’s backbone.
- **1 teaspoon vanilla extract:** Don’t skimp! **Good vanilla is worth it.** It’s the soul of the cookie, IMO.
- **1 and 1/4 cups (150g) bread flour:** Ta-da! Our star ingredient. This is what gives us that glorious chew. Don’t swap it for all-purpose unless you want a different cookie entirely.
- **1/2 teaspoon baking soda:** For lift and a little spread.
- **1/2 teaspoon salt:** Crucial! Balances the sweetness and actually makes the chocolate taste even better. Don’t skip it, even if you think you’re “not a salt person.”
- **1 cup (170g) chocolate chips or chunks:** The good stuff! Semi-sweet is classic, but use what makes your heart sing.
Step-by-Step Instructions
Alright, apron on (or not, we don’t judge), let’s get baking! These steps are so easy, you could probably do them in your sleep.
- **Melt the Butter & Combine Sugars:** Grab a medium-sized bowl and melt your butter. Once it’s all liquid gold, stir in both the granulated and brown sugars until well combined. It won’t be perfectly smooth, and that’s totally fine.
- **Add Wet Ingredients:** Whisk in your egg and vanilla extract until everything is smooth and glossy. You should see it lighten a bit in color.
- **Mix Dry Ingredients:** In a separate, smaller bowl, whisk together your bread flour, baking soda, and salt. Make sure there are no lumps of baking soda or salt hiding!
- **Combine Wet and Dry:** Pour the dry ingredients into the wet ingredients. Mix with a spatula or wooden spoon until *just* combined. **Seriously, stop mixing as soon as the flour streaks disappear!** Overmixing develops too much gluten, and while great for bread, it makes tough cookies.
- **Fold in the Chocolate:** Gently fold in your chocolate chips or chunks until they’re evenly distributed throughout the dough. Try not to eat too much raw dough. (Or do. Your secret’s safe with me.)
- **Chill (or Don’t!):** This is where some folks might tell you to chill for hours. We’re busy people! Pop the bowl into the fridge for at least **30 minutes**. This small chill time makes a huge difference in flavor and prevents excessive spreading. If you’re really impatient, 15 minutes is better than none.
- **Preheat & Prep:** While your dough chills, preheat your oven to **350°F (175°C)**. Line a baking sheet with parchment paper or a silicone baking mat. This is a non-negotiable for easy cleanup and no-stick cookies.
- **Scoop ‘Em Out:** Use a cookie scoop (about 1.5-2 tablespoons) or two spoons to drop dough balls onto your prepared baking sheet. Leave about 2 inches between them so they have room to spread.
- **Bake ‘Em Up:** Bake for **9-12 minutes**, or until the edges are golden brown and the centers still look slightly soft and puffy. They’ll continue to set up as they cool. Don’t overbake unless you love dry cookies!
- **Cool & Devour:** Let the cookies cool on the baking sheet for 5-10 minutes (this helps them firm up) before transferring them to a wire rack to cool completely. Or, you know, eat one warm, because life is short.
Common Mistakes to Avoid
Nobody’s perfect, but we can avoid some classic cookie blunders with a little foresight. Learn from my mistakes (and the mistakes of countless bakers before us!):
- **Overmixing the Dough:** We talked about it, but it bears repeating. Once the flour is incorporated, *stop*. Seriously. Unless you’re aiming for hockey pucks instead of chewy cookies, put that mixer down.
- **Skipping the Chill Time:** “But I’m hungry *now*!” I hear you. But that short chill time isn’t just to make you wait. It helps the flour hydrate, the flavors deepen, and most importantly, it prevents your cookies from spreading into one giant, flat mega-cookie. **Don’t skip it if you want that perfect texture!**
- **Using Cold Butter When Melted is Called For:** Read the recipe, friend! The state of your butter (melted, softened, cold) drastically changes the cookie’s final texture. Don’t freelance with the butter temp unless you know what you’re doing.
- **Not Preheating Your Oven:** Thinking you don’t need to preheat the oven—rookie mistake. A consistently hot oven ensures even baking from the start. Otherwise, your cookies might spread too much before they even start baking properly.
- **Baking Too Long:** Remember those slightly soft centers? Trust them. They firm up as they cool. Overbaking is the fast lane to dry, crunchy cookies, and nobody wants that.
Alternatives & Substitutions
Feeling a little wild? Want to customize? Here are some ideas to shake things up:
- **Chocolate Choices:** Go wild! Use dark chocolate chunks for a more intense flavor, milk chocolate for sweetness, white chocolate for something different, or a mix of all three! Toss in some mini chocolate chips for extra chocolatey goodness in every bite.
- **Add-Ins:** Nuts (walnuts, pecans), toffee bits, shredded coconut, or even a sprinkle of sea salt on top before baking for that gourmet touch. Just don’t go overboard, we still want a cookie, not a fruitcake.
- **Butter Alternatives:** For a dairy-free version, a good quality plant-based butter will work, though the flavor and texture might be slightly different. Ghee also works well for a nutty flavor.
- **No Bread Flour?** Okay, if you *really* can’t get your hands on bread flour, you can use all-purpose. However, just know your cookies won’t have that super-chewy, bakery-style texture that makes this recipe special. They’ll still be good, just… different.
- **Extra Vanilla:** Feeling extra? Add an extra half teaspoon of vanilla. No regrets.
FAQ (Frequently Asked Questions)
Got questions? I’ve got answers (and probably a cookie crumb on my shirt):
- **Q: Why bread flour? What’s the big deal?**
A: Ah, the million-dollar question! Bread flour has a higher protein content than all-purpose flour, which means more gluten. More gluten equals more chewiness. It’s the secret sauce for that perfect, satisfying pull in every bite, just like a top-tier bakery cookie. - **Q: Do I *really* need to chill the dough? I’m starving!**
A: I feel your pain, truly. But **yes, even a short chill (30 minutes!) is super helpful.** It gives the flour time to hydrate, deepens the flavors, and prevents your cookies from spreading into flat puddles on the baking sheet. If you’re *really* in a rush, you can skip it, but just know your cookies might be a bit flatter and the flavor not quite as developed. - **Q: My cookies spread too much! What did I do wrong?**
A: This is a common one! It could be a few things: your butter was too warm when you mixed it, your dough wasn’t chilled enough (or at all!), your oven wasn’t fully preheated, or maybe you used too much baking soda. Double-check your measurements and definitely aim for that chill time! - **Q: Can I use margarine instead of butter?**
A: Well, technically yes, you *can*. But why hurt your soul like that? Butter provides a richness and flavor that margarine simply can’t replicate. It’s the heart of a good cookie! If you’re dairy-free, a good quality plant-based butter is a much better choice. - **Q: How long do these cookies last?**
A: In my house? About an hour. Kidding! (Mostly.) Store them in an airtight container at room temperature for up to 3-5 days. If you want them to last longer, you can freeze the scooped dough balls and bake them from frozen (just add a few minutes to the baking time). - **Q: Can I make the dough ahead of time?**
A: Absolutely! This dough is fantastic for making ahead. You can chill it in the fridge for up to 3 days. The longer it chills, the more developed the flavors will be. You can also scoop the dough balls and freeze them on a baking sheet, then transfer them to a freezer bag once solid. Bake from frozen whenever a craving strikes!
Final Thoughts
So there you have it, folks! Your new go-to recipe for when only the best, chewiest, most delicious chocolate chip cookie will do. These aren’t just cookies; they’re a warm hug, a moment of pure bliss, and proof that a little bread flour can go a long, long way. Whether you’re making them for a party, a quiet night in, or just because it’s Tuesday and you deserve it, these cookies won’t let you down.
Now go impress someone—or yourself—with your new culinary skills. You’ve earned it! Seriously, go bake. And maybe save one for me? Just kidding… mostly.

