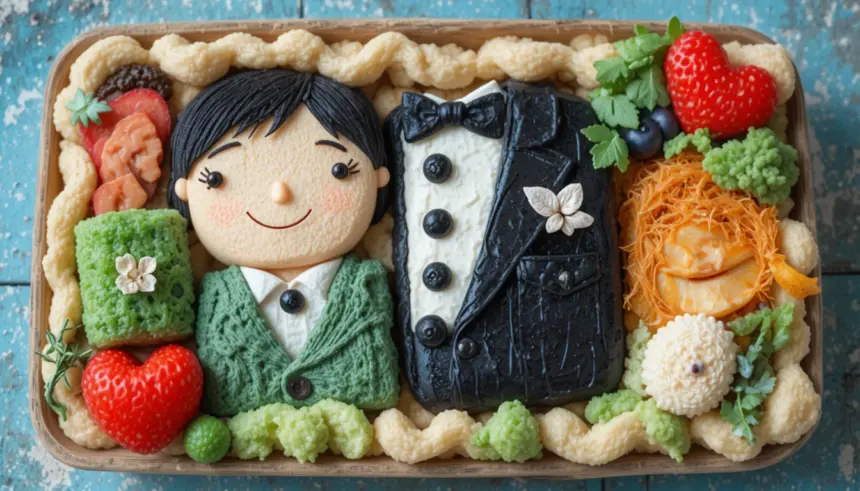
So, your significant other’s birthday, anniversary, or just a random Tuesday (because love should be celebrated daily, right?) is coming up, and you want to do something sweet but also kinda… low-effort genius? Enter the Bento Cake! It’s tiny, it’s cute, and it basically screams, “I love you, but I also have a life, so here’s a cake that fits in a lunchbox!” Let’s get baking, buttercup!
Why This Recipe is Awesome
Honestly, because it’s the perfect blend of thoughtful and “I probably didn’t spend all day stressing over this.” It’s like the little black dress of cakes – always appropriate, always adorable, and always a hit. Plus, it’s small, so you don’t have a giant cake staring at you from the fridge, silently judging your diet choices for the next week. It’s also **idiot-proof** (trust me, if I can do it, you absolutely can), super customizable, and just screams *effort* without actually requiring, well, *all* the effort. Perfect for when you want to impress without summoning your inner Martha Stewart (unless you want to, then by all means!).
Ingredients You’ll Need
Time to gather your baking arsenal! Don’t worry, nothing too fancy here. Just the good stuff.
- All-Purpose Flour: 1 cup. The backbone of all good cakes. Don’t skip it, unless you’re aiming for a sad, flat pancake.
- Granulated Sugar: ¾ cup. Because sweet things make life sweeter, duh.
- Baking Powder: 1 teaspoon. Our little magic puff-upper.
- Salt: ¼ teaspoon. Just a pinch to make everything else pop!
- Milk: ½ cup. Any kind you prefer, whole milk works best for richness.
- Vegetable Oil: ¼ cup. Keeps things moist and delicious. You could use melted butter too, if you’re feeling fancy.
- Vanilla Extract: 1 teaspoon. The MVP of flavor town. Don’t skimp!
- Egg: 1 large. The binder that holds all our hopes and dreams (and ingredients) together.
- For the Buttercream Frosting:
- Unsalted Butter: ½ cup (1 stick), softened. Room temp is key, folks! Not melted, not rock hard.
- Powdered Sugar (Confectioners’ Sugar): 2-3 cups, sifted. Start with two, add more if needed. Sifting prevents lumps, FYI.
- Milk or Cream: 1-2 tablespoons. To get that perfect consistency.
- Vanilla Extract: ½ teaspoon. More vanilla, more joy!
- Food Coloring (optional): For that pop of color!
Step-by-Step Instructions
Alright, apron on, game face ready! Let’s make some tiny cake magic.
- Preheat & Prep: First things first, preheat your oven to 350°F (175°C). Line a small 6-inch round cake pan (or two 4-inch pans for a taller cake, IMO) with parchment paper and grease the sides. **Don’t skip the parchment!** It’s your cake’s best friend for easy release.
- Mix Dry Ingredients: In a medium bowl, whisk together the flour, sugar, baking powder, and salt. Give it a good whisk to get rid of any lumps and distribute the leavening agents evenly.
- Combine Wet Ingredients: In a separate bowl, whisk together the milk, oil, vanilla extract, and egg until well combined.
- Bring It All Together: Pour the wet ingredients into the dry ingredients. Mix with a spatula until just combined. **Do not overmix!** A few small lumps are totally fine and better than a tough cake.
- Bake It Up: Pour the batter evenly into your prepared pan(s). Bake for 25-30 minutes for a 6-inch cake, or 18-22 minutes for smaller pans. A toothpick inserted into the center should come out clean.
- Cool Down: Let the cake cool in the pan for about 10-15 minutes before inverting it onto a wire rack to cool completely. **Patience is a virtue here!** Don’t try to frost a warm cake unless you want a melted mess.
- Make the Buttercream: While the cake cools, beat the softened butter in a large bowl with an electric mixer until light and fluffy (about 2-3 minutes). Gradually add the sifted powdered sugar, alternating with the milk/cream and vanilla. Beat until smooth and creamy. If using food coloring, add it now and mix well.
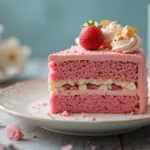
- Assemble & Decorate: Once the cake is completely cool, level the top with a serrated knife if needed. If you baked two smaller cakes, stack them with a layer of frosting in between. Frost the entire cake with your delicious buttercream. Now for the fun part: decorate! Write a cute message, add some sprinkles, or get creative!
Common Mistakes to Avoid
Listen, we’ve all been there. Here are some rookie errors to dodge like a pro:
- Thinking you don’t need to preheat the oven: Rookie mistake. Your cake needs that consistent heat from the get-go, or it’ll be unevenly baked and sad.
- Overmixing the batter: You want a tender cake, not a rubbery hockey puck. Mix until just combined, seriously. A few lumps are fine!
- Not letting the cake cool completely: This is probably the biggest offender. Frosting a warm cake is like trying to ice a melting iceberg. It won’t end well.
- Not sifting powdered sugar for frosting: Hello, lumpy frosting! Sifting takes two seconds and saves you from a gritty, unpleasant experience.
- Using cold butter for frosting: Softened butter is key for that light, fluffy, perfect buttercream. Cold butter will give you a chunky, unspreadable mess.
Alternatives & Substitutions
Feeling adventurous or just missing an ingredient? No stress, we got options!
- Cake Mix Magic: Short on time or ingredients? Grab a box of your favorite vanilla or chocolate cake mix! Just follow the box directions, then bake in your small pan. Easy peasy!
- Flavor Fun: Swap out vanilla extract for almond extract, lemon zest, or even a dash of coffee for a mocha kick. The world is your oyster… or your cake, in this case!
- Dairy-Free Delight: For a dairy-free version, use plant-based milk (almond, soy, oat) and dairy-free butter for the cake and frosting. Works like a charm!
- Cream Cheese Frosting: Not a buttercream fan? Use 4 oz softened cream cheese, ¼ cup softened butter, 2 cups powdered sugar, and ½ tsp vanilla extract. Beat until fluffy. So good!
- Topping It Off: No sprinkles? No problem! Use fresh berries, chocolate shavings, mini chocolate chips, or even a light dusting of cocoa powder. Get creative!
FAQ (Frequently Asked Questions)
Got questions? I’ve got (casual) answers!
- Can I make this cake ahead of time? Absolutely! You can bake the cake layers a day or two in advance, wrap them tightly, and store at room temp or in the fridge. Frosting can also be made a day ahead and stored in the fridge, then re-whipped before use.
- What if I don’t have a small cake pan? Get creative! You can bake the batter in a small oven-safe bowl, or even use a muffin tin (fill 2-3 liners for small “cupcakes” that can be stacked). You might need to adjust baking times.
- My frosting is too thin/thick, help! Too thin? Add more sifted powdered sugar, a tablespoon at a time. Too thick? Add a tiny splash more milk or cream, ½ teaspoon at a time. Easy fix!
- Can I use margarine instead of butter? Well, technically yes, but why hurt your soul like that? Butter just tastes better and gives a richer, creamier frosting. Margarine can work in a pinch, but the flavor won’t be as good, IMO.
- How long does a bento cake last? Covered and stored in the fridge, it’ll happily last for 3-4 days. But let’s be real, it’ll probably be devoured much faster than that!
- Is this actually good for a boyfriend? What if he doesn’t like cute things? Look, everyone loves cake. And a *small*, personalized cake that shows you put thought into it? That’s a win, regardless of his “cute tolerance.” Plus, it’s delicious. You can’t go wrong with delicious.
Final Thoughts
There you have it, future bento cake master! You’ve just unlocked the secret to a super cute, incredibly thoughtful, and surprisingly easy dessert that will absolutely impress your boyfriend (or anyone, really!). So, go forth and bake with confidence. You’ve got this! Now go impress someone—or yourself—with your new culinary skills. You’ve earned it!

