So you’re craving something ridiculously tasty but also, let’s be real, you’re currently in a staring contest with your couch and the couch is winning, huh? Same, friend, same. You want that grilled goodness, that juicy perfection, but the thought of a complicated recipe makes you want to order takeout. Fear not, my fellow culinary adventurer (who sometimes prefers to just *imagine* adventure). We’re diving into the glorious world of **boneless chicken thigh recipes grilled**, and it’s going to be epic. And easy. Mostly easy.
Why This Recipe is Awesome
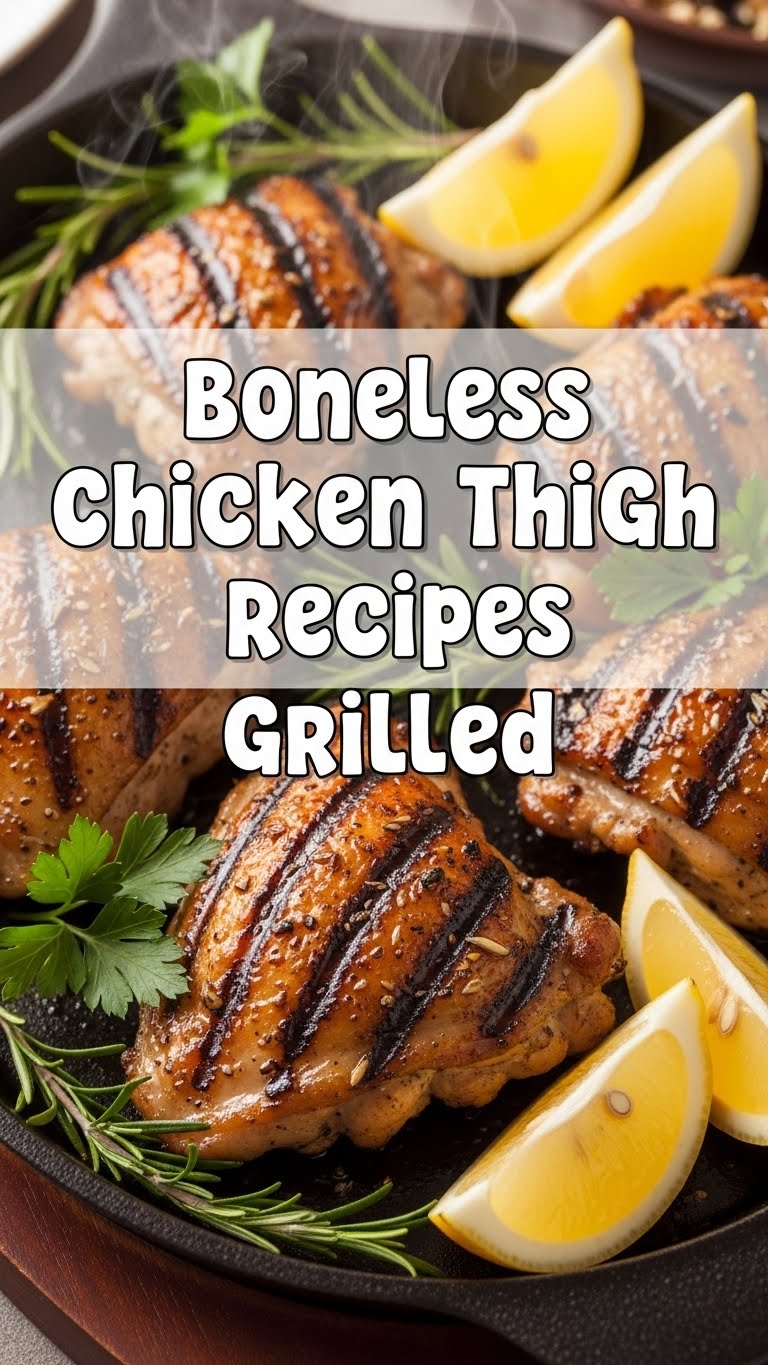
First off, let’s just address the elephant in the kitchen: chicken thighs are the unsung heroes of the poultry world. They’re forgiving, packed with flavor, and practically *beg* to be grilled. Unlike their uptight breast cousins, thighs stay ridiculously juicy even if you get a little distracted by your phone for a minute (we’ve all been there, no judgment). Plus, boneless and skinless? That just means zero fuss, max flavor. It’s truly **idiot-proof**, and I’ve proof-tested it myself after a particularly long Monday. You get that amazing grilled char, that smoky goodness, and a meal that tastes like you put in way more effort than you actually did. It’s a win-win, IMO.
Ingredients You’ll Need
Gather ’round, my little chef-in-training. Here’s what you’ll need for grilled chicken thigh nirvana. Keep it simple, or spice it up – your call!
- **Boneless, Skinless Chicken Thighs:** Your main squeeze. About 1.5-2 lbs for 4-6 servings. Look for nice, plump ones.
- **Olive Oil:** A little slick to help everything stick and prevent, you know, actual sticking to the grill.
- **Garlic Powder:** Because garlic makes friends with everything. Seriously, it’s a social butterfly.
- **Paprika (Smoked or Sweet):** For a whisper of color and a little extra depth. Smoked paprika is a personal faves if you want extra “grilled” vibes.
- **Onion Powder:** The quieter, equally important sibling of garlic powder.
- **Salt & Freshly Ground Black Pepper:** The dynamic duo. Don’t skimp, but don’t overdo it either. It’s a delicate balance.
- **(Optional but Recommended) Your Favorite Marinade or Dry Rub:** Feeling fancy? A splash of Italian dressing, some teriyaki, or a zesty lemon-herb marinade can elevate this from “great” to “OMG!”
Step-by-Step Instructions
Alright, apron on (or not, I’m not your boss), let’s get grilling!
- **Pat ‘Em Dry:** Seriously, grab some paper towels and pat those chicken thighs until they’re as dry as your sense of humor on a Monday morning. **Dry chicken = better sear = more flavor.** This is crucial!
- **Get Seasoning:** In a bowl, toss the chicken thighs with a drizzle of olive oil. Now, sprinkle generously with garlic powder, onion powder, paprika, salt, and pepper. If you’re using a store-bought marinade or dry rub, this is where it gets its moment to shine. Make sure every piece is coated like it’s going to a fancy party.
- **Marinate (if you have time):** If you’re using a marinade or just want to let those flavors mingle, cover the bowl and stick it in the fridge for at least 30 minutes, or up to 4 hours. If you’re in a hurry, you can skip this, but a little marination time never hurt anyone.
- **Preheat That Grill:** Fire up your grill to **medium-high heat**. You want it hot enough to give you a good sear but not so hot it incinerates your delicious chicken. Aim for around 400-450°F (200-230°C).
- **Grill Time!** Place the chicken thighs directly on the clean, oiled grill grates. Close the lid and cook for about 5-7 minutes per side. You’re looking for beautiful grill marks and an internal temperature of **175°F (80°C)**. Chicken thighs are pretty forgiving, so don’t stress *too* much about a few degrees.
- **The Golden Rule: Rest!** Once cooked, transfer the chicken to a cutting board and **let it rest for 5-10 minutes**. This allows the juices to redistribute, ensuring every bite is moist and flavorful. Patience, young grasshopper!
- **Serve it Up:** Slice ’em, dice ’em, or just serve them whole. These go great with anything from grilled veggies to a simple salad or rice.
Common Mistakes to Avoid
We all make mistakes, but some are more delicious than others. Let’s learn from mine!
- **Not drying your chicken:** I mentioned it, but it’s worth repeating. If your chicken is wet, it’ll steam instead of sear, and nobody wants soggy chicken.
- **Grilling cold chicken:** Don’t pull your chicken straight from the fridge and slap it on the grill. Let it sit out at room temperature for 15-20 minutes first. It helps it cook more evenly.
- **Overcrowding the grill:** Give those beautiful thighs some space! If you cram too many on, the grill temperature drops, and you end up steaming instead of grilling. Cook in batches if you need to.
- **Not letting it rest:** This is like skipping the grand finale of a fireworks show. The resting period is crucial for juicy chicken. **Seriously, don’t skip it.**
- **Obsessively flipping:** Resist the urge! Let the chicken cook on one side to get those gorgeous grill marks and then flip. Constant flipping just makes for sad, un-seared chicken.
Alternatives & Substitutions
Feeling adventurous? Or just realized you’re out of paprika? No worries, we can roll with it!
- **Marinade Magic:** Instead of a simple rub, try a Lemon-Herb marinade (lemon juice, fresh herbs, garlic), a zesty Teriyaki, or even a spicy Buffalo marinade for a kick. Store-bought is totally fine; no judgment here.
- **Spice It Up:** Swap paprika for chili powder, smoked paprika for chipotle powder, or add a pinch of cayenne for heat. Get creative with your spice cabinet!
- **No Grill? No Problem!** You can totally pan-sear these in a cast-iron skillet on the stovetop or bake them in the oven at 400°F (200°C) for about 20-25 minutes (flipping halfway). You won’t get the same smoky char, but you’ll still get deliciousness.
- **Herbaceous Goodness:** Toss in some fresh chopped rosemary, thyme, or oregano with your olive oil and spices for an aromatic boost.
FAQ (Frequently Asked Questions)
Got questions? I’ve got answers. Mostly.
- **How do I know if the chicken is cooked through?**
Get yourself an instant-read thermometer! **It should read 175°F (80°C)** in the thickest part. If you don’t have one, cut into the thickest part; there should be no pink, and the juices should run clear. - **Can I use frozen boneless chicken thighs?**
Technically, yes, but **you absolutely *must* thaw them completely first**. Trying to grill frozen chicken is like trying to ice skate uphill – difficult and probably not going to end well. - **How long can I marinate the chicken?**
For optimal flavor and texture, anywhere from 30 minutes to 4 hours is great. You can go overnight (8-12 hours) but sometimes very acidic marinades can start to “cook” the chicken slightly. - **What if my chicken thighs are unevenly thick?**
Great question! You can gently pound the thicker parts with a meat mallet (or the bottom of a heavy pan) to an even thickness. This helps them cook more evenly. - **Can I add a sauce after grilling?**
Heck yes! A brush of BBQ sauce, a drizzle of honey mustard, or a dollop of chimichurri would be divine. Add it in the last few minutes of grilling, or after it’s rested.
Final Thoughts
So there you have it, folks! Grilling boneless chicken thighs isn’t just a meal; it’s a lifestyle. A delicious, juicy, easy-to-achieve lifestyle. This recipe is your new best friend for weeknight dinners, weekend cookouts, or whenever you just want something satisfying without the fuss. Now go impress someone—or yourself—with your new culinary superpowers. You totally earned it. And maybe send me a pic, ’cause I live for that stuff!


