So, you’re craving something ridiculously delicious, refreshing, and just a little bit fancy, but without the whole “chef-in-training” drama, right? You want that melt-in-your-mouth magic without spending an entire afternoon chained to the kitchen. Girl, same. My culinary motto is “Maximum flavor, minimum fuss,” and today, we’re diving into a recipe that absolutely embodies that: Blueberry Ice Cream with Fresh Blueberries. Get ready to have your mind (and taste buds) blown!
Why This Recipe is Awesome
Okay, let’s be real. There are a million ice cream recipes out there. So why THIS one? Well, for starters, it’s practically **idiot-proof**. And trust me, if I can nail it without setting off the smoke alarm, you absolutely can too. This isn’t just ice cream; it’s a creamy, dreamy, vibrant hug in a bowl that screams “summer.” It’s got that perfect balance of sweet and tart, with bursts of fresh blueberries that make every spoonful an adventure. Plus, you get to tell everyone you made ice cream. Instant culinary hero status, achieved. You’re welcome.
Ingredients You’ll Need
Gather your troops! Here’s what you’ll need to transform into a dessert wizard:
- 2 cups Heavy Cream: Don’t even think about light cream. We’re going for rich, decadent deliciousness here. This is not the time to diet, my friend.
- 1 cup Whole Milk: Again, full-fat is your bestie. It adds to that glorious creamy texture.
- ¾ cup Granulated Sugar: Or a little less if your blueberries are super sweet, or a tad more if you have a serious sweet tooth. You do you.
- 1 teaspoon Pure Vanilla Extract: The secret MVP that elevates everything. Don’t skimp on quality here!
- Pinch of Salt: Seriously, just a tiny pinch. It balances the sweetness and makes all the flavors sing.
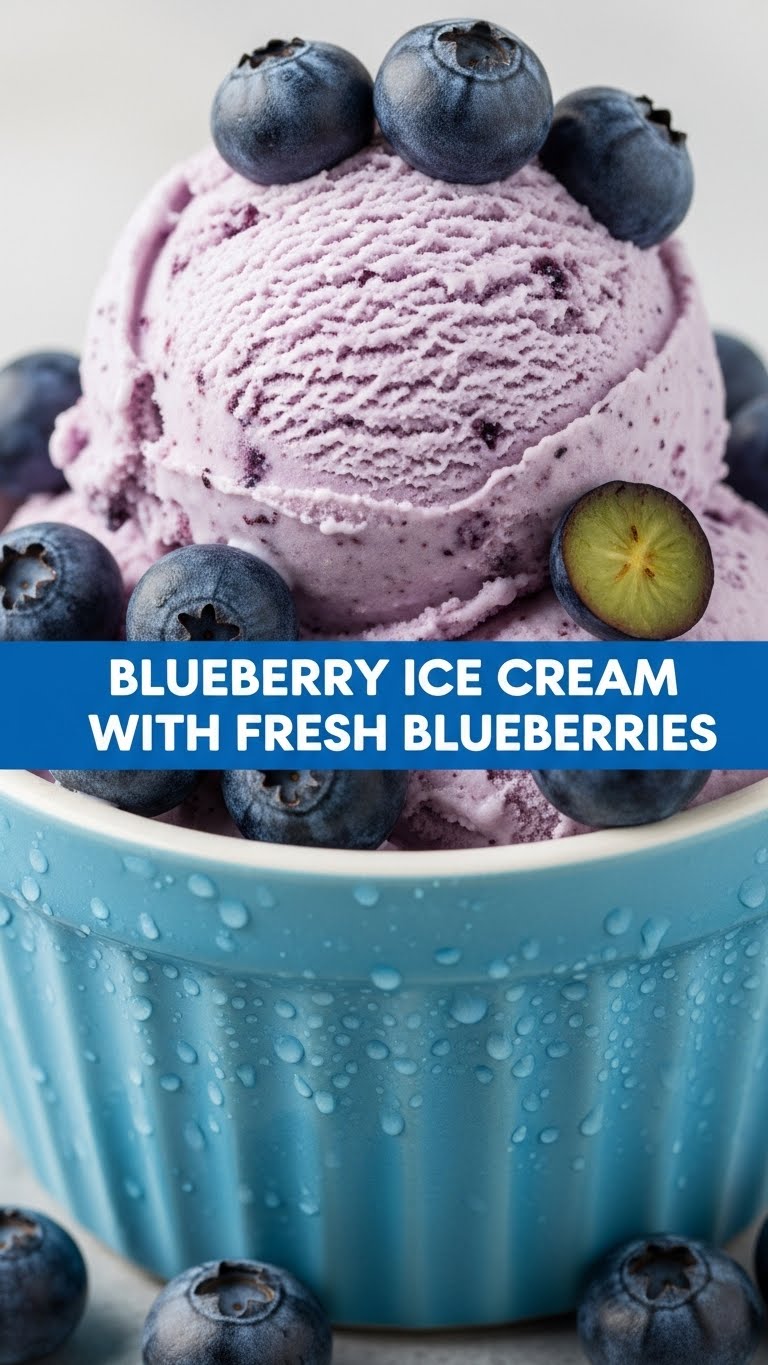
- 2 cups Fresh Blueberries: The star of the show! Make sure they’re plump and juicy. If you *have* to use frozen, thaw them completely and drain any excess liquid.
Step-by-Step Instructions
Alright, let’s get this party started! Follow these simple steps and you’ll be scooping in no time.
- Mix Your Base: In a large bowl, whisk together the heavy cream, whole milk, sugar, vanilla extract, and that tiny pinch of salt until the sugar is fully dissolved. You don’t need to whip it, just make sure it’s well combined.
- Chill Out: This step is **non-negotiable** for perfectly churned ice cream. Cover the bowl and refrigerate the mixture for at least 2 hours, or ideally, overnight. A super cold base churns into a smoother, creamier ice cream.
- Prep Your Berries: While your base is chilling, grab your blueberries. Take about ½ cup of them and gently mash them with a fork. You want some bits and pieces, not a super smooth purée. Leave the remaining 1½ cups whole. This gives you amazing texture variety!
- Churn, Baby, Churn!: Once your ice cream maker bowl is super cold (check your machine’s instructions), pour in your chilled cream mixture. Churn according to your manufacturer’s directions, usually about 20-30 minutes, until it’s the consistency of soft-serve.
- Add the Blues: During the last 5 minutes of churning, add both the mashed and whole blueberries to the ice cream maker. Let them incorporate fully. This ensures they’re evenly distributed and don’t get frozen into solid chunks.
- Freeze for Firmness: Transfer the soft ice cream to an airtight container. Press a piece of parchment paper or plastic wrap directly onto the surface to prevent ice crystals (aka “freezer burn”). Freeze for another 3-4 hours, or until firm enough to scoop.
Common Mistakes to Avoid
We’ve all been there, made a rookie mistake. Learn from my past (humiliating) errors:
- Skipping the Chill Step: Trying to churn a warm ice cream base is like trying to convince a cat to take a bath – futile and messy. Seriously, **don’t skip chilling the base**.
- Overfilling Your Ice Cream Maker: The mixture expands as it churns. If you overfill, you’ll have a sticky, creamy mess all over your counter. Read your machine’s manual, people!
- Adding Frozen Blueberries Directly: Unless specified by your machine, don’t add rock-hard frozen berries. They’ll just turn into icy nuggets instead of bursting with flavor. Thaw them first!
- Eating the Entire Batch in One Sitting: Okay, maybe not a *mistake* in terms of the recipe, but possibly for your immediate well-being. Share, or at least portion it out! (I’m talking to myself here, TBH.)
Alternatives & Substitutions
Feeling a little rebellious? Here are some ways to switch things up:
- Dairy-Free Dream: Swap the heavy cream for full-fat canned coconut cream (the thick stuff at the top) and the whole milk for unsweetened plant-based milk (almond, oat). The texture will be slightly different, but still delicious!
- Sweetener Swap: You could try honey or maple syrup instead of sugar, but be aware they can affect the final texture slightly. Start with a bit less and taste as you go.
- Mixed Berries: Why stick to just blueberries? Throw in some raspberries or blackberries for a vibrant “mixed berry” ice cream. Just make sure to prep them similarly.
- No Ice Cream Maker? This recipe is designed for an ice cream maker for that classic creamy texture. If you don’t have one, you *can* try a no-churn method (usually involves condensed milk and whipped cream), but FYI, it’s a completely different recipe and texture profile. IMO, a cheap ice cream maker is a worthwhile investment for this kind of deliciousness!
FAQ (Frequently Asked Questions)
Got questions? I’ve got answers! (Mostly.)
Q: Can I use frozen blueberries instead of fresh?
A: You *can*, but it’s best to thaw them completely and drain any excess liquid before adding them. Fresh truly gives the best texture and flavor bursts, though!
Q: Do I really *need* an ice cream maker?
A: For this specific recipe and its intended creaminess, yes, absolutely. It’s what creates that smooth, airy texture. Trying to freeze it solid without churning will likely result in an icy block.
Q: My ice cream is too hard after freezing, what gives?
A: Don’t panic! This can happen if it’s been in the freezer for a very long time or if your freezer is set to super-chill. Just let it sit out on the counter for 10-15 minutes before scooping. Problem solved!
Q: Can I reduce the sugar amount?
A: Yes, you can! Blueberries have natural sweetness. Start with ½ cup and taste your base before chilling. Just remember, sugar also helps with the texture, making it less icy. So don’t go too crazy.
Q: How long does homemade ice cream last?
A: In an airtight container, it’ll last about 1-2 weeks in the freezer. But honestly, good luck making it last that long! Mine usually mysteriously disappears within days.
Q: Can I add lemon zest to this?
A: **OMG YES!** A little lemon zest (about 1 teaspoon) added to the base can brighten up the blueberry flavor beautifully. Go for it!
Final Thoughts
So there you have it! Your new go-to recipe for Blueberry Ice Cream. You’ve just created something truly special, something that store-bought simply can’t compete with. It’s fresh, it’s vibrant, and it’s made with love (and probably a little bit of playful swearing if you’re anything like me). Now go impress someone – or just yourself – with your new culinary skills. You’ve earned every single delicious scoop!


